This post may contain affiliate links. Please read our disclosure policy.

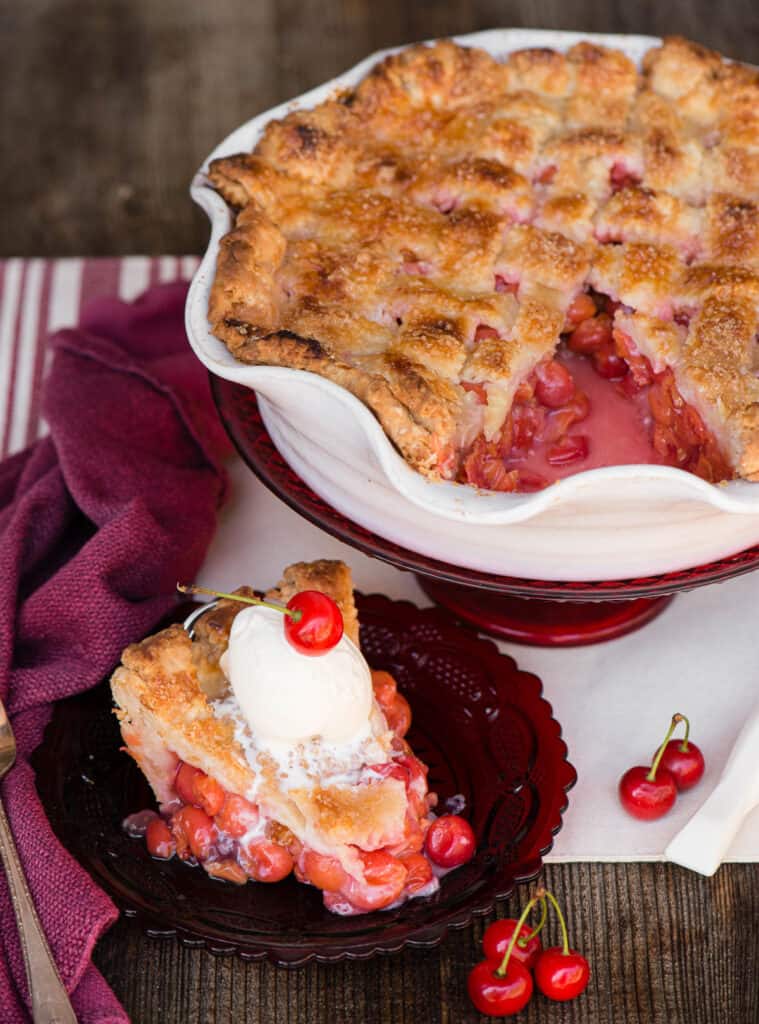
Enjoy the best homemade Cherry Pie made with fresh tart cherries, flaky pie crust, and the most delicious flavorful cherry pie filling.
This step-by-step recipe has tons of ingredient and process photos to guide you through the entire process so that you’ll achieve a perfect summer pie!
As If You Need a Reason to Make Cherry Pie
A pie like this is a labor of love considering the time it takes to pick and pit the cherries, but it is so worth it! Save yourself some time and buy the cherries at a farmers market.
- Fresh cherries – If you think of cherry pie, you probably envision pie made with store bought canned cherry pie filling. When you use fresh tart cherries, the flavor and texture of the filling is unlike any other pie you’ve ever tasted!
- Amazing flavor – You can’t have cherry pie without some almond extract mixed in. The combination of cherry and almond is the absolute best. That’s why I used an almond crust in my Cherry Cobbler and also paired the two flavors in my Cherry Almond Thumbprints.
- No runny filling – The recipe itself along with some additional tips will create a pie filling that’s not runny. This is sometimes difficult to achieve with a fresh fruit pie!
Ingredients needed:
- Pie Crusts – you can use store bought but I highly recommend making my flaky and delicious homemade pie crusts made with butter.
- Tart cherries – I picked these from my neighbor’s tree! If you have sweet cherries, you make want to consider making my Vanilla Cake with Cherries and Mascarpone for dessert.
- Granulated sugar – just the right amount is used to make the pie sweet while still maintaining the tart flavor of the cherries
- Tapioca flour – I use this as my thickener but you can also use corn starch
- Lemon juice – the cherries are already tart but I always love adding some fresh lemon
- Salt – just a bit
- Almond extract – the flavor it adds is amazing
- Cinnamon – or you can use pumpkin pie spice
- Butter – a couple tablespoons are added to the top of the filling prior to cooking

How to make the cherry pie filling:
Full ingredient list and detailed step by step instructions are listed in the recipe card below, but here is a summary.
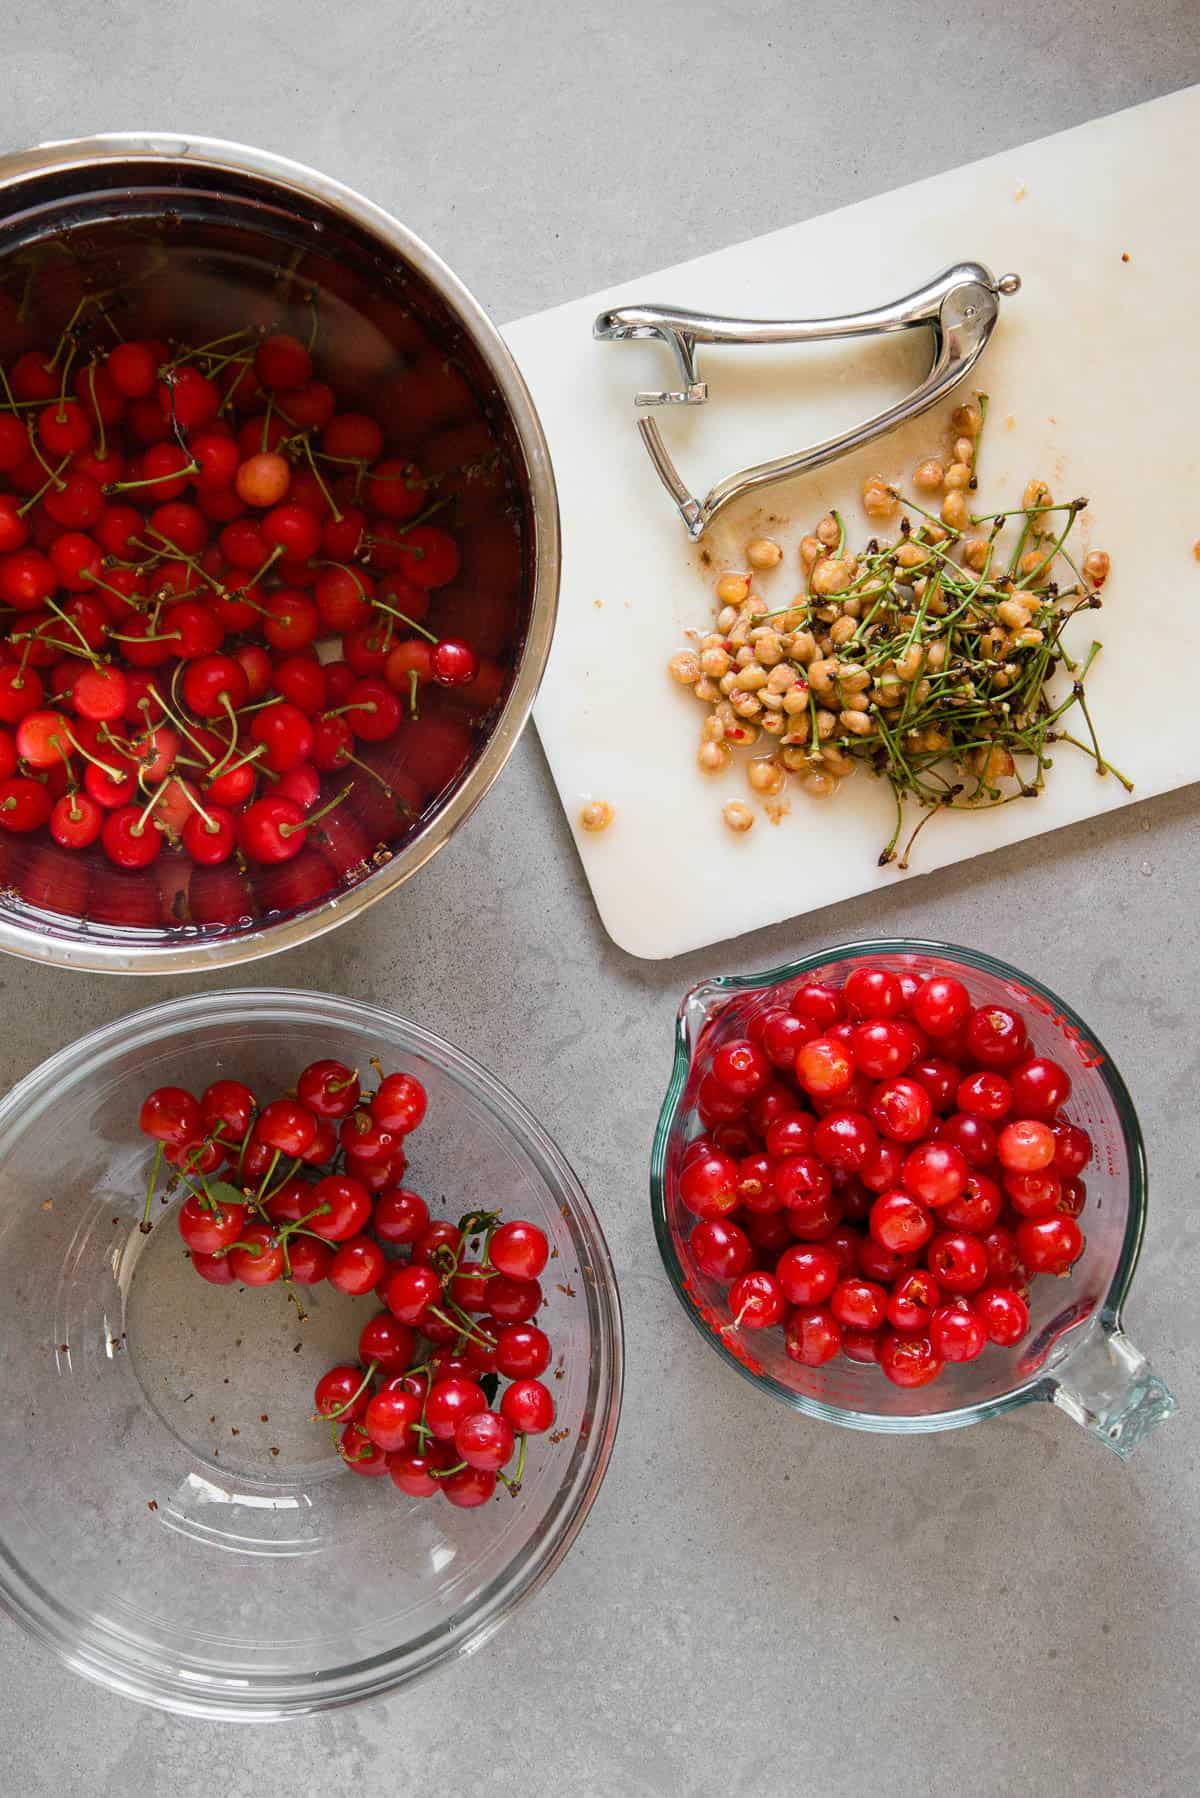
- Wash and pit cherries. To wash the cherries, I will soak in a bowl of water with a small amount of distilled vinegar. Give them a good rinse after their soak. Then, remove the pits. You can use your fingers, a small knife, or a cherry pitter (my preference).
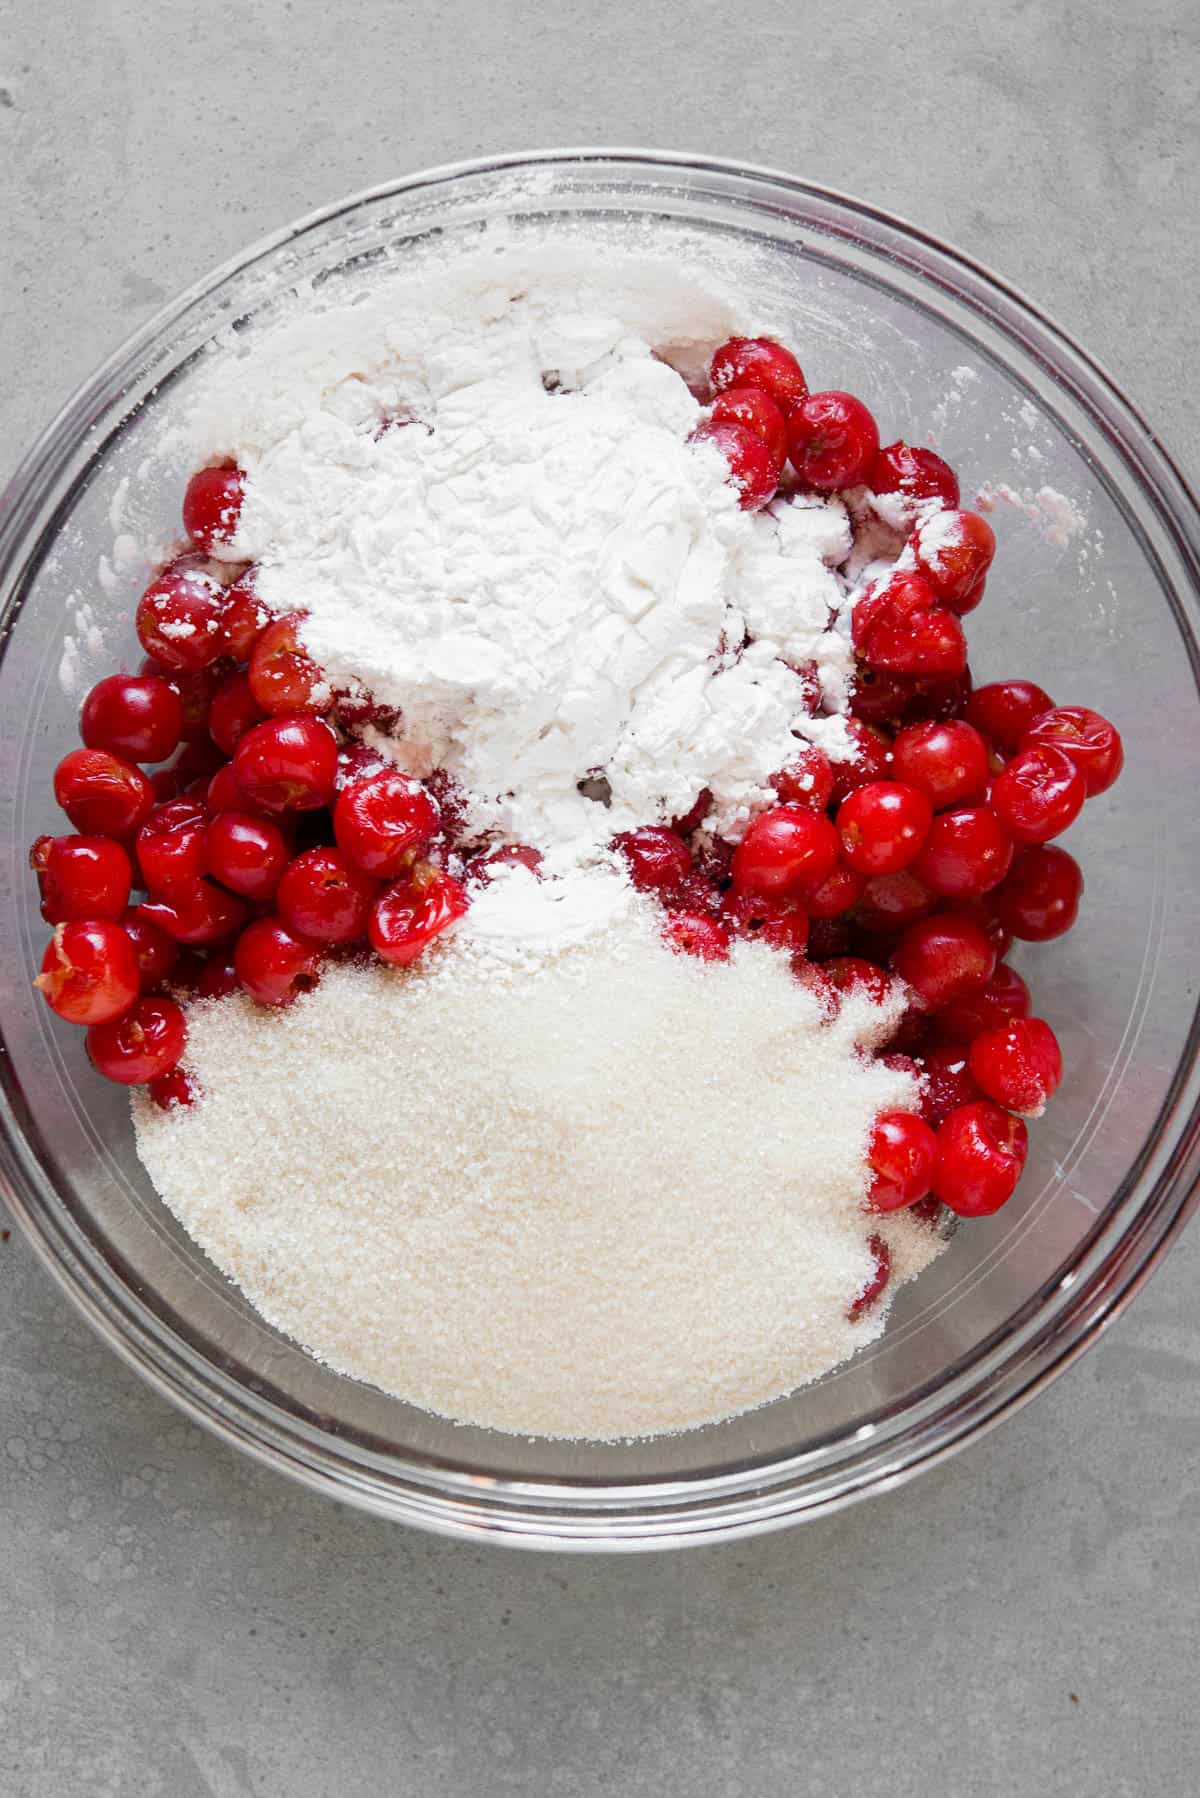
- Add sugar, tapioca, lemon juice, salt.
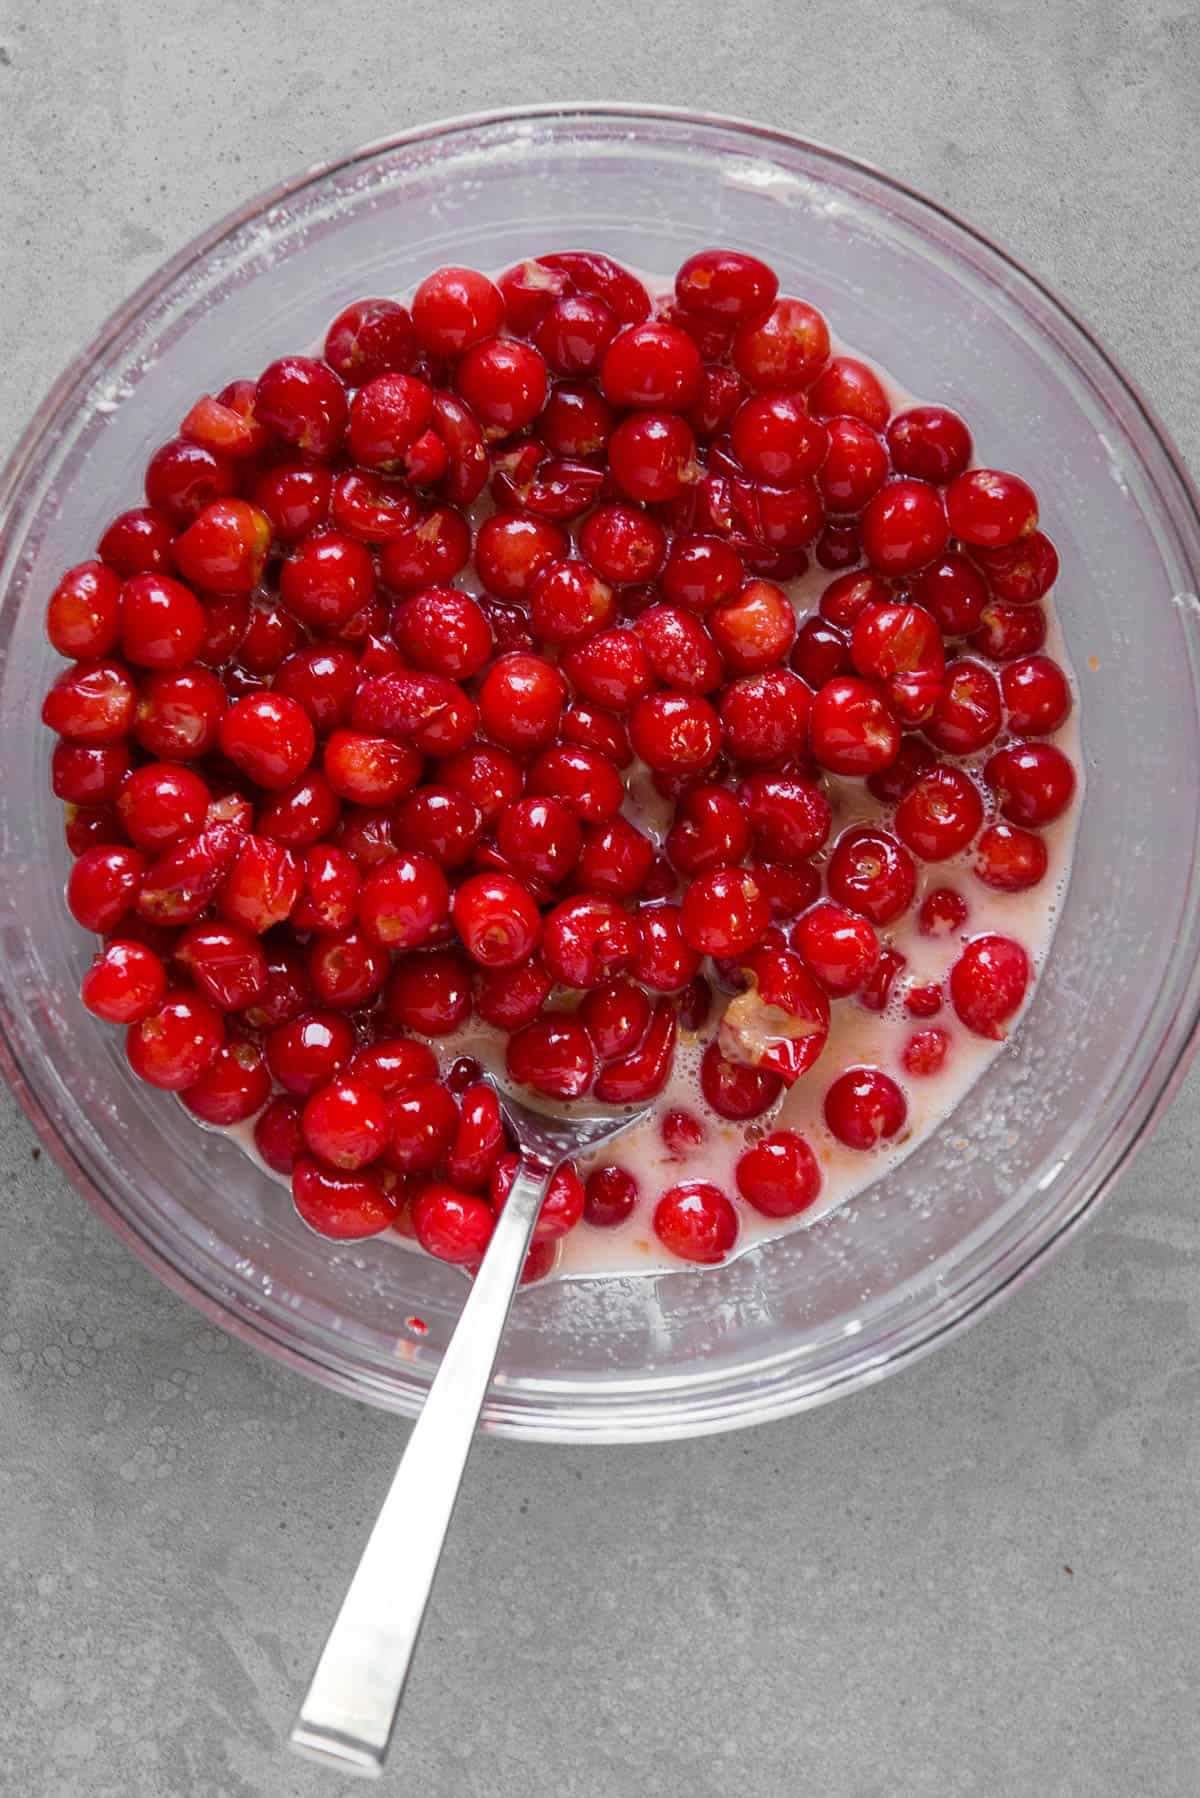
- Mix and let sit. The tapioca flour needs time to absorb the juice prior to adding to the pie.
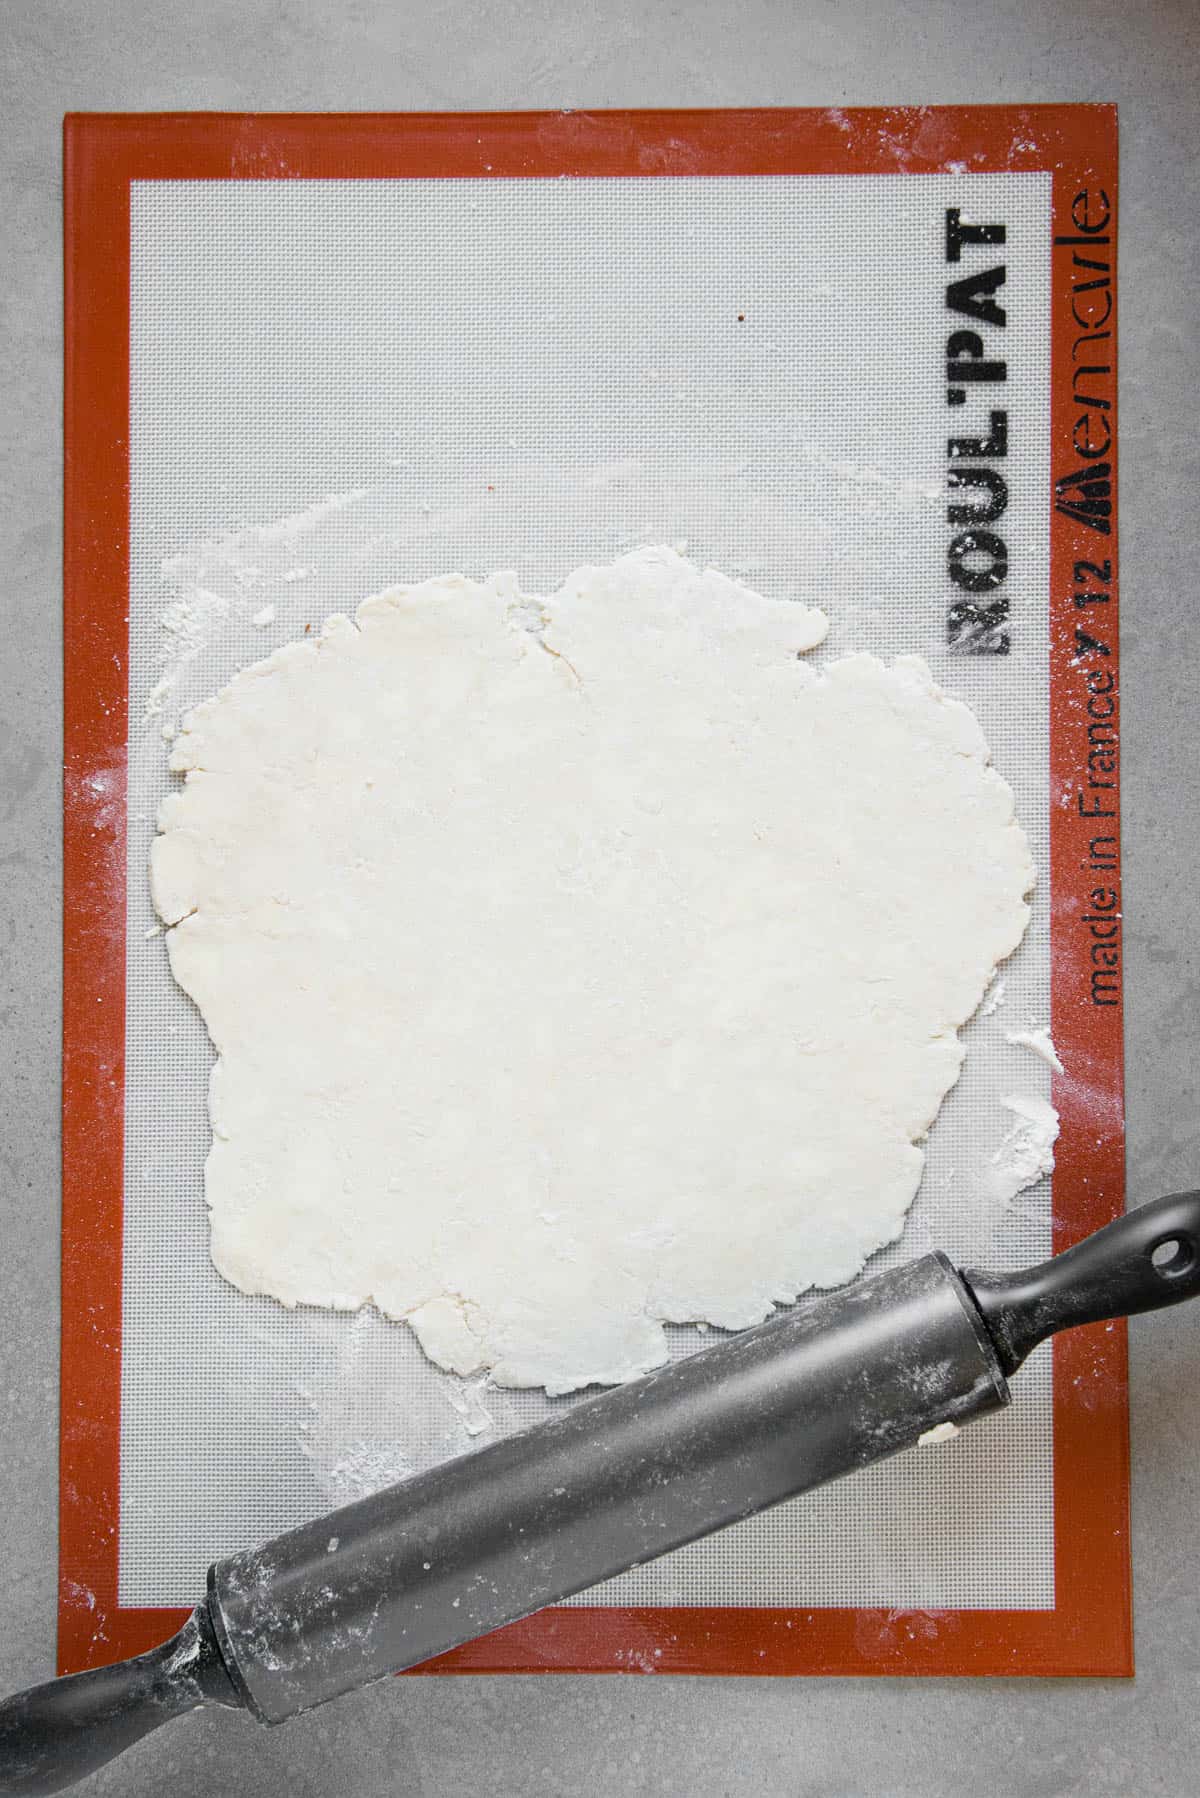
- Roll out pie crust. While the cherries are soaking, roll out the first crust large enough to line your pie dish with a bit of overlap.
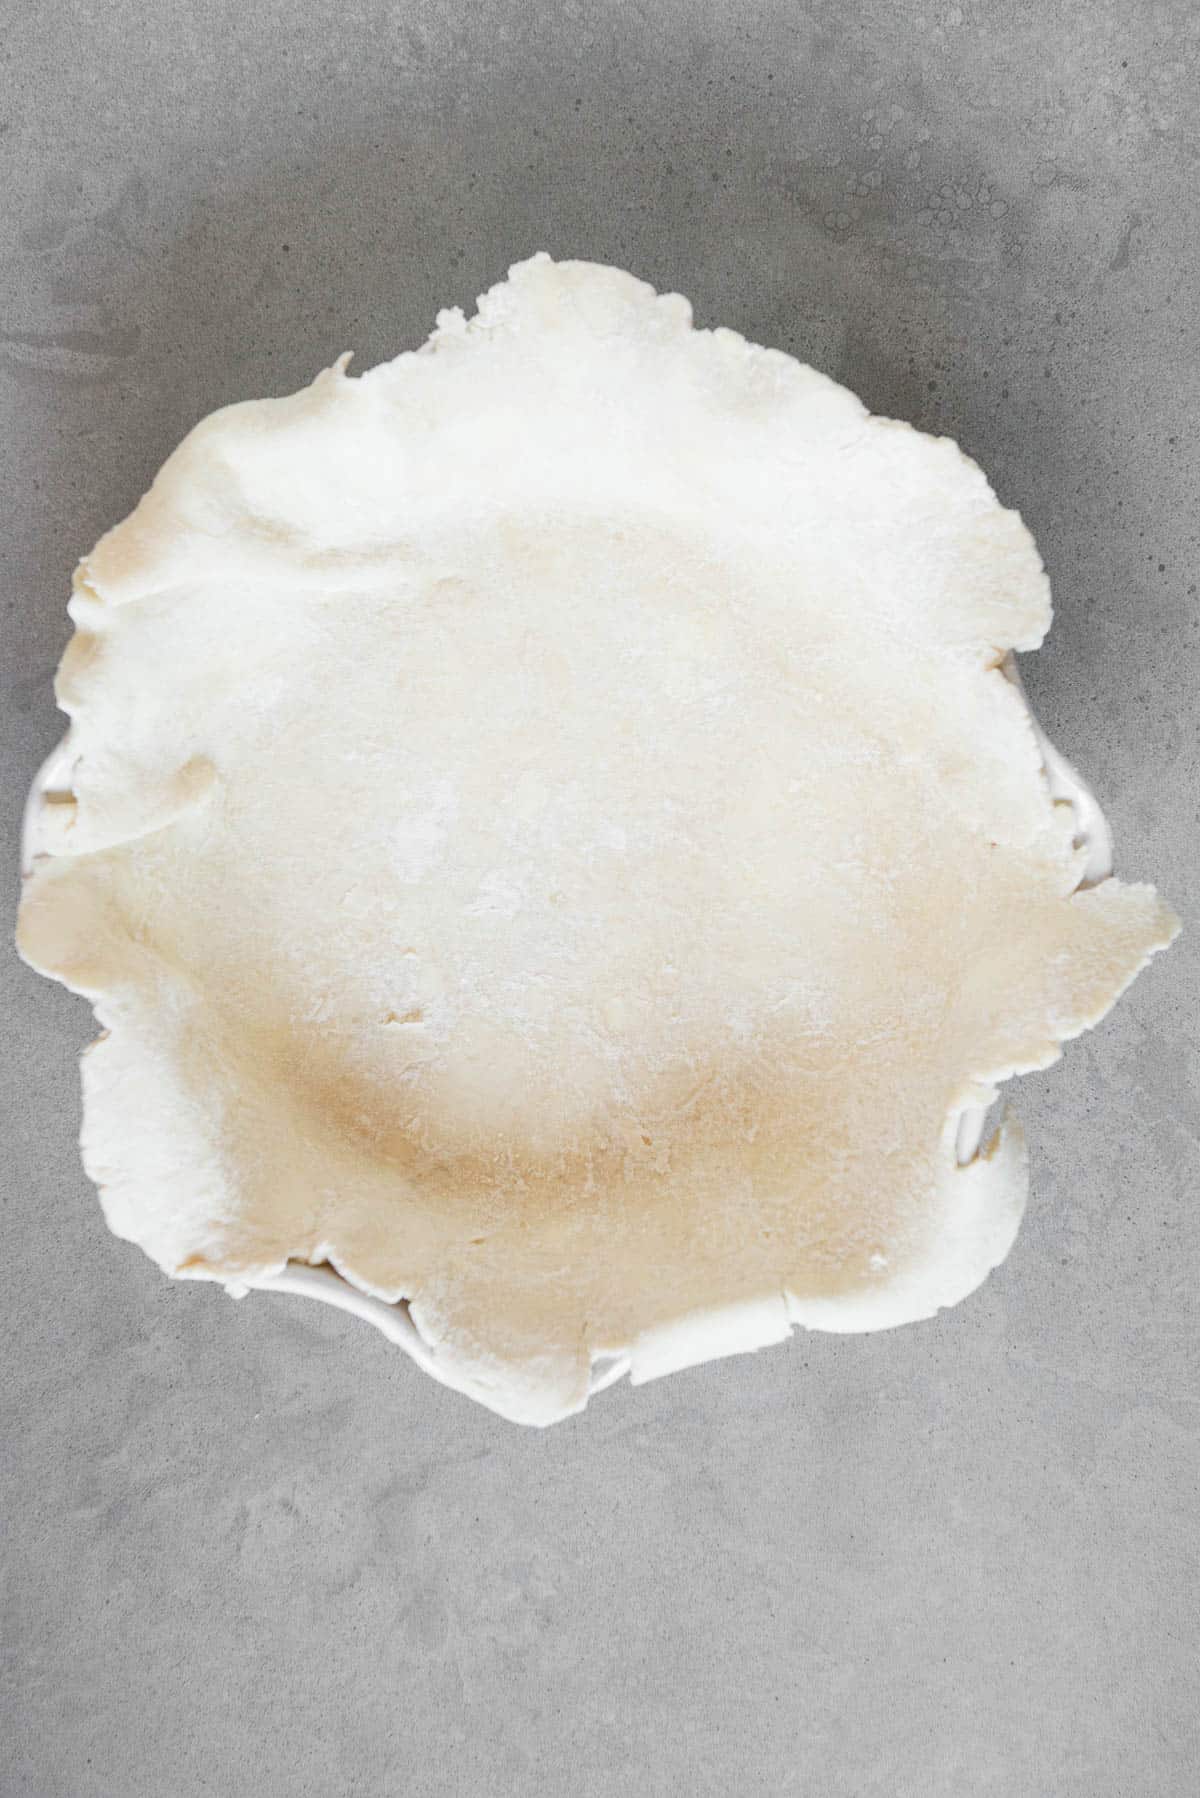
- Line pie dish. Carefully transfer rolled out pie crust dough to dish.
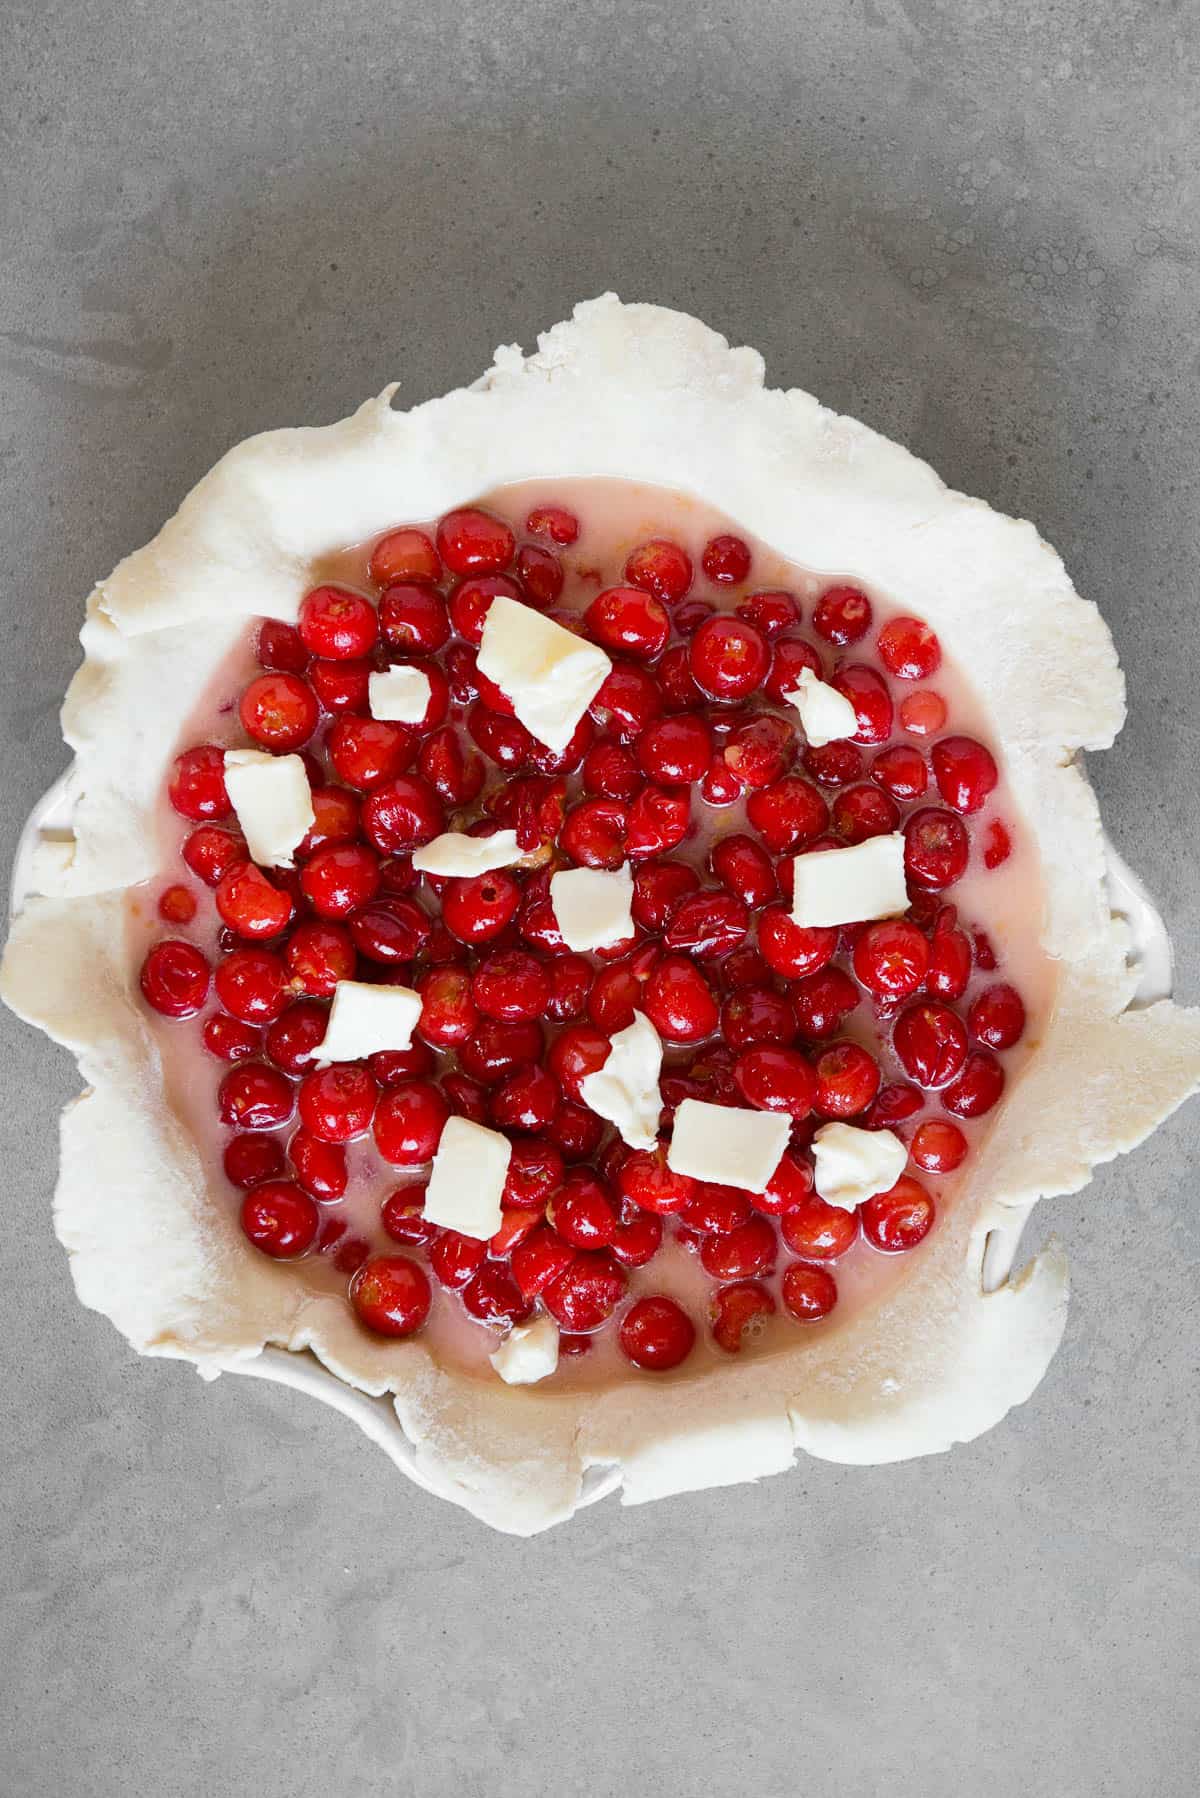
- Add filling. Stir in almond extract and cinnamon prior to adding to pie shell. Then, dot with butter.
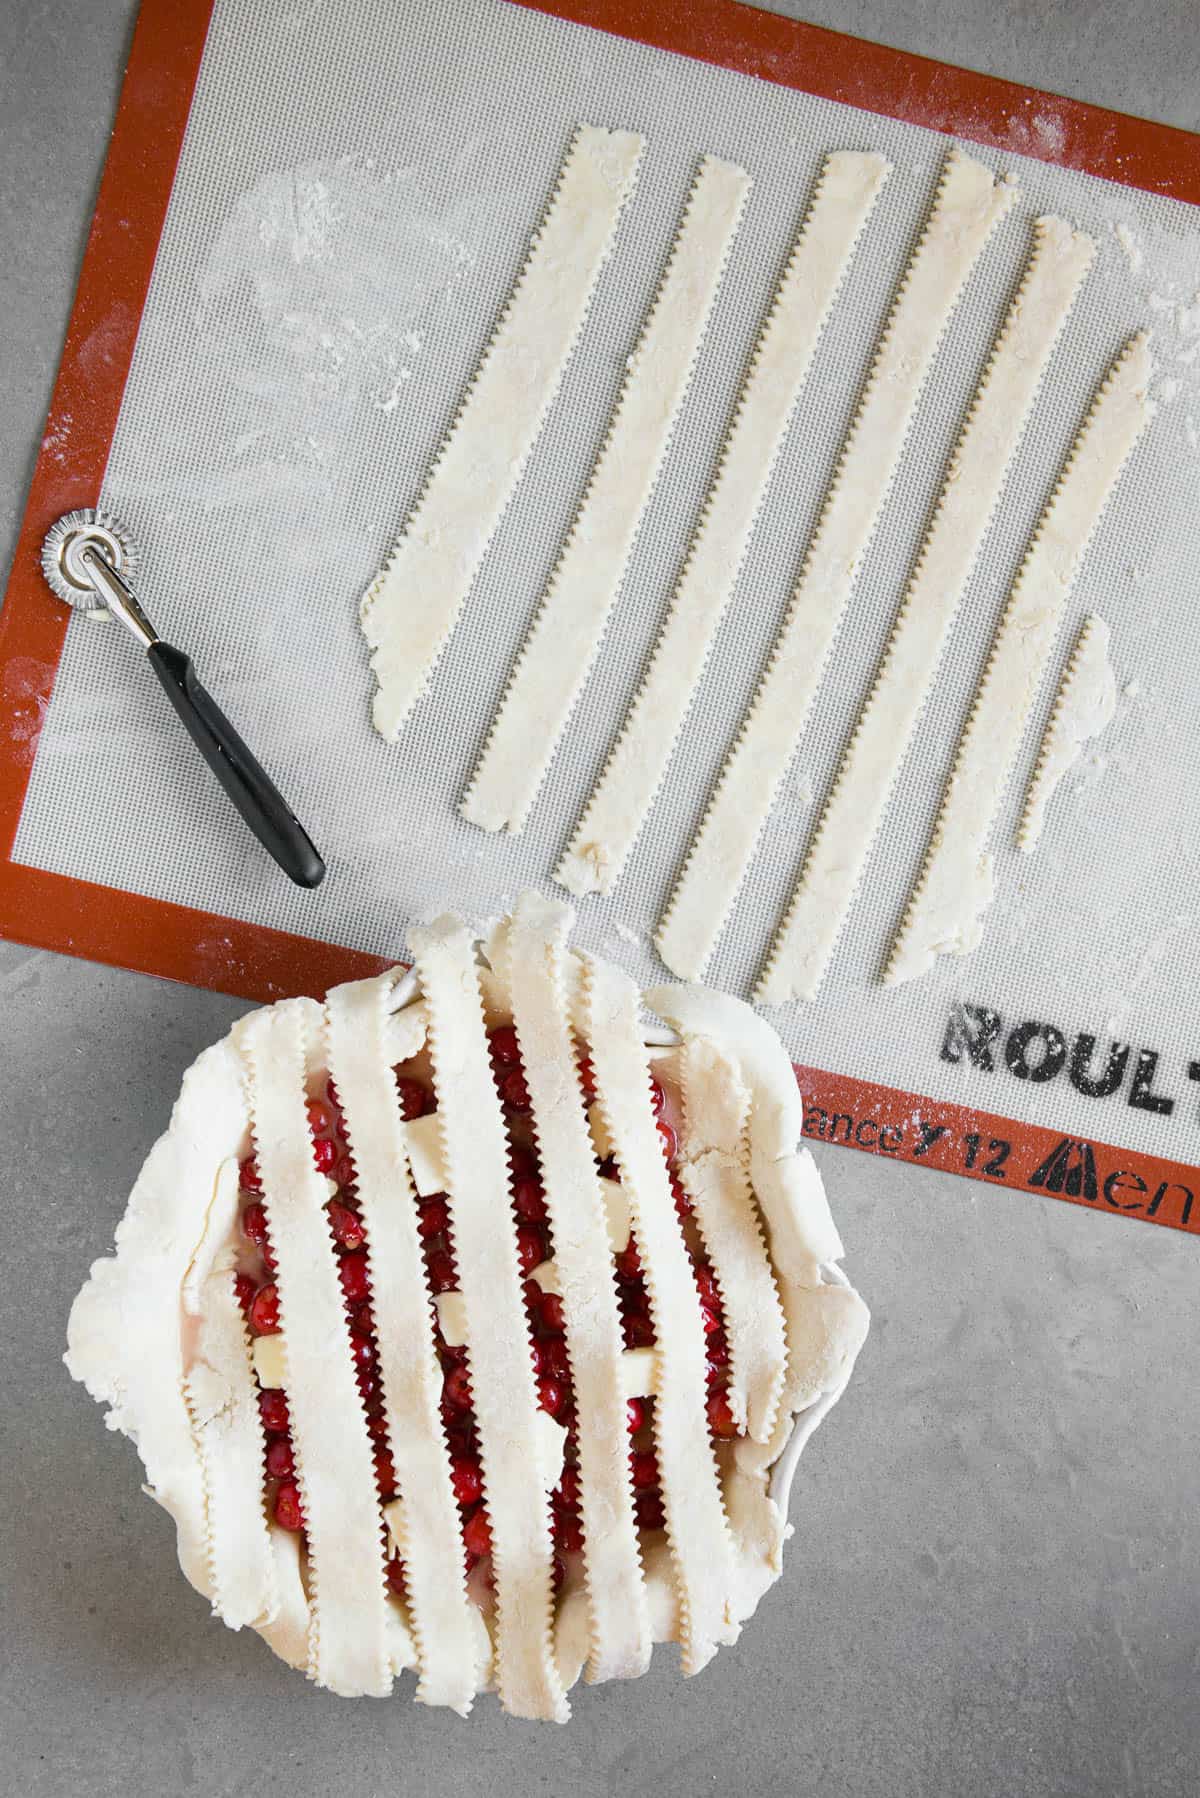
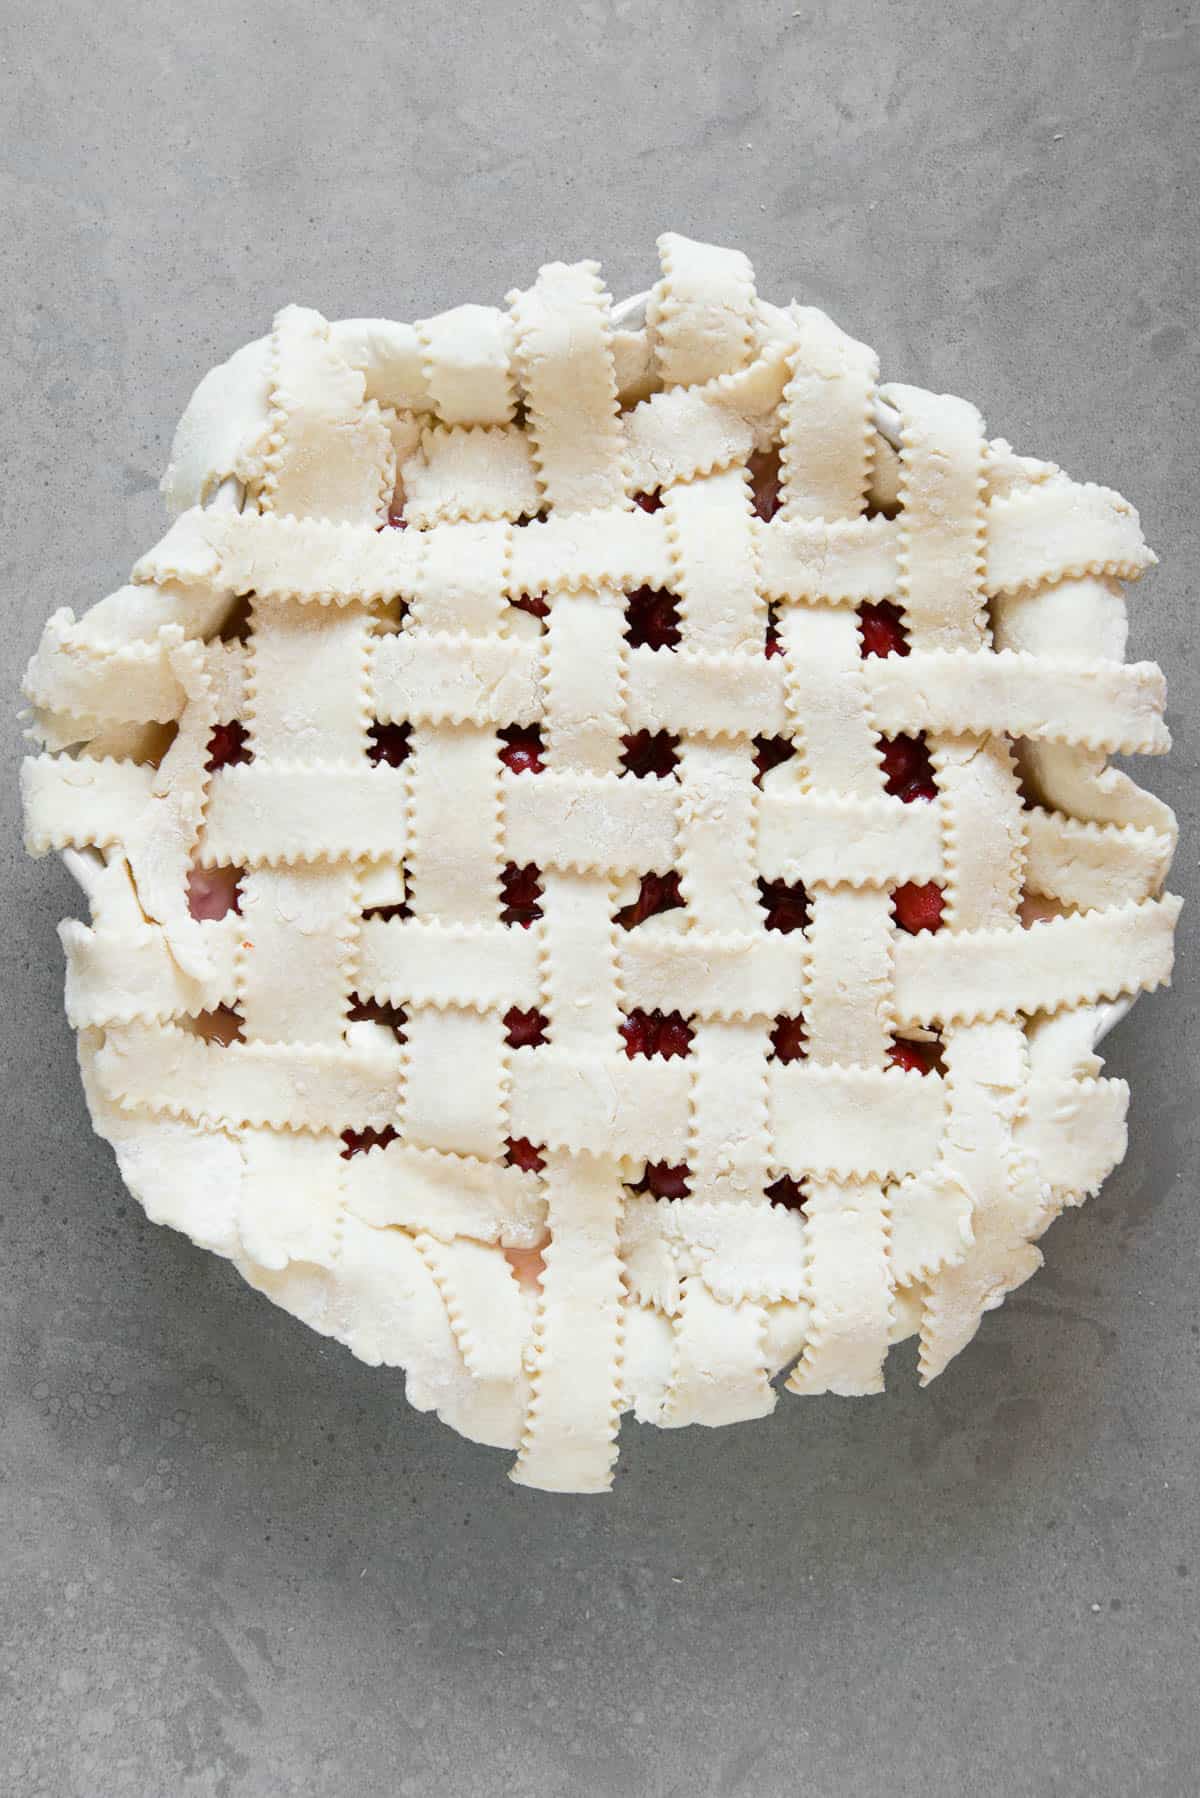
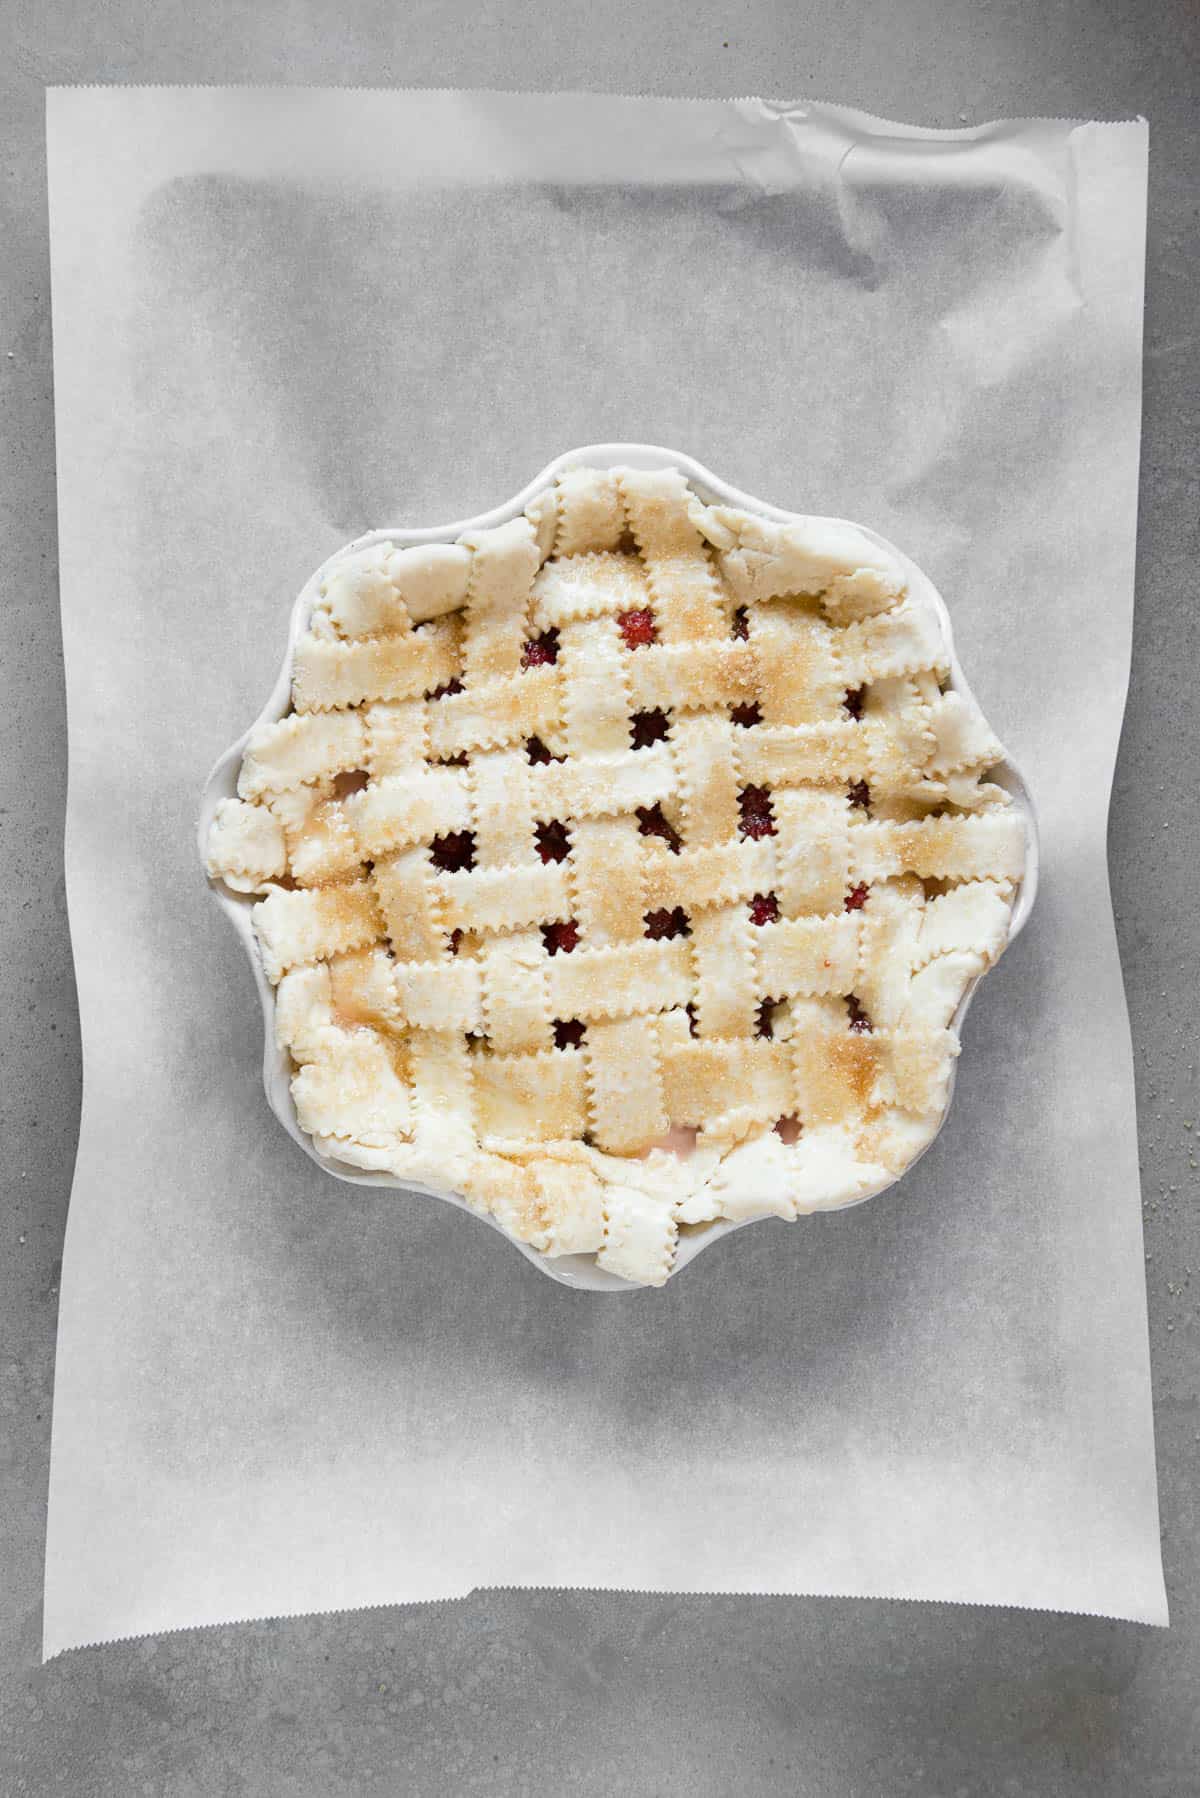
How to make a lattice pie crust:
You can simply top the cherry pie with a whole crust and cut holes or a design to allow steam to vent, but I much prefer a lattice crust and it’s super easy to make.
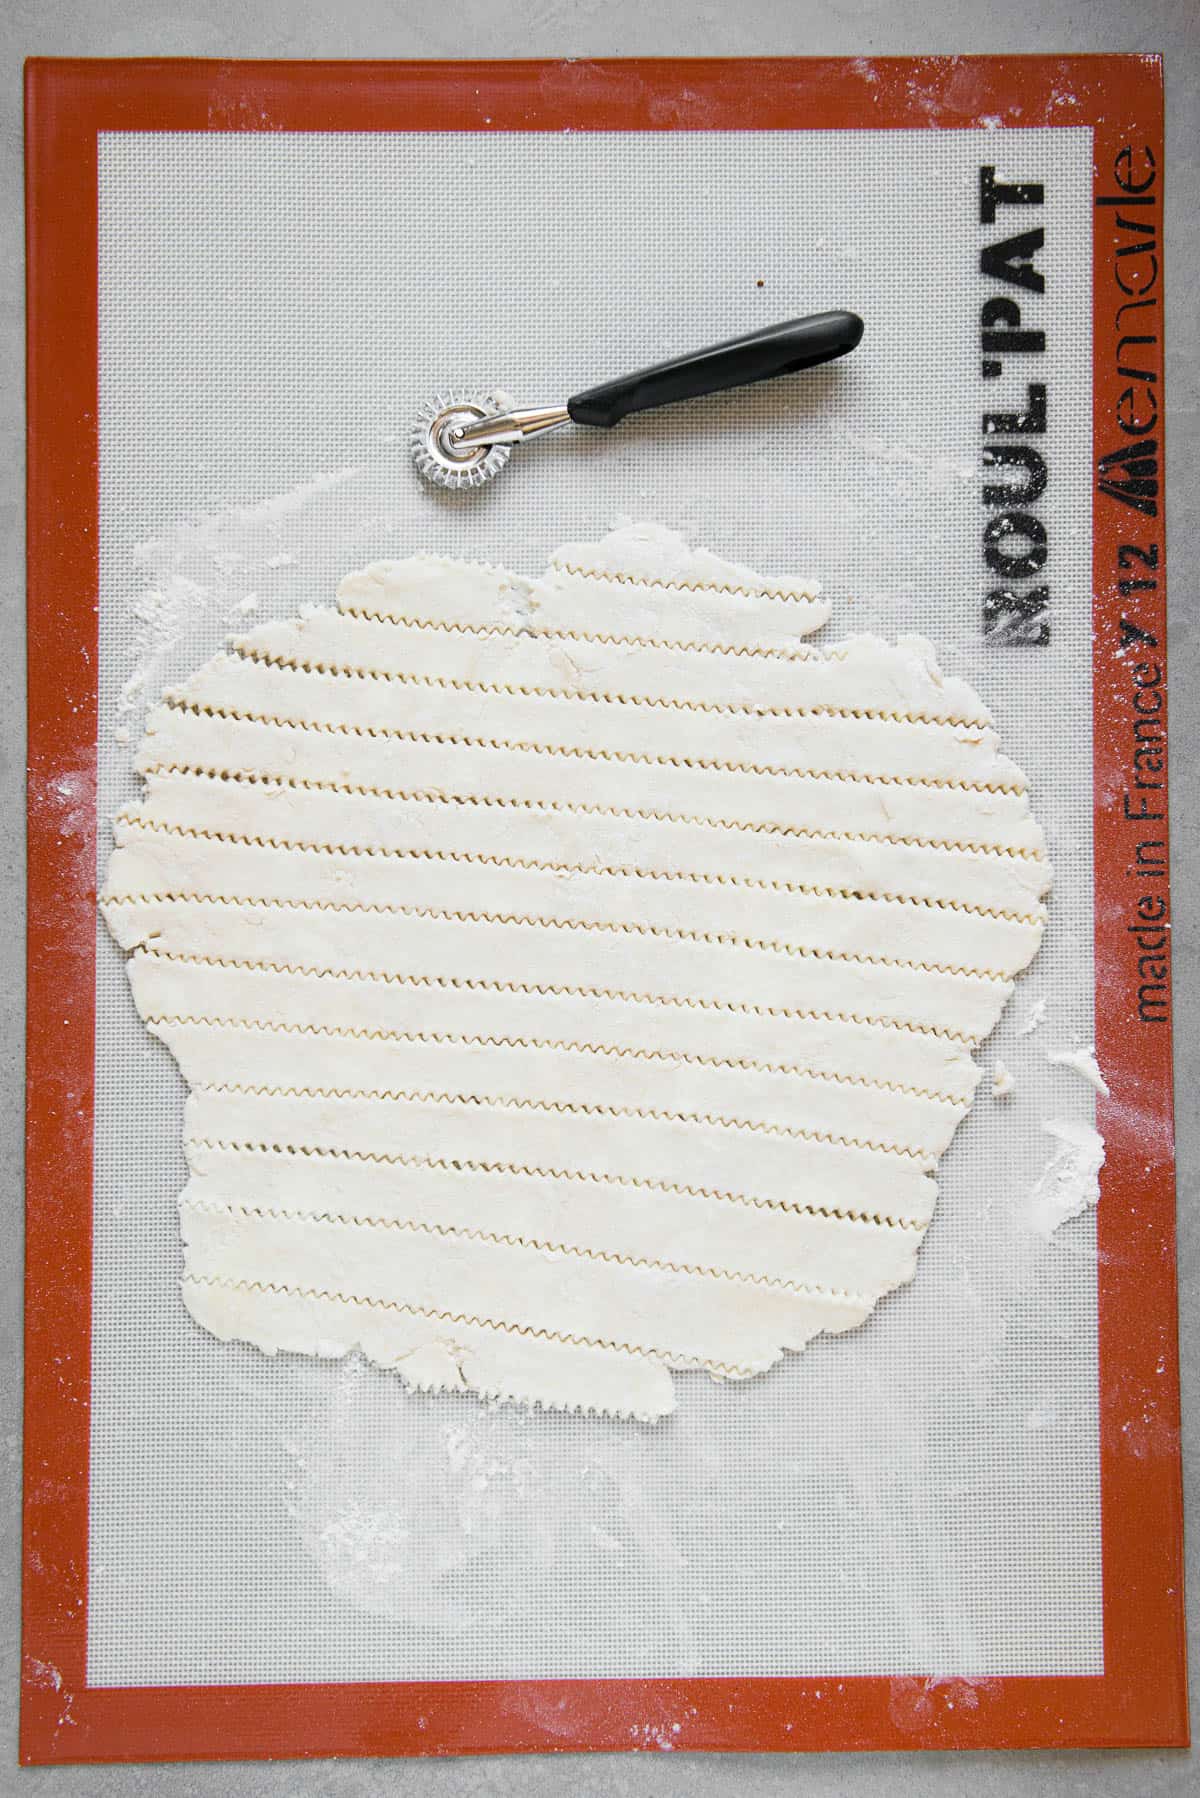
- Roll and slice. Roll out your second crust so that it is long enough to cover the entire pie with a bit of excess. Then, using a knife or pastry cutter, cut strips. The thinner the strips, the more you will weave.
- Lay alternating strips. Lift every other strip and place it on the pie, all going in the same direction, with space in between rows.
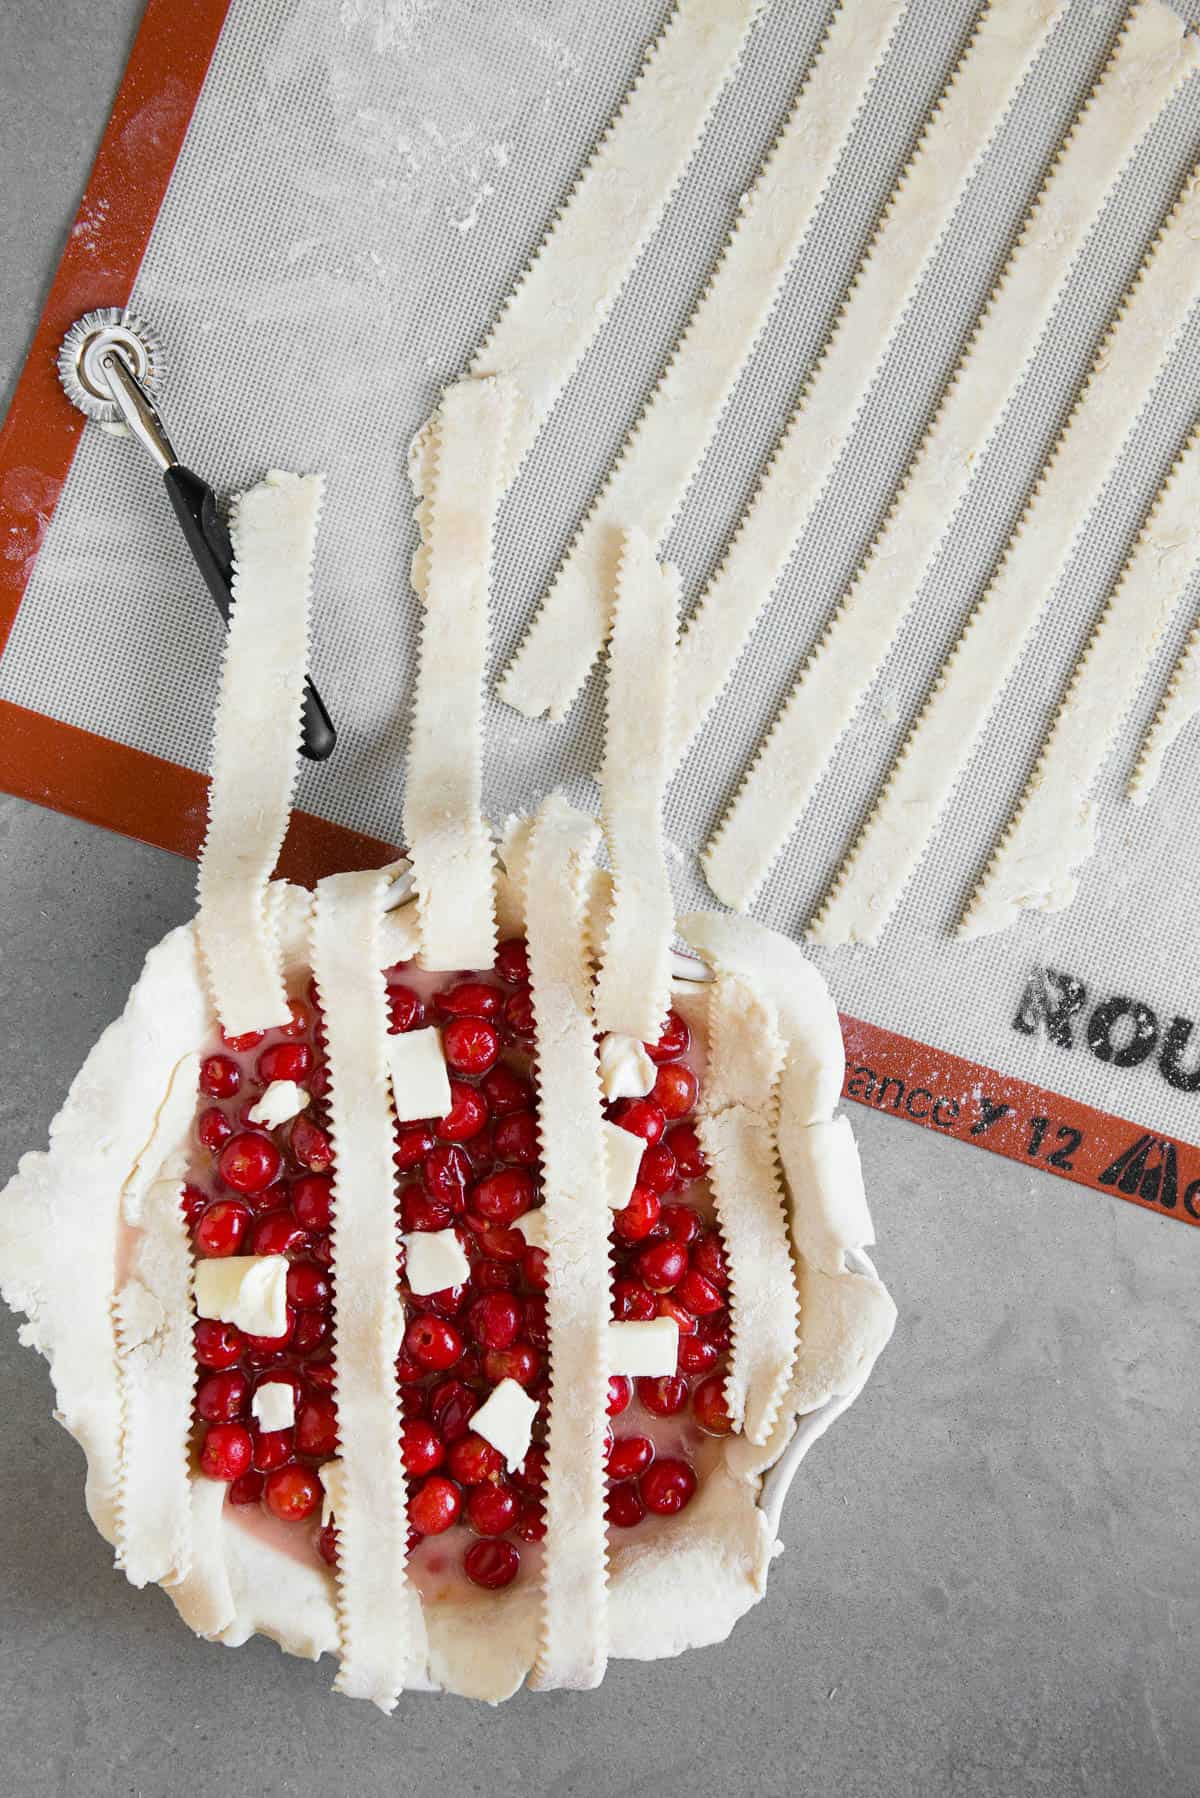
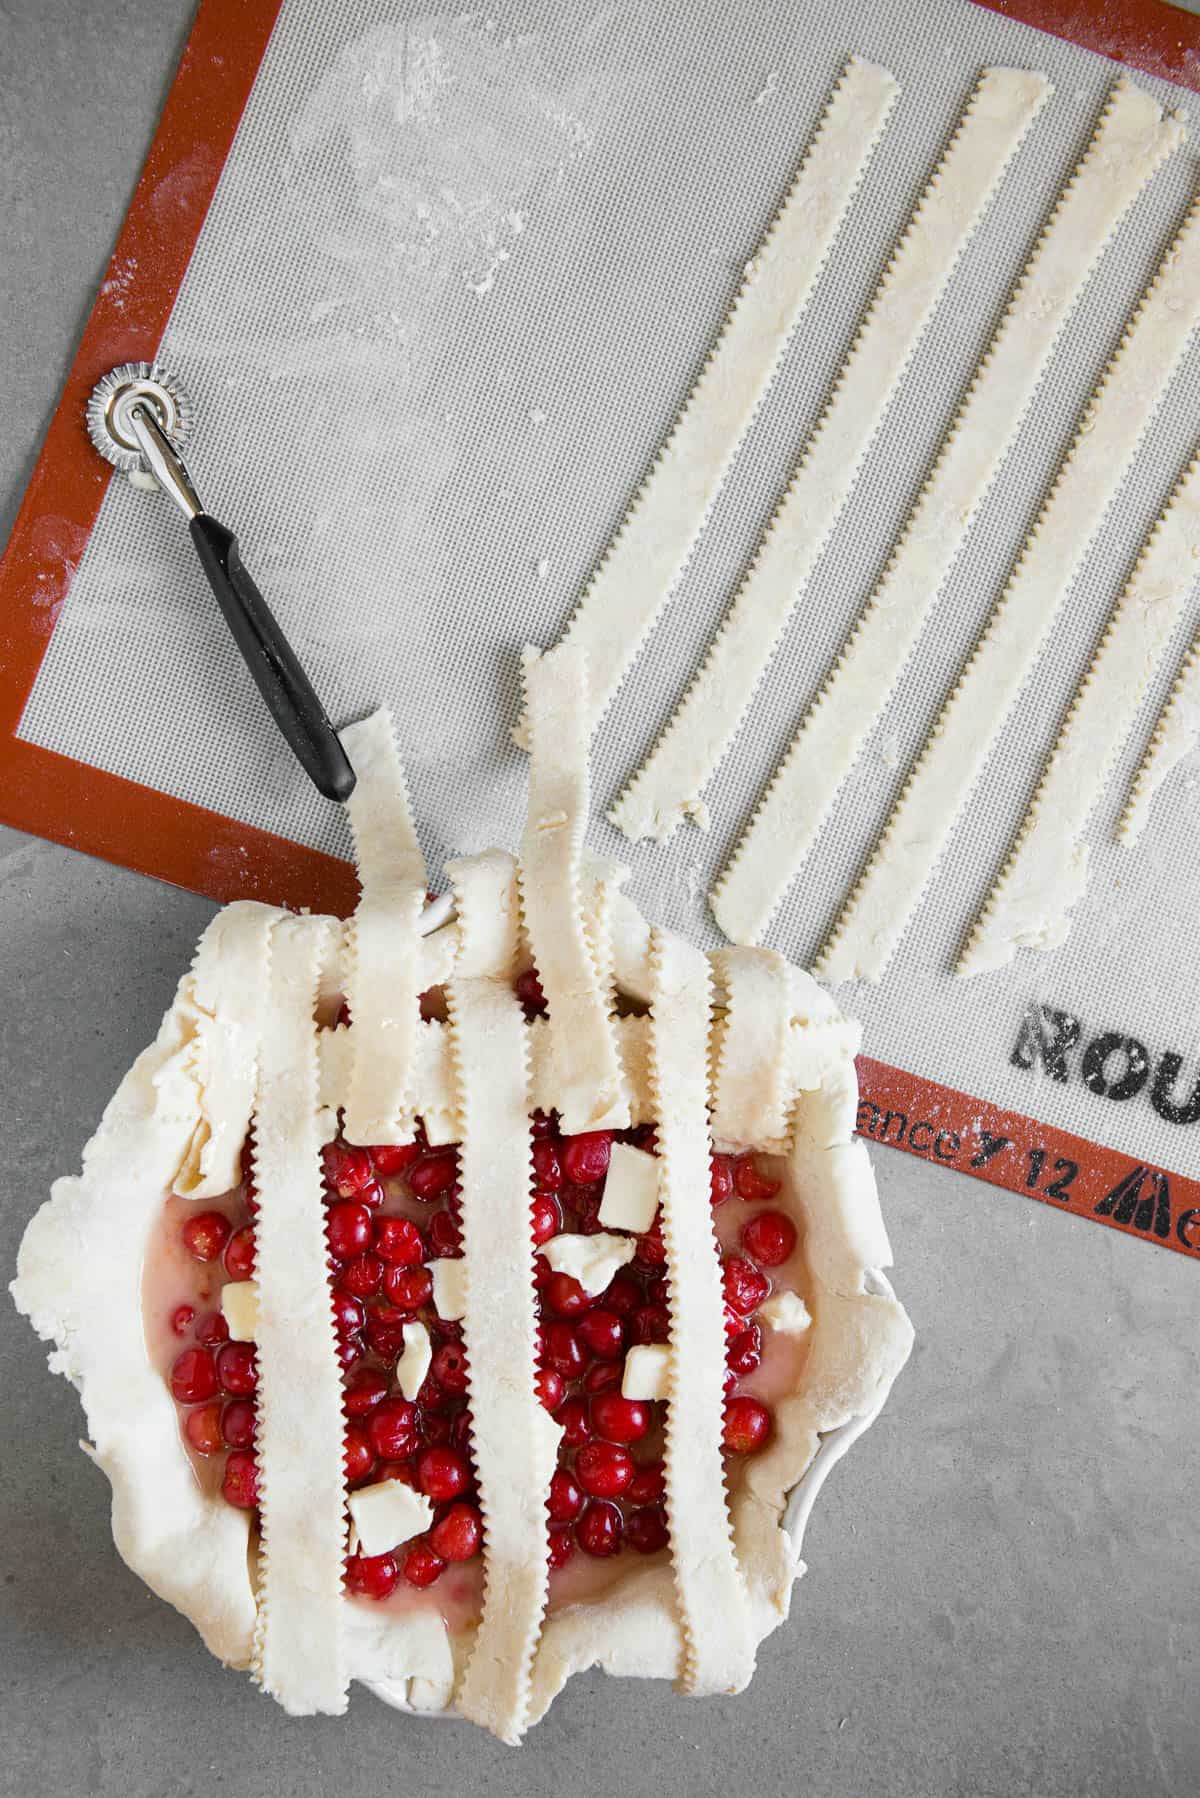
- Pull back. Pull every other strip back. You can then take the first piece to lay crosswise. This piece will go over every other strip and under the ones you pulled back.
- Continue alternating. Once you’ve laid a strip down, pull back alternating rows to lay the new strip.
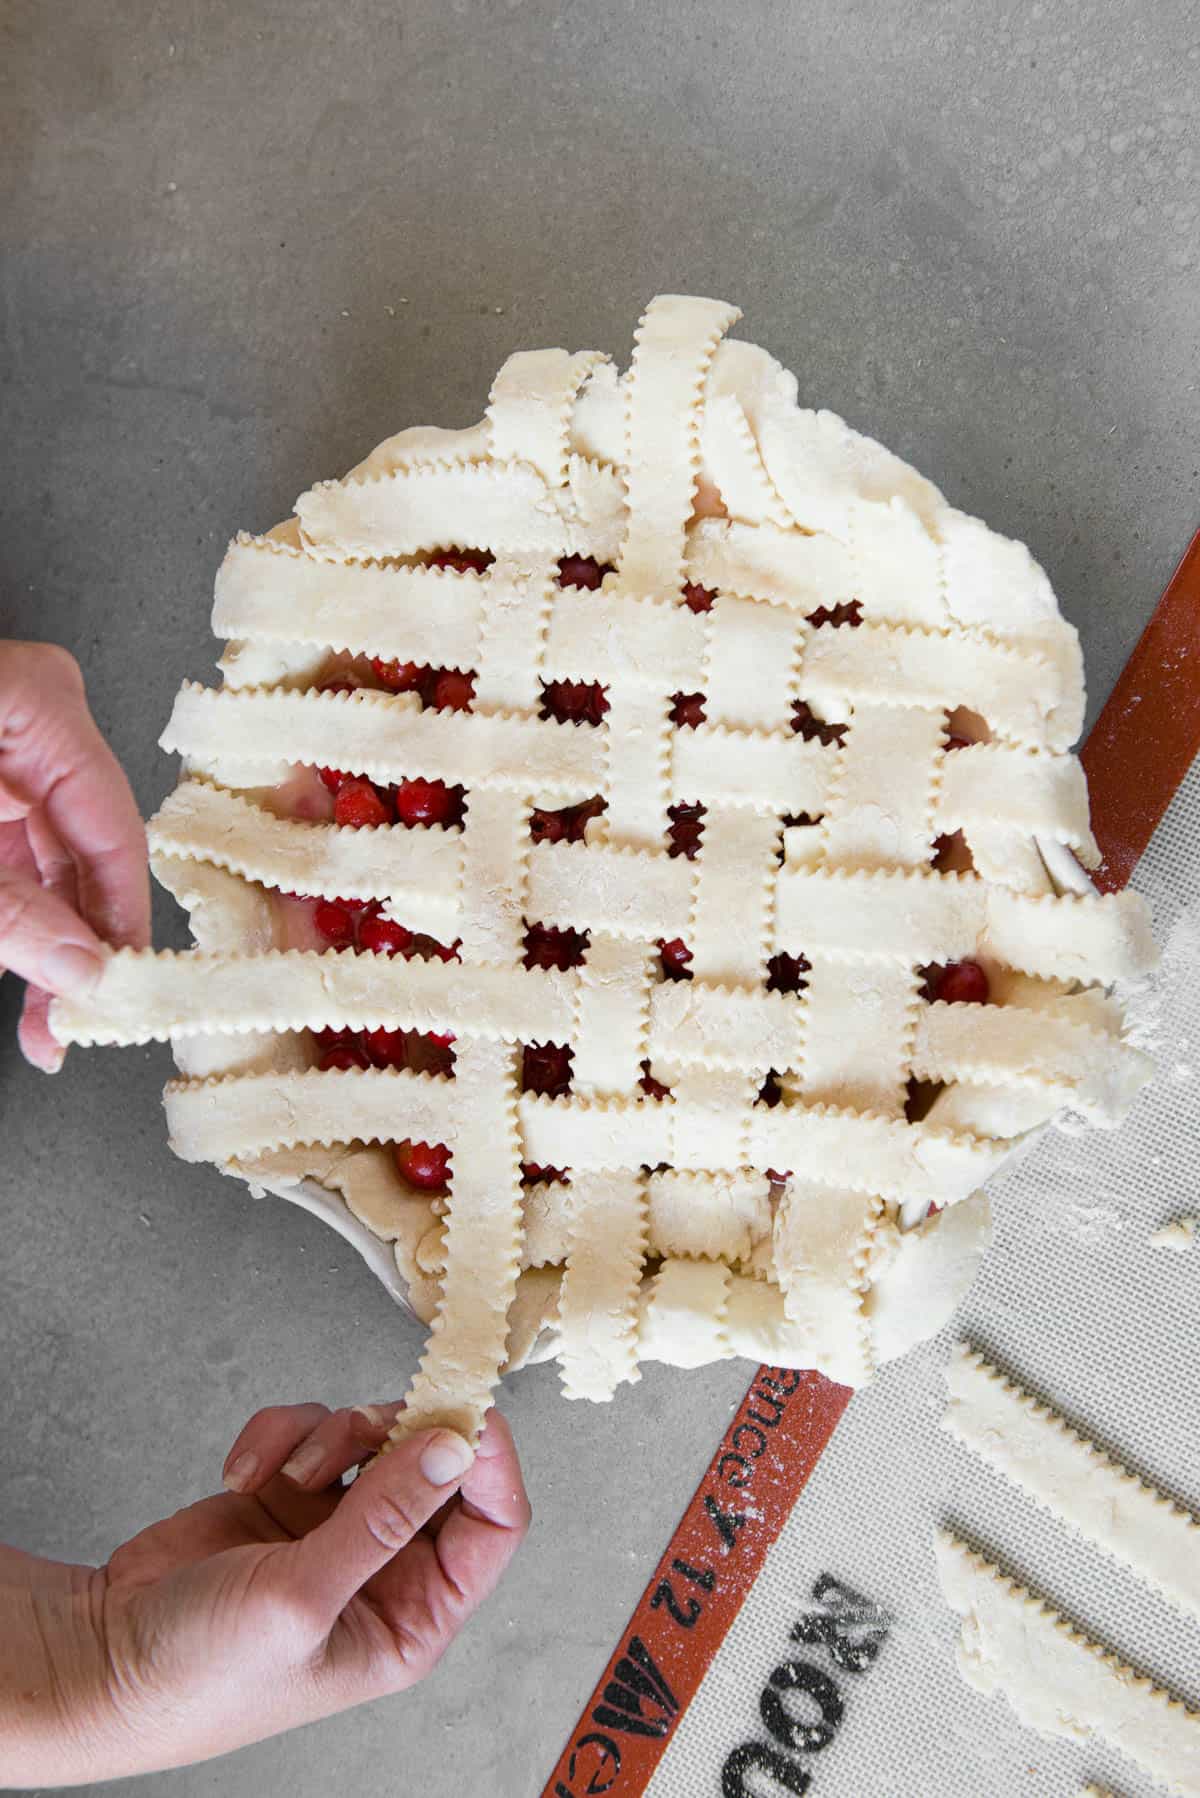
- Continue pattern. Continue pulling back and laying alternating strips until all of the dough has been used.

How to bake this cherry pie:
Remember, detailed step by step instructions are listed in the recipe card below, but here is a summary.
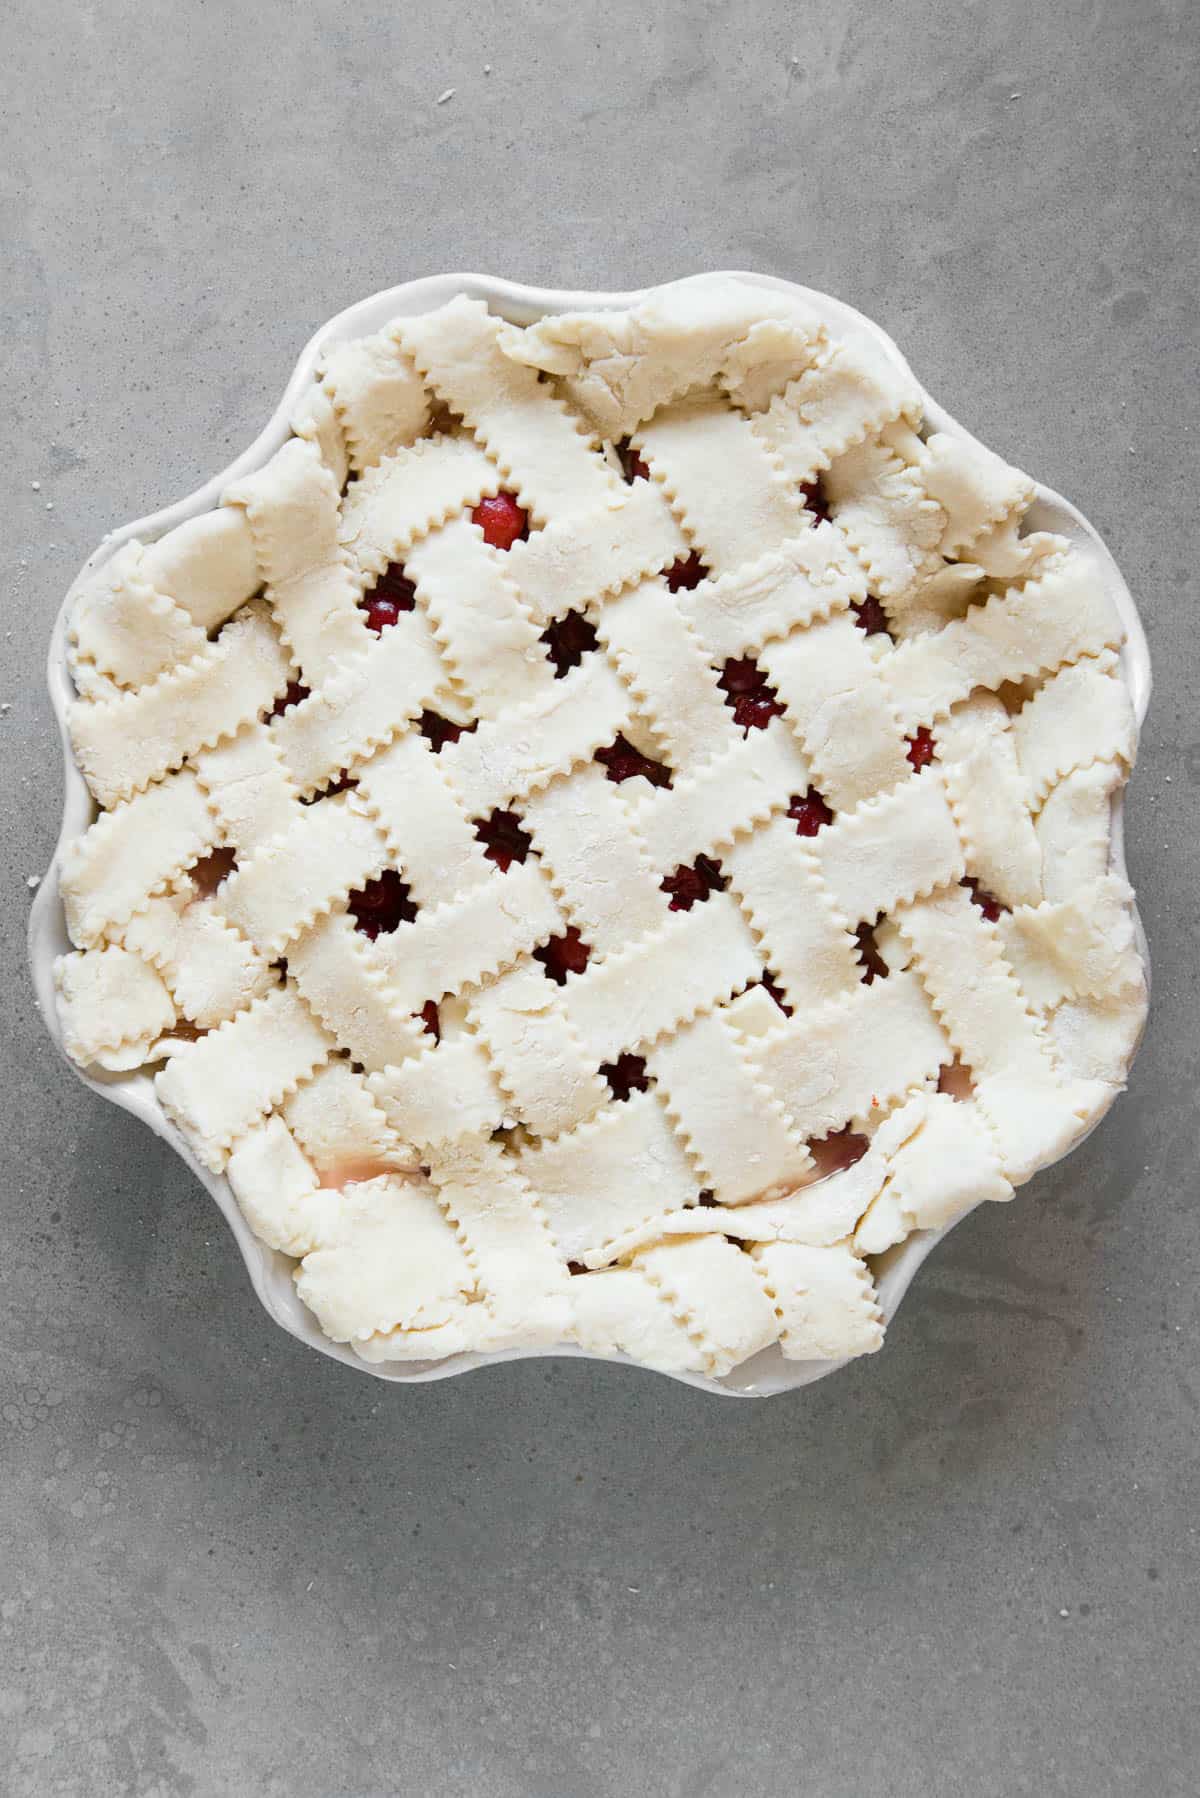
- Tuck and seal edges. Once the lattice weave is complete, tuck and seal the edges of the pie crust and tuck down into the sides of the pie dish.
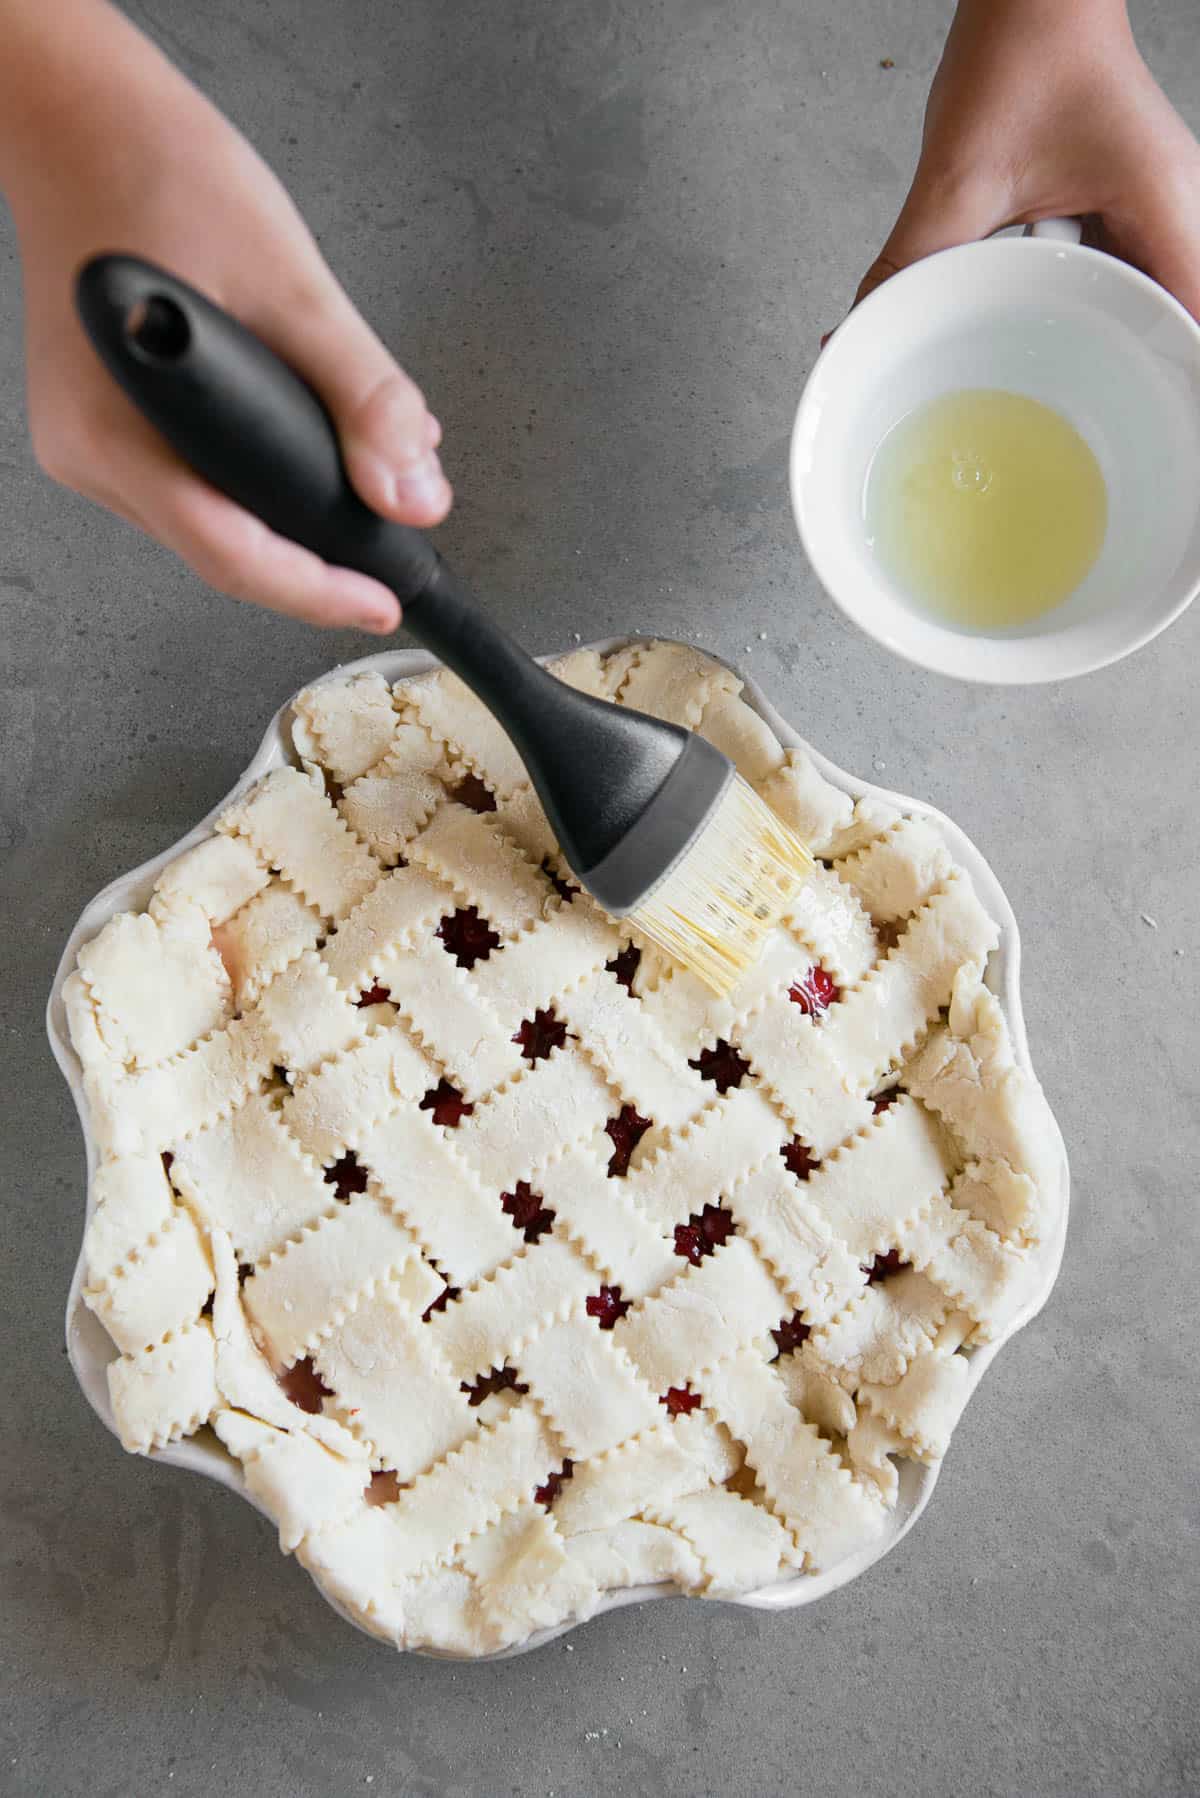
- Egg wash. Use a pastry brush to paint egg white onto the top of the crust. Discard any remaining excess.
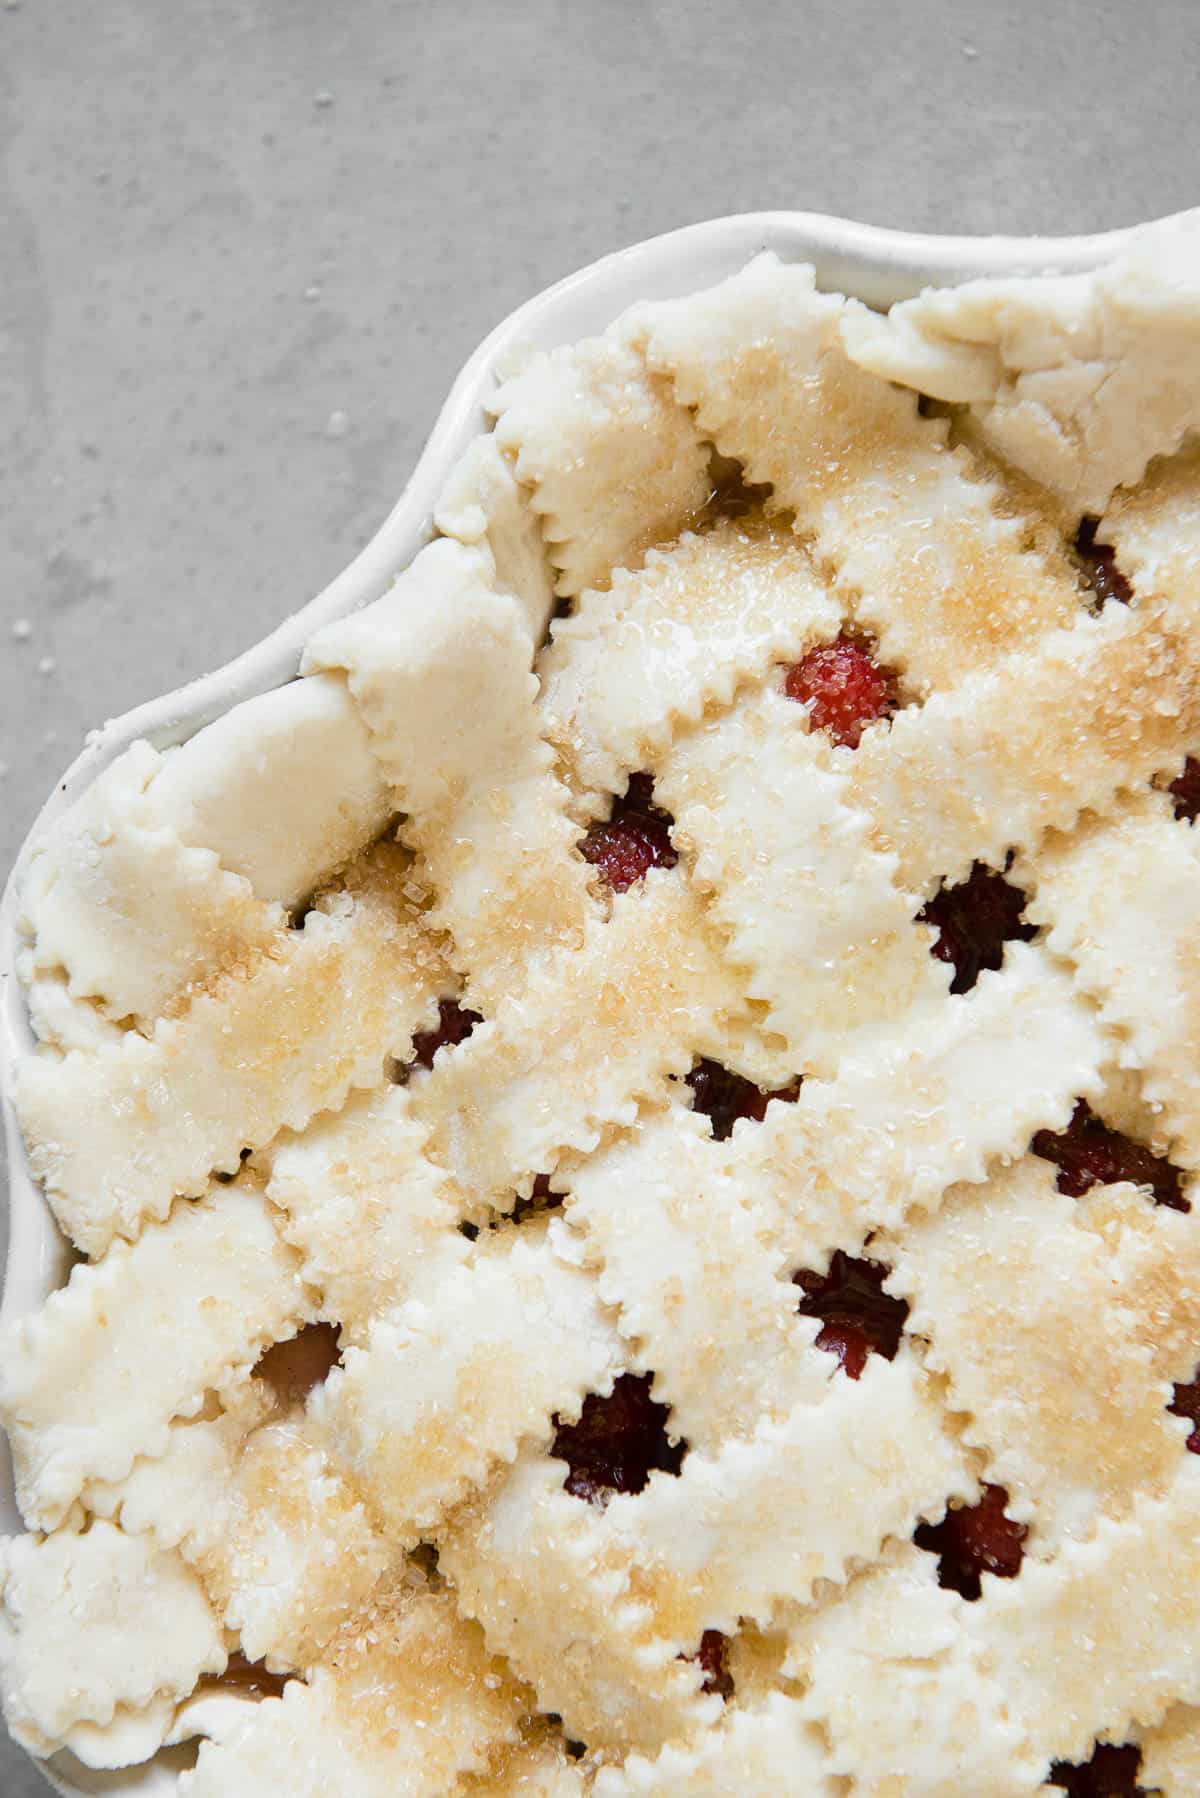
- Top with sugar. Sprinkle course sugar onto the wet crust.
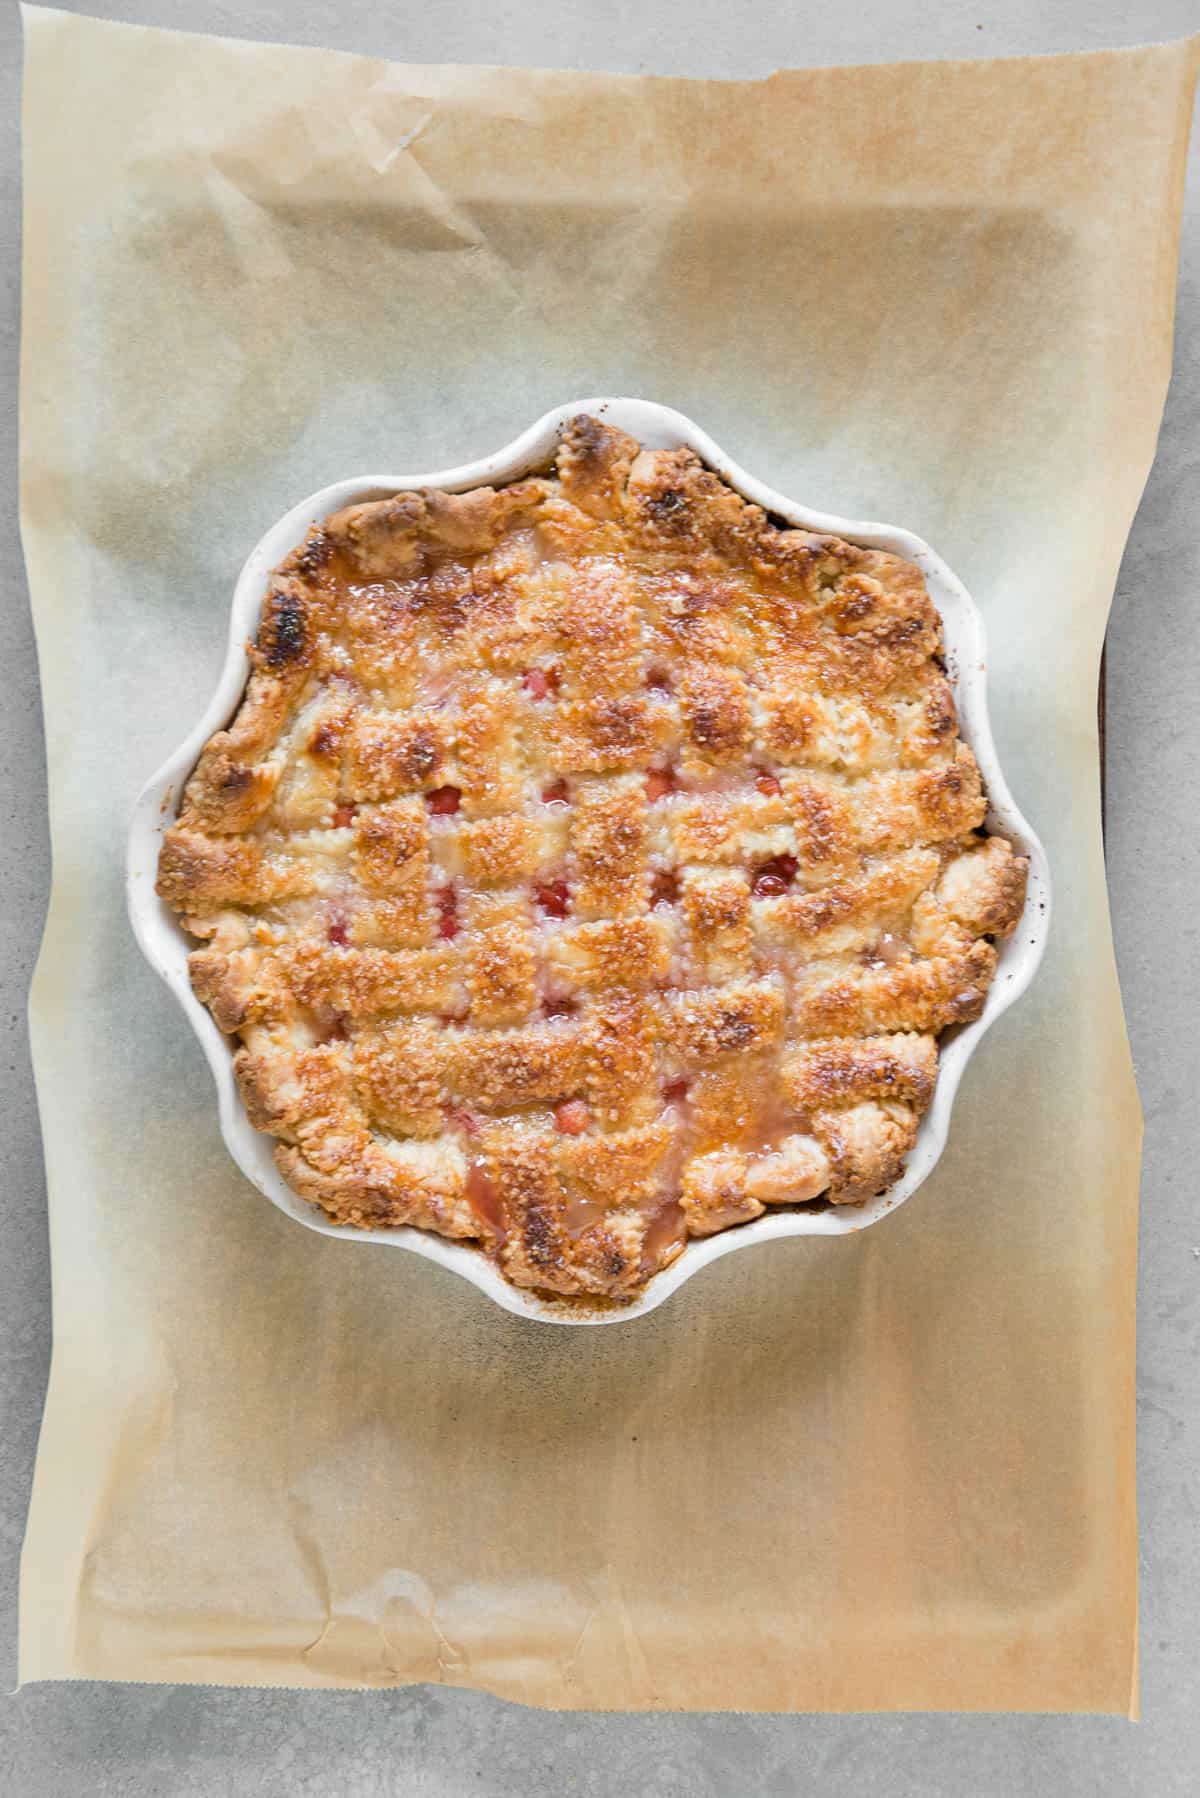
- Place on covered baking sheet. The butter will bubble over and a parchment lined baking sheet will prevent the butter from dripping down into your oven and creating a smoky mess.
- Bake. Place prepared pie into a preheated oven and bake for about 55 minutes. After about 35 minutes of baking, loosely cover the pie with aluminum foil to prevent the crust from getting too brown.
How to thicken cherry pie filling:
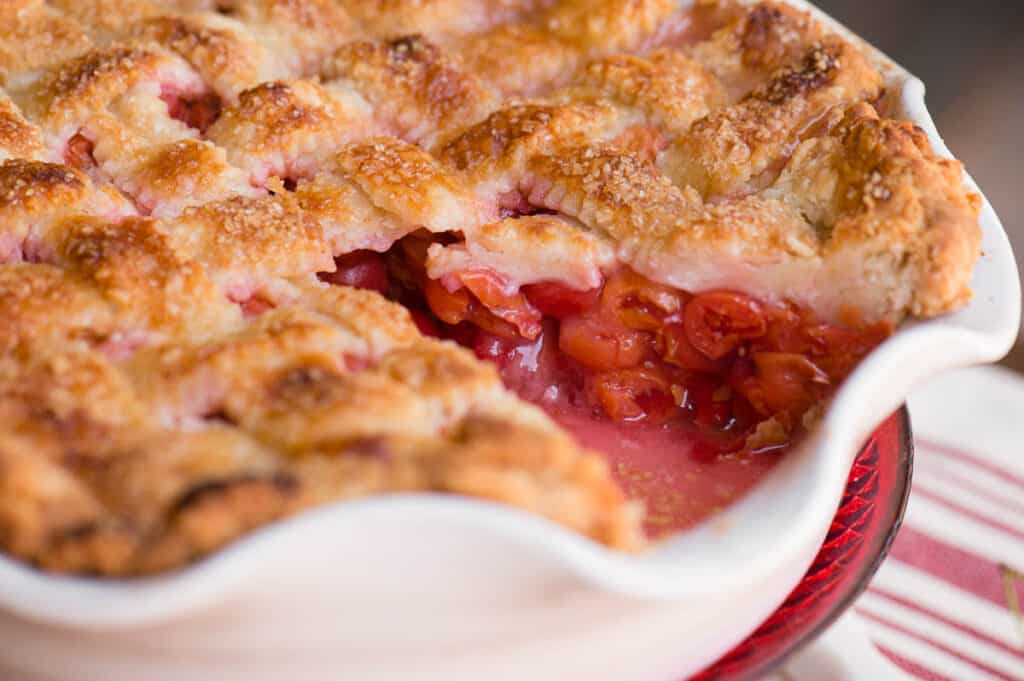
When pitting fresh cherries, you will inevitably release a lot of liquid. The tapioca flour will help the liquid thicken, however if you prefer a thicker pie filling, you may want to drain off the liquid before adding the tapioca flour.
Alternatively, you could drain off all of the juice and cook it down in a saucepan over low heat with about half of the sugar to create a thick syrup. Then, once that syrup cools, mix it back in with the cherries and remaining sugar when you add the tapioca flour.
Be sure to allow pie to fully cool before slicing. The first slice might still appear a bit runny on the bottom, but you will find that the filling gels up quite nicely.

Other fantastic fruit pie recipes:
- Homemade Apple Pie
- Fresh Blueberry Pie
- Banana Cream Pie
- Fresh Strawberry Pie
- Strawberry Rhubarb Pie
- Lemon Meringue Pie
- Fresh Rhubarb Pie
If you’ve made this or any other recipe on my site, let me know in the comment section how it turned out. I love hearing from my readers!
You can also follow along on PINTEREST, FACEBOOK and INSTAGRAM to see more amazing recipes to satisfy any foodie craving!

Pin this now to save it for later
Pin ItHomemade Cherry Pie
Ingredients
- 2 pie crusts homemade is best
- 5 cups sour cherries pitted and packed down for measurement
- 1 cup granulated sugar
- 1/2 cup tapioca flour or substitute with cornstarch
- 2 tablespoons lemon juice
- 1/4 teaspoon kosher salt
- 1 teaspoon almond extract
- 1/4 teaspoon cinnamon can substitute with pumpkin pie spice
- 2 tablespoons butter
- 1 teaspoon raw sugar or other large sugar crystals, to top crust
Instructions
- Prepare 5 cups sour cherries by washing in a large bowl of water with a bit of distilled vinegar, rinsing well, and then removing the stems and pits. When measuring quantity, gently pack pitted cherries into large measuring cup to get about 5 cups. *See note below about liquid.
- Combine the pitted cherries with 1 cup granulated sugar, 1/2 cup tapioca flour, 2 tablespoons lemon juice, and 1/4 teaspoon kosher salt. Stir well until everything is evenly combined and allow to sit for at least 20 minutes before adding to the pie shell.
- While the cherries sit, preheat the oven to 425°F. Roll out both pie crusts into circles large enough to fit the pie dish and extend up the sides. Fit one of the crusts in your pie dish.
- Prior to transferring pie filling to pie shell, stir the 1 teaspoon almond extract and 1/4 teaspoon cinnamon into the cherry mixture. Spoon the filling into the pasty lined pie dish. Dot the filling with the 2 tablespoons butter.
- Place the remaining crust on top of the filling. You can place the entire crust over the pie and cut a design to allow steam to escape, your you can cut the crust into strips and arrange as a woven lattice crust (my preference). Seal and tuck the edges.
- Using a pastry brush, cover the top of the crust with the egg white and discard any remaining egg. Sprinkle 1 teaspoon raw sugar on top.
- Place the pie on a parchment-lined baking sheet. This will prevent any melted butter or cherry filling from spilling over and creating smoke in your oven. Bake in a preheated oven for 50 to 55 minutes total, loosely tenting with foil after about 35 minutes to prevent the crust from getting too brown.
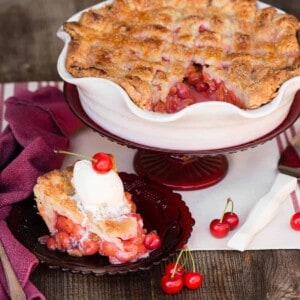
- Remove the pie from the oven, and cool it on a rack before slicing, so the filling can set. For best results, allow pie to fully cool before cutting.
Notes
Nutrition
Nutrition information is automatically calculated, so should only be used as an approximation.

Very good proportions. I originally thought it would be too much tapioca since Cooks Illustrated suggests less, but after a couple pies I’m sold. I pit and freeze my cherries in advance, and thaw and partially cook them in a large saucepan with the sugar, tapioca flour, lemon, and salt, then turn off heat and stir in the other ingredients before transferring to the pie. At this point the filling is quite rubbery from the partially cooked tapioca, but don’t worry, the texture will be perfect once the pie is fully cooked and cooled. Mixing in a few other frozen stonefruit like apricots or peaches is also a nice touch.
This pie was the perfect dessert for the end of summer! We have a ton of cherries so I will be making it again!
Hi Krissy
Thankyou for this recipe. I have sour cherries I picked and froze and want to make pies. How should I treat the frozen cherries before adding them to the pie so they don’t cause a runny pie?
I would thaw them first and strain them from any juice before adding them.
This is one delicious cherry pie. Thanks to your tutorial I was able to do the lattice weave. It did not look as good as yours but it was still impressive.
I love cherry pie and making it fresh is so good. I am definitely going to have to be making this one some more.
Hi, in reference to the tapioca flour, you could also use clear Jel, a modified type of cornstarch, for a thickening agent.