This post may contain affiliate links. Please read our disclosure policy.
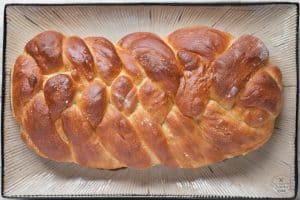
There’s nothing quite like the aroma of freshly baked challah bread filling your kitchen. This rich, egg-enriched loaf with its signature golden braid is tender, slightly sweet, and wonderfully versatile. Whether you’re enjoying it warm from the oven, turning it into Challah French toast, or sharing it at a family dinner, this homemade challah recipe is a must-try.
I’ve made this recipe countless times, and through plenty of trial and error, I’ve refined the method to make sure you get a perfectly risen, beautifully braided, and irresistibly golden loaf every time.
This post was originally published in December 2016 and has been fully updated with new photos and recipe tips so that you can easily recreate this recipe in your own kitchen.
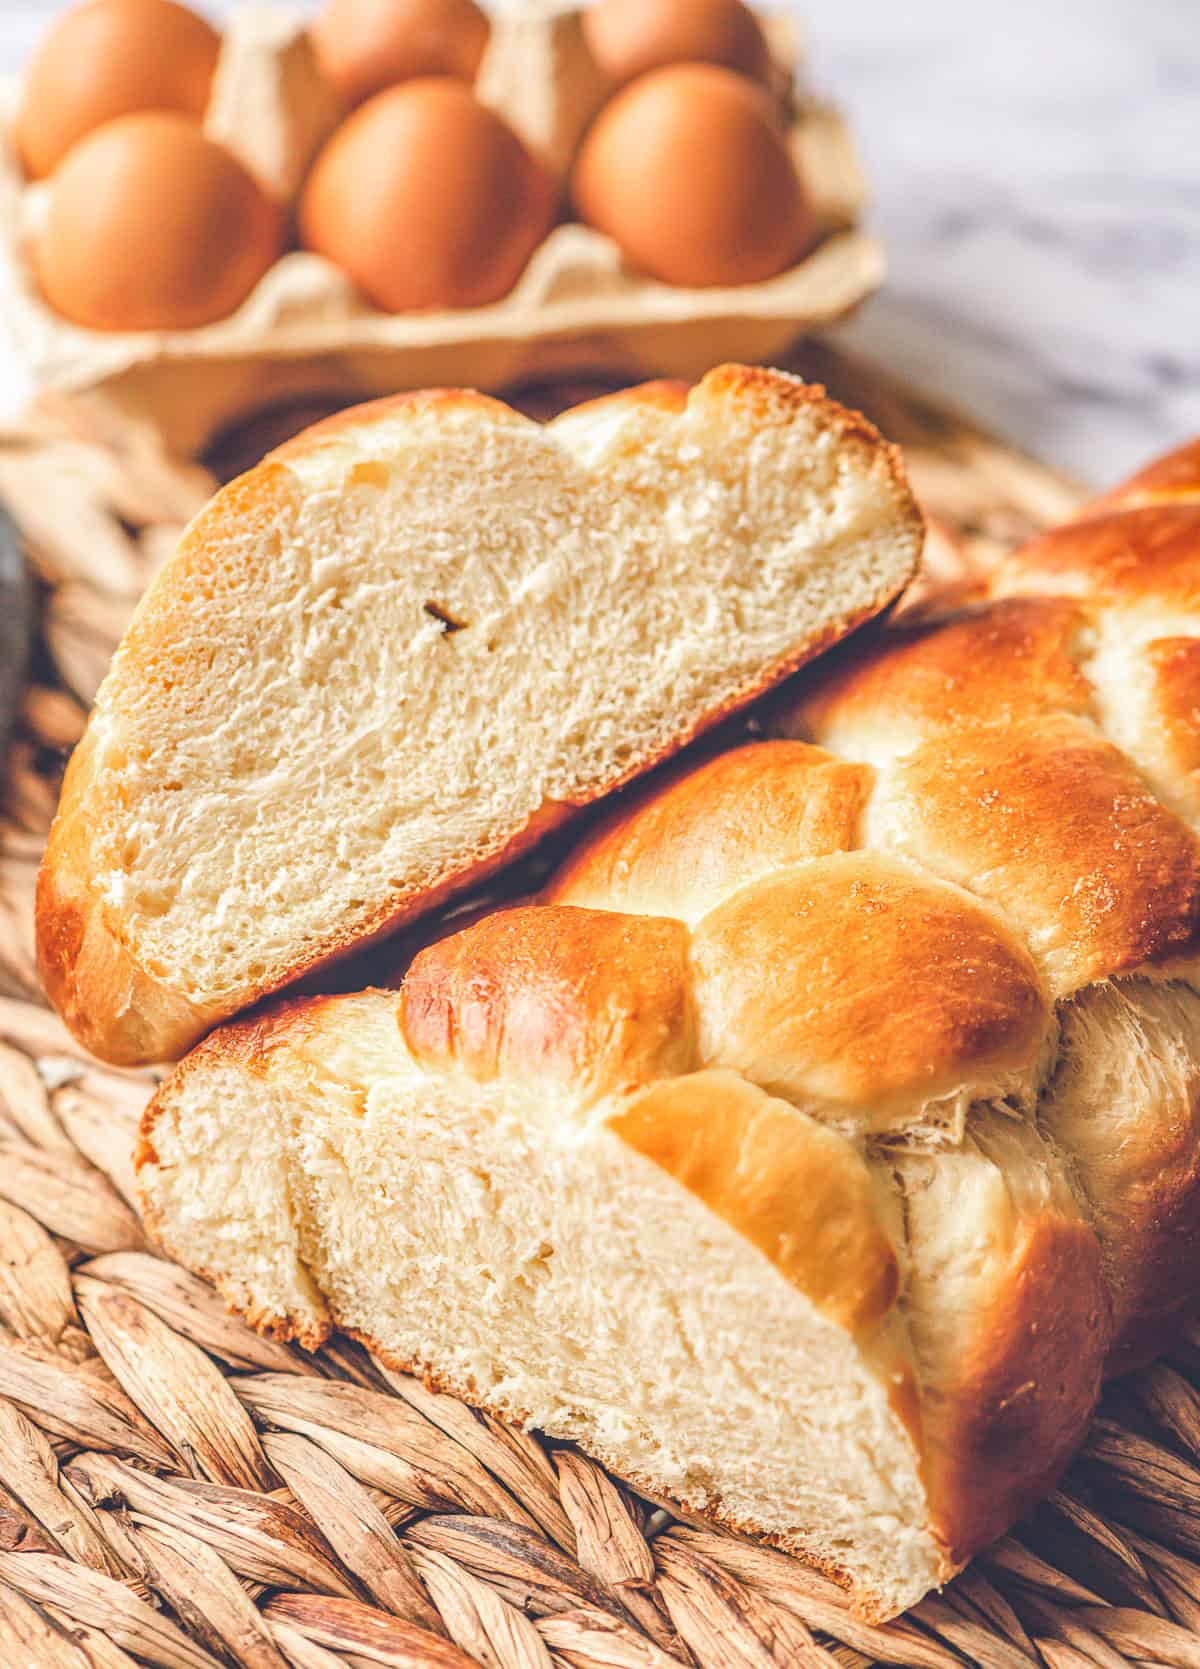
Table of Contents
- What Makes Challah Bread Special?
- Why I Think You’ll Love This Recipe
- Ingredients You’ll Need
- Step-by-Step Instructions
- Step 1: Activate the yeast
- Step 2: Make the dough
- Step 3: First rise
- Step 4: Braid the dough
- Step 5: Second rise
- Step 6: Egg wash and bake
- My Tips for Perfect Challah Every Time
- Ways to Enjoy Challah Bread
- FAQs About Making Challah Bread
- Challah Bread Recipe
What Makes Challah Bread Special?
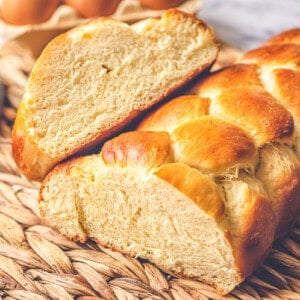
Challah bread is a traditional Jewish bread, often enjoyed during Shabbat and holidays. Its signature braid symbolizes love, unity, and tradition. The dough is enriched with eggs, honey, and oil, giving it a soft and tender crumb with a slightly sweet flavor.
What sets this bread apart from other enriched breads like brioche is that it contains oil instead of butter, making it dairy-free. This subtle difference results in a lighter texture and a richer egg flavor.
Why I Think You’ll Love This Recipe
Challah bread is surprisingly easy to make, and once you’ve tried it, you’ll never want to buy store-bought again. Here’s why it’s worth the effort:
- Easy to master: While the braid may look intimidating, it’s actually quite simple with a little practice.
- Perfect for beginners: The dough is soft and forgiving, making it ideal for anyone new to bread-making. The other homemade yeast breads I like to make are my Homemade Dinner Rolls and my Cornmeal Yeast Rolls.
- Versatile: Enjoy it fresh, toasted, or as the base for decadent French toast or berry bread pudding.
- Make-ahead friendly: Much like my Homemade Potato Buns, you can freeze the shaped loaf and bake it later for freshly baked bread on demand.
Ingredients You’ll Need
Challah bread uses basic pantry staples, but the combination creates magic. Here are the key players:
- Yeast and warm water: Activates the dough and helps it rise to a fluffy texture. Combining the two ingredients before mixing is common practice. I follow this step when making the dough for my Easy White Bread, Pumpkin Spice Monkey Bread and my Apple Fritter Monkey Bread.
- Honey: Adds sweetness and enhances the flavor of the bread.
- Eggs and egg yolk: Enrich the dough, giving it its golden color and tender crumb.
- Vegetable oil: Adds richness and moisture without making the bread too heavy.
- All-purpose flour: The base that forms the structure of the bread.
- Egg wash: Gives the bread its signature glossy, golden finish.
Exact quantities are listed below in the recipe card. Note: the recipe card allows you to easily scale the recipe and will automatically adjust the ingredient quantities.
Step-by-Step Instructions
Always refer to the recipe card below, but here is a visual summary.
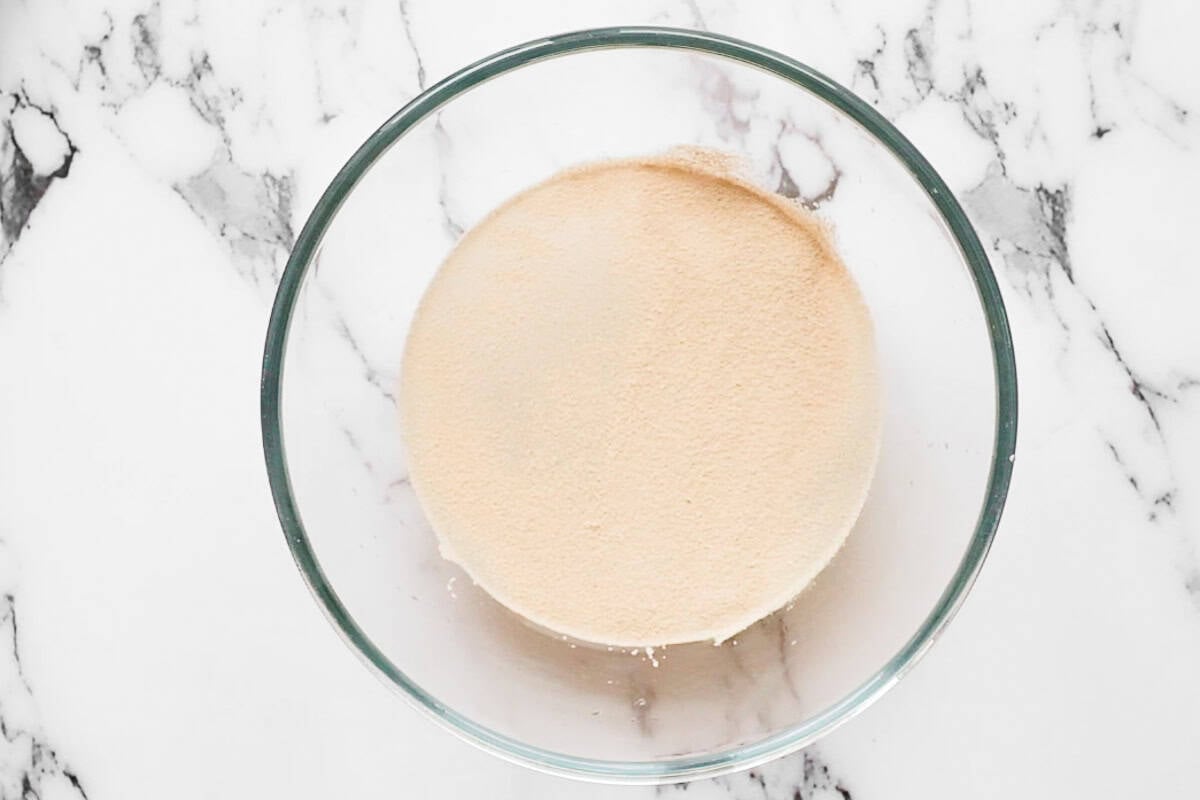
Step 1: Activate the yeast
Sprinkle the yeast over warm water and let it dissolve until it becomes frothy. This ensures the yeast is active.
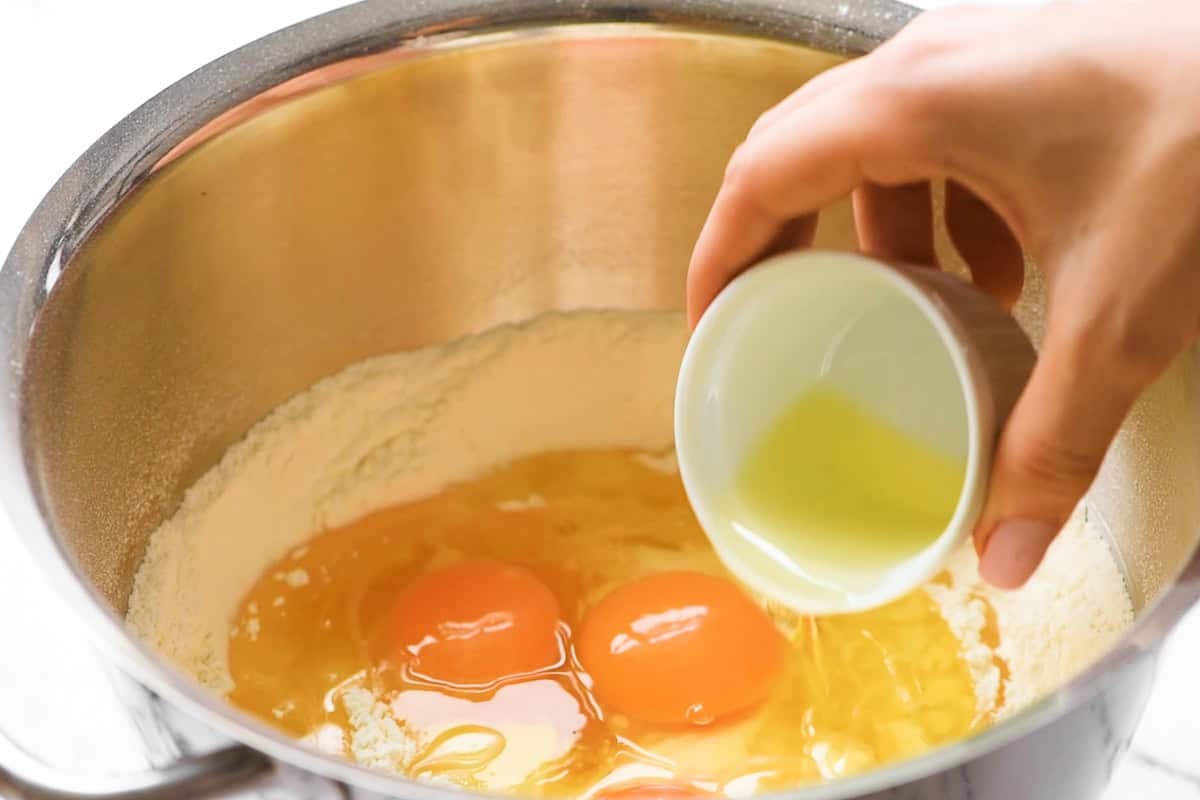
Step 2: Make the dough
In your stand mixer, combine the flour and salt, then add the honey, eggs, egg yolk, and oil.
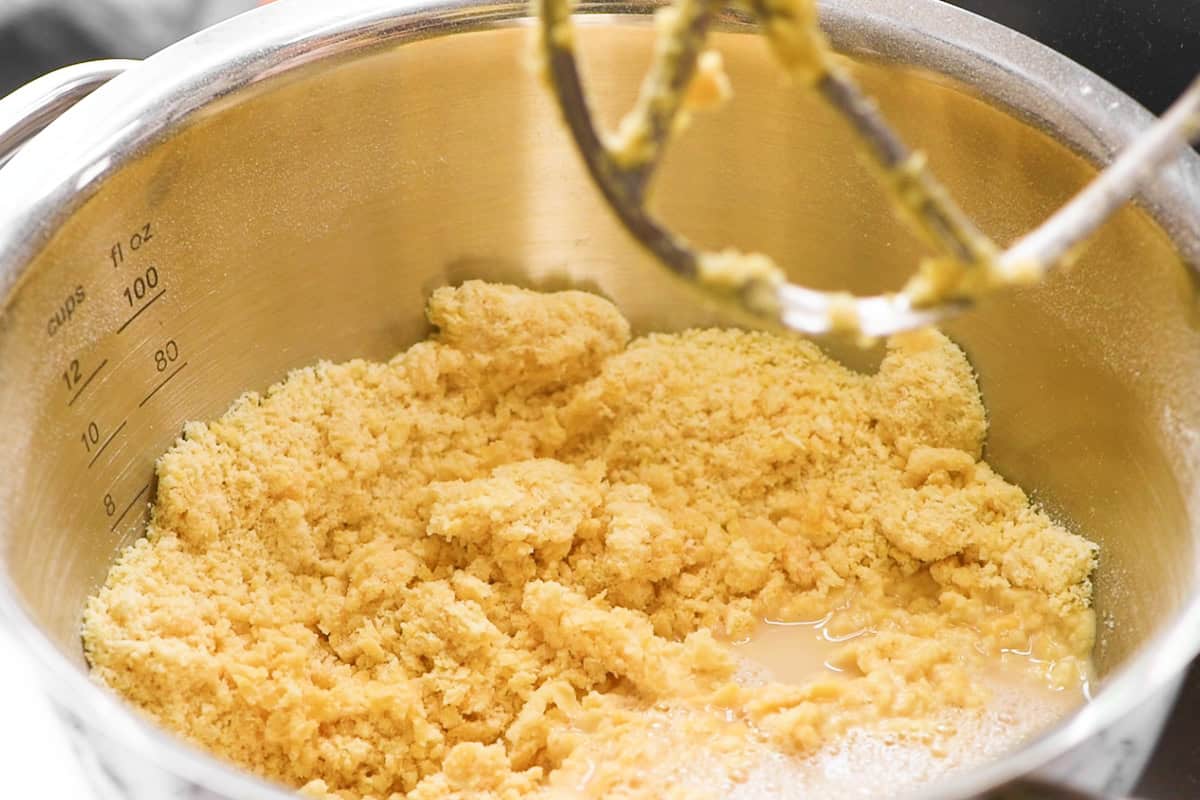
Mix until you get a shaggy dough. Slowly add the yeast mixture.
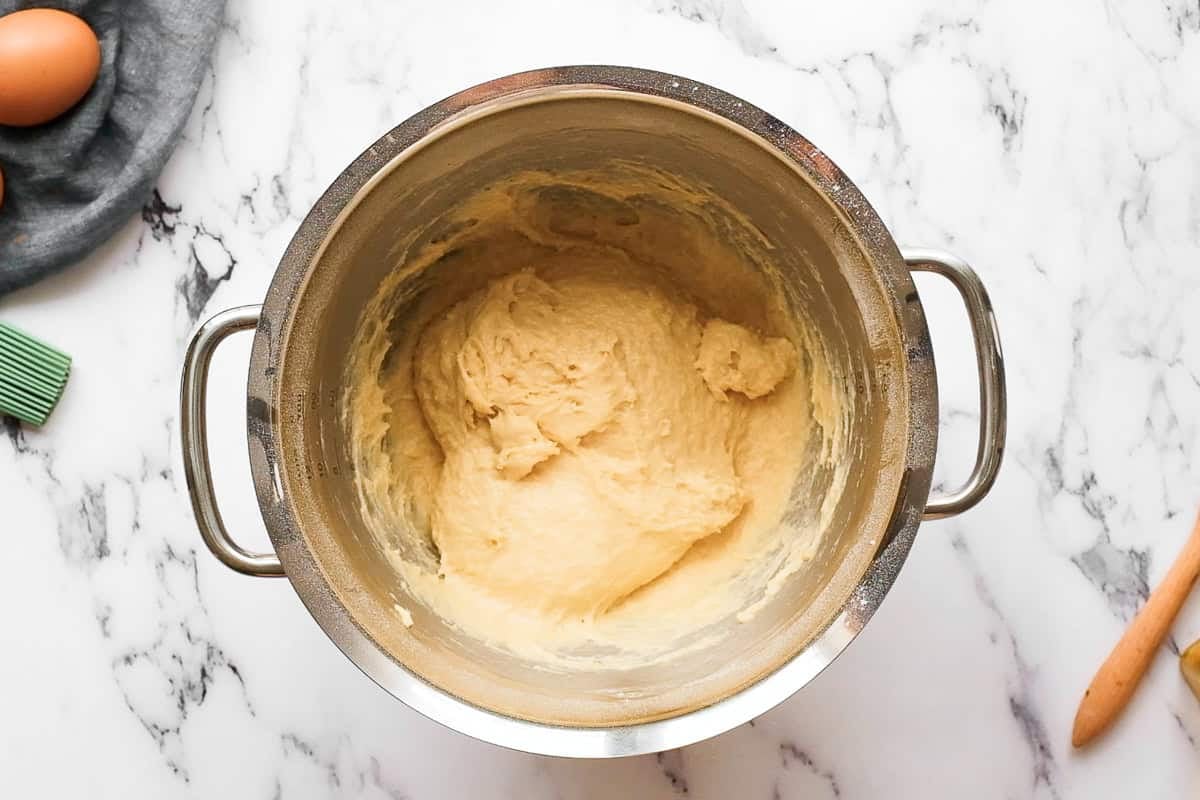
Knead until a smooth, soft dough forms.
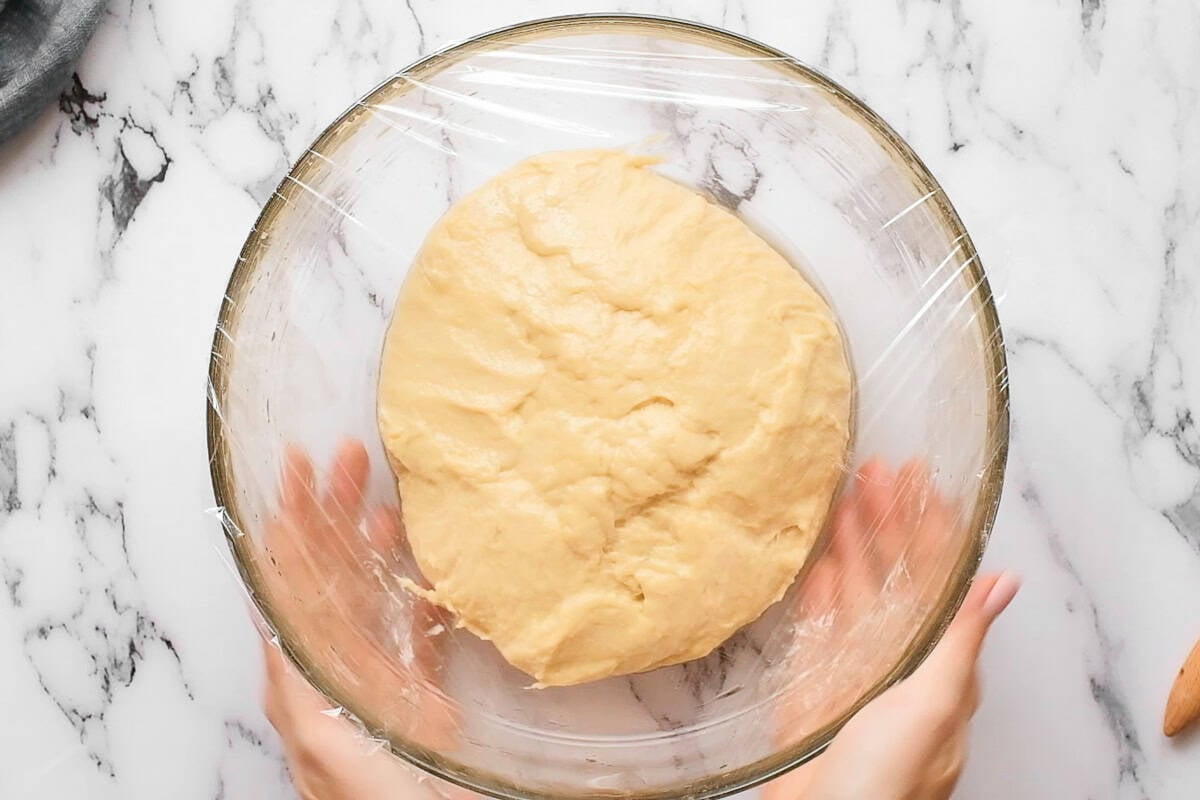
Step 3: First rise
Transfer the dough to an oiled bowl, cover it, and let it rise until doubled in size. This takes about 1–2 hours.
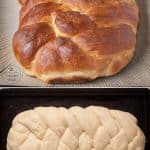
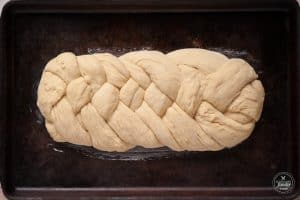
Step 4: Braid the dough
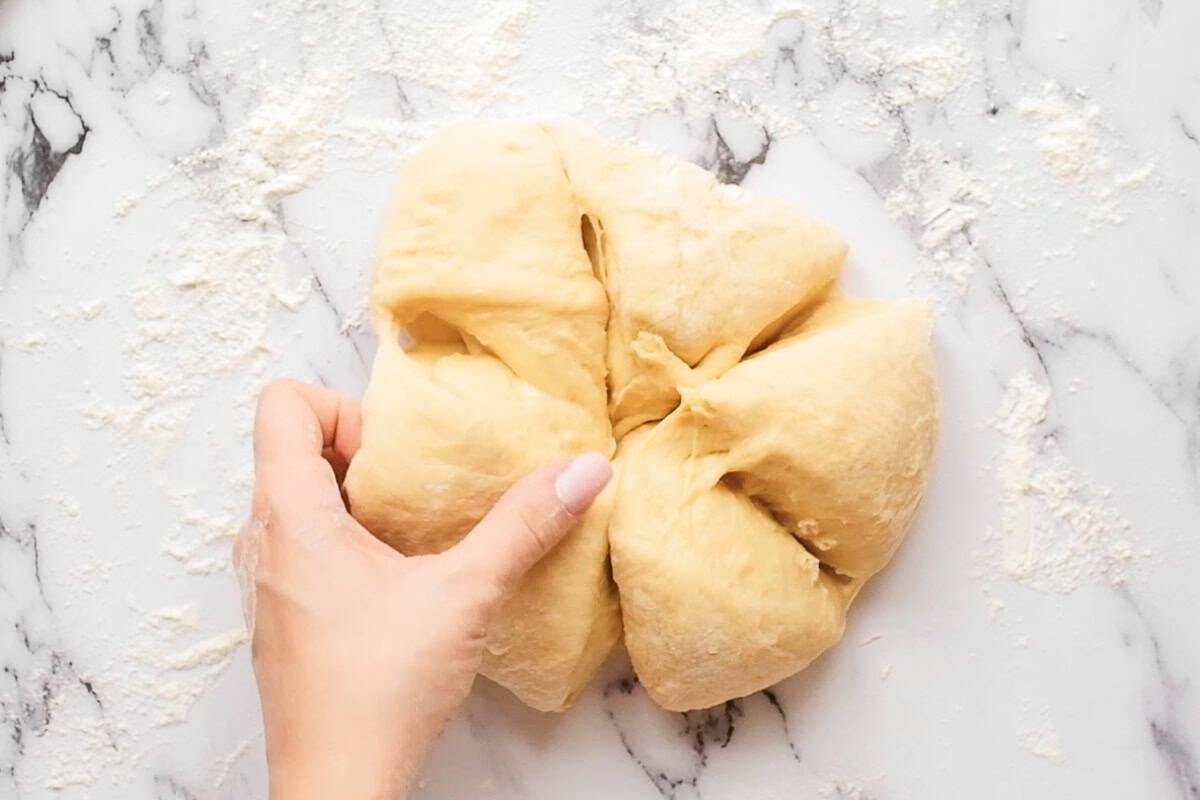
Divide the dough into six equal pieces.
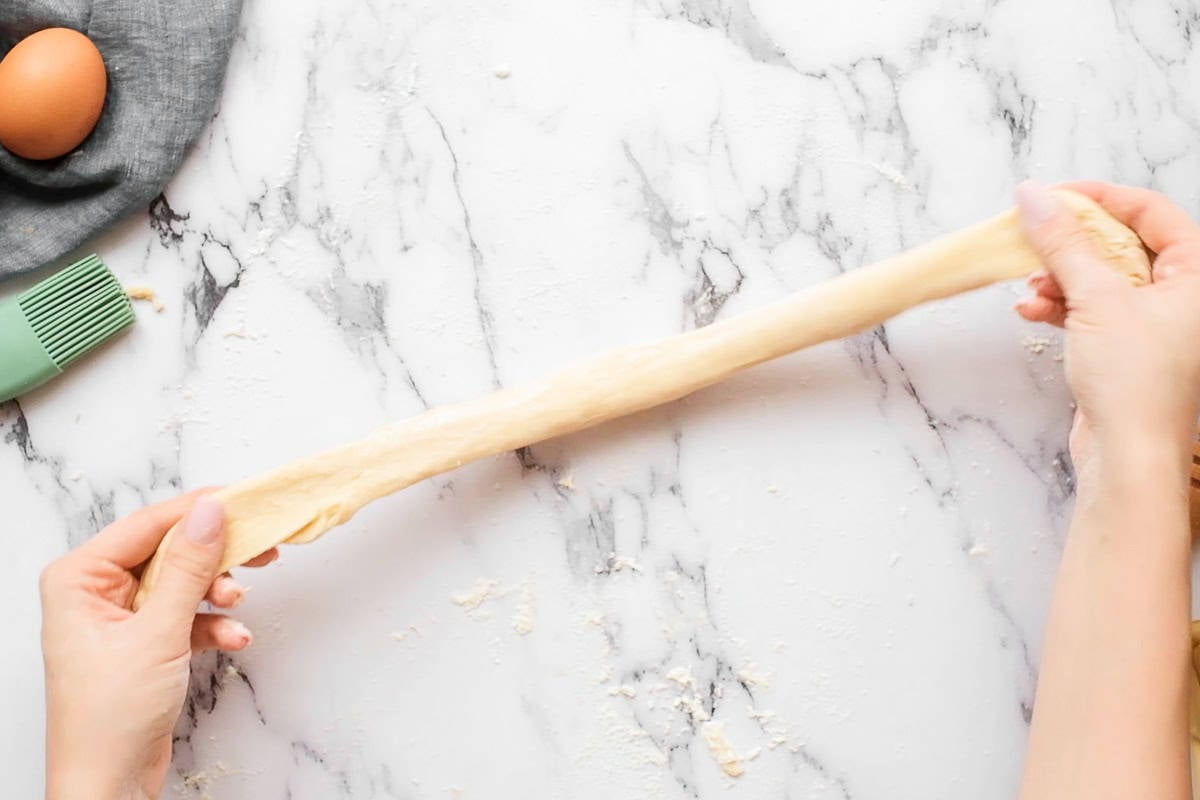
Roll each piece into long ropes.
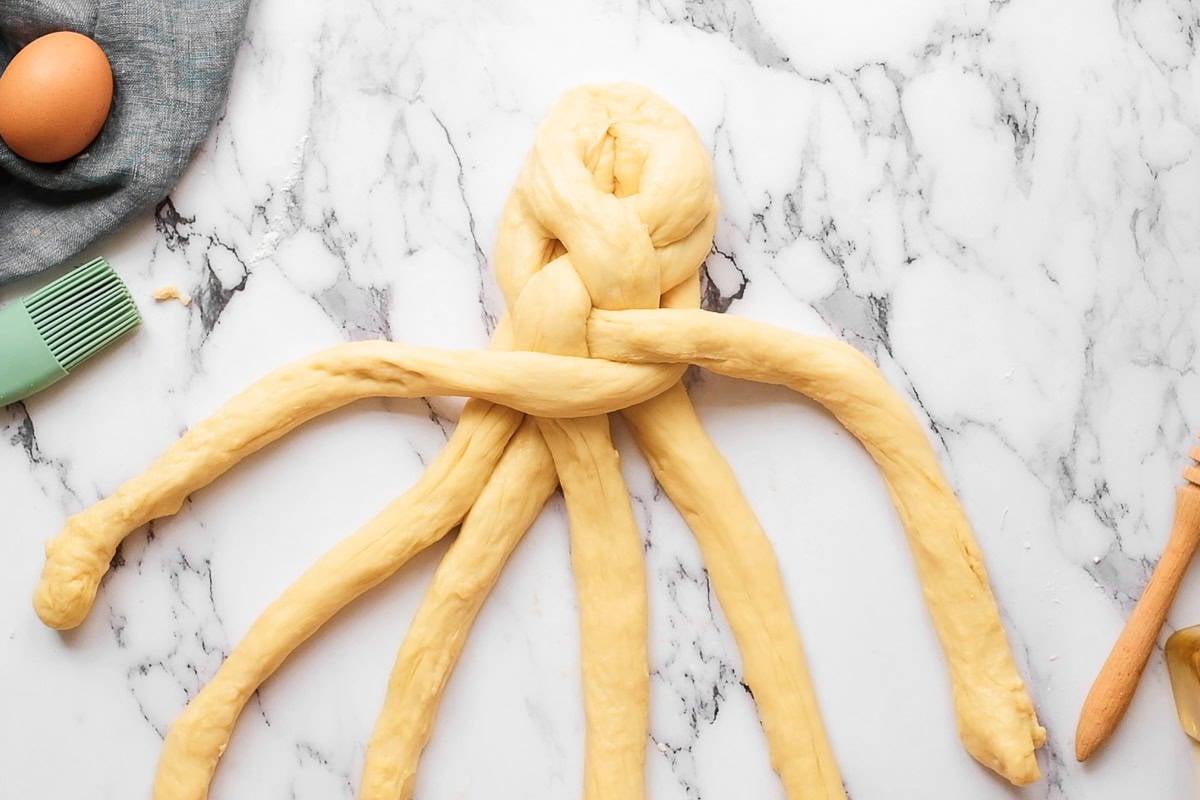
Braid the ropes together using a simple over-under weaving pattern.
Step 5: Second rise
Place the braided loaf on a baking sheet and let it rise again until puffy.
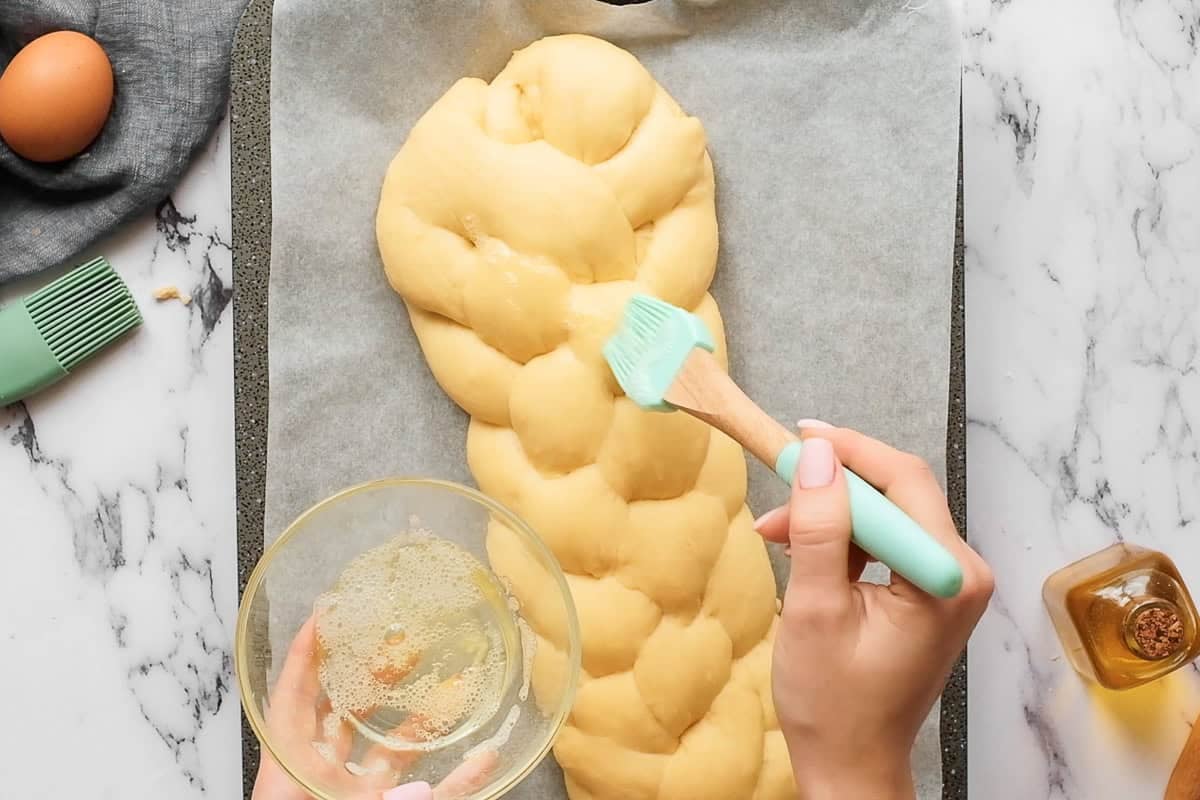
Step 6: Egg wash and bake
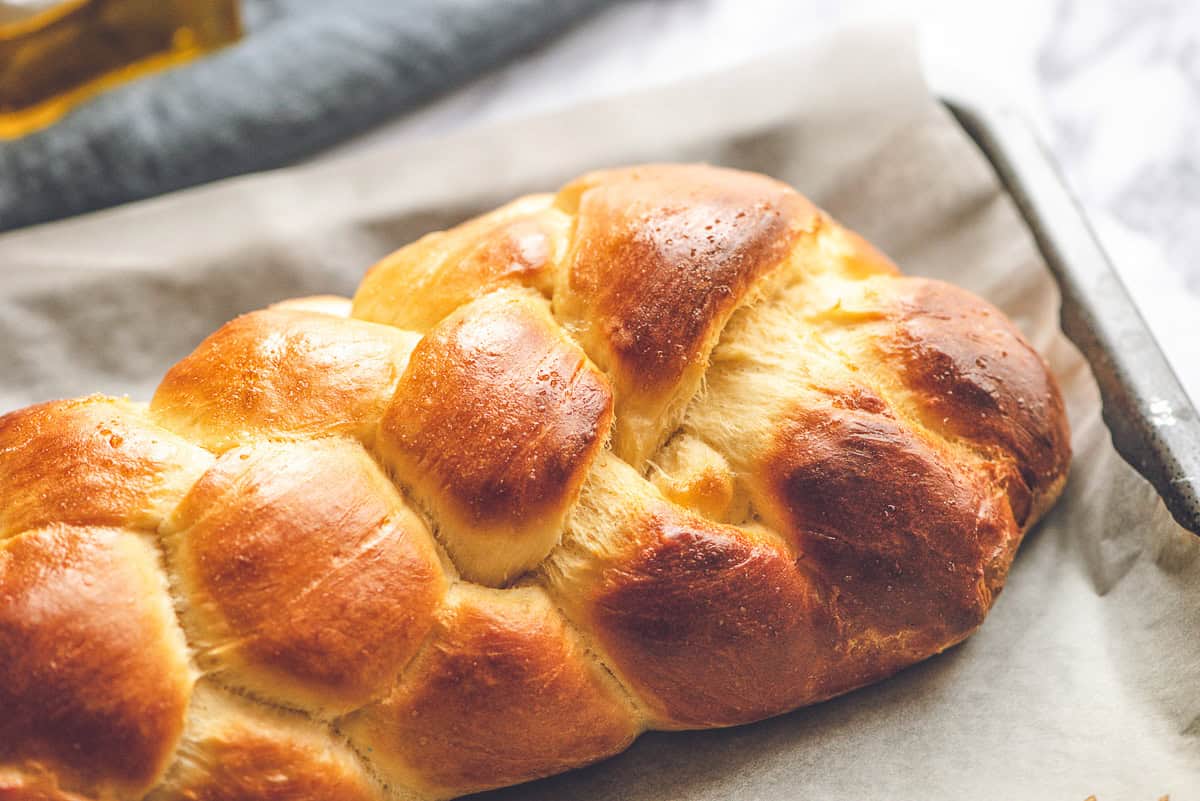
Brush the loaf with egg wash for a glossy finish, then bake until deeply golden brown and perfectly risen. Let the bread cool on a rack before slicing.
My Tips for Perfect Challah Every Time
After making this bread more times than I can count, here are a few tricks I’ve learned:
Golden shine: For an extra glossy finish, apply a second layer of egg wash halfway through baking.
Don’t rush the rise: Letting the dough properly double in size ensures a light and airy loaf.
Braiding hack: If you’re new to braiding, try a three-strand braid first. It’s simpler but still beautiful.
Flour control: The dough should be soft and slightly tacky, but not sticky. Add flour gradually until the texture is just right.
Ways to Enjoy Challah Bread
Challah is delicious on its own, but it also shines in a variety of recipes:
- French toast: Its sweet, eggy flavor makes it perfect for thick, custardy French toast.
- Sandwiches: Use it for next-level sandwiches or grilled cheese.
- Bread pudding: Transform leftover challah into a rich, custardy dessert.
- Sweet or savory: Enjoy it with butter and honey or pair it with savory dishes like stews and soups.
FAQs About Making Challah Bread
Sometimes it can feel intimidating or overwhelming to make any kind of homemade bread. Here are a few questions and answers that might help you along the way.
Yes! You can mix and knead the dough by hand. It will take a bit longer (about 10–12 minutes of kneading) but the results will be just as delicious.
After dissolving the yeast in warm water, it should become foamy within 5–10 minutes. If it doesn’t, the yeast may be expired, and you should start with a fresh batch.
Absolutely! After braiding the dough, place it on a baking sheet and freeze until firm. Once frozen, wrap it tightly in plastic wrap and store it in a freezer-safe bag. When ready to bake, let it thaw and rise before proceeding with the recipe.
If your challah is dense, it may be due to insufficient kneading or not allowing the dough to rise fully. Ensure you knead until the dough is smooth and let it double in size during both rises.
Yes! Simply increase the honey by 1–2 tablespoons if you prefer a sweeter loaf. It also enhances the bread’s golden color.
If you tried this Challah Bread recipe or any other recipe on my website, please leave a 🌟 star rating and let me know how it went in the 📝 comments below. Thanks for visiting!
Pin this now to save it for later
Pin ItChallah Bread
Ingredients
- 1/4 ounce active dry yeast Note: an individual packet of yeast usually contains 0.25 ounces which is equivalent to 2 1/4 teaspoons
- 1 cup lukewarm water
- 4 1/2 cups all-purpose flour
- 2 teaspoons salt
- 1/4 cup honey
- 2 large eggs
- 1 large egg yolk reserve the white for the egg wash
- 1/4 cup vegetable oil
- 1 egg white for brushing on top of the bread before baking
Instructions
- Sprinkle the 1/4 ounce active dry yeast over the 1 cup lukewarm water in a small bowl. Swirl gently to dissolve. If a thin frothy layer does not form, your yeast might no longer be active and you must use active yeast for this recipe.
- In the bowl of your stand mixer, mix together 4 cups of the 4 1/2 cups all-purpose flour and the 2 teaspoons salt. Reserve the remaining 1/2 cup of flour for the kneading process.
- Add the 1/4 cup honey, 2 large eggs, 1 large egg yolk, and 1/4 cup vegetable oil and mix with a spoon to form a shaggy dough. Pour the yeast mixture over the egg slurry and mix until combined.
- Using the dough hook attachment, knead the dough on low speed for 6 to 8 minutes. If the dough seems very sticky or does not create a smooth ball that pulls away from the sides of the bowl, add flour a spoonful at a time until it is just in between sticky and dry. Stop kneading the dough when it is soft, smooth, and holds a ball-shape.
- Place the dough in an oiled bowl, cover with plastic wrap, and place somewhere warm. My house is always cold so I like to preheat the oven to 200°F, turn it off, and crack the door. I allow the dough to rise in the warm oven. Let the dough rise until doubled in size, 1 to 2 hours depending on how warm the environment is.
- Punch the dough (this is the best part!). Divide the dough into six equal pieces. I did this by weighing the dough, dividing by six, and ensuring each piece was roughly the same size. Roll each of the six pieces to equal lengths, 12-15 inches long. They will try to shrink back so give them the occasional pull. Make them a bit smaller on the ends.
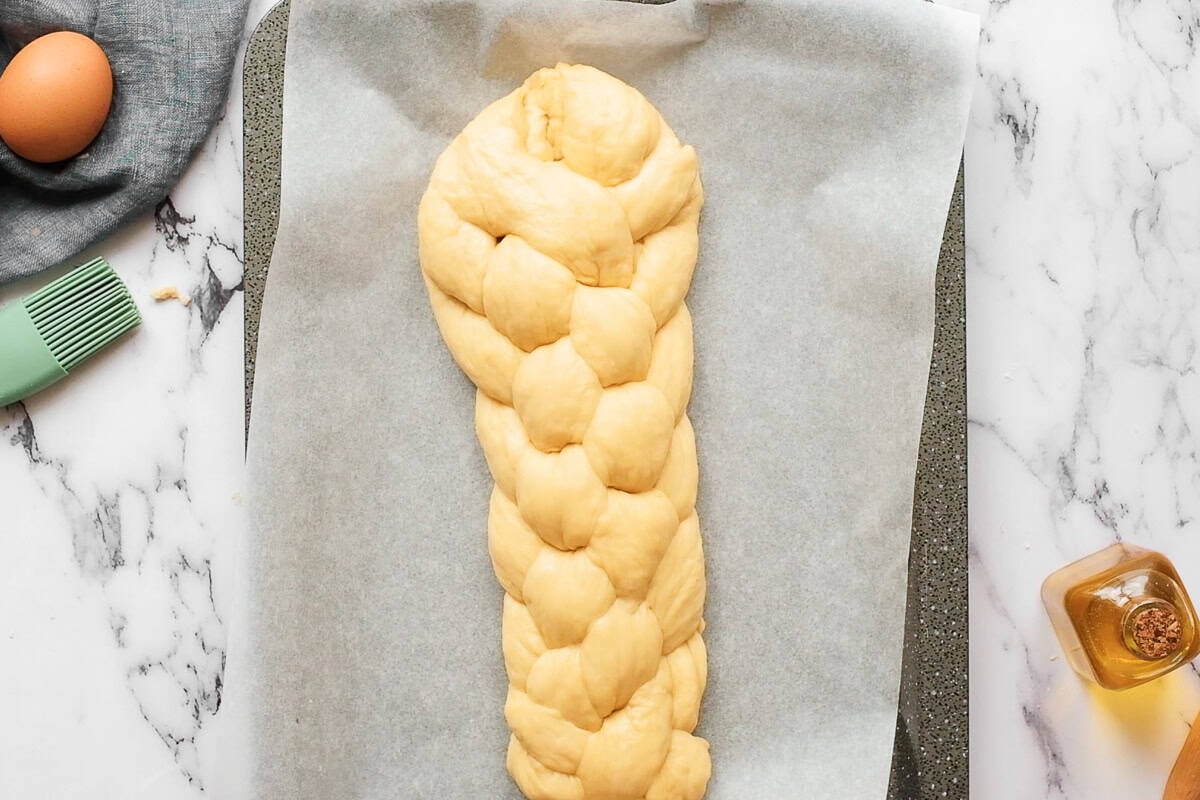
- To braid the dough, squeeze the ends together on one side. Spread out all six ropes. Always starting from the rope on the far right side, pull it over two strands, under the third, and then over the last two strands. Reposition all of the dough ropes such that you can repeat this pattern, again using the rope that’s on the far right hand side. Repeat this weave until the entire loaf has formed and then sqeeze the ends together to seal. Tuck both ends on both sides of loaf underneath. You can either freeze the dough at this point or continue below to cook.
- Line a baking sheet with parchment and transfer the loaf on top. Dust the loaf with a little flour and loosely cover it with plastic wrap or a clean dishcloth. Place the pan somewhere warm and away from drafts and allow it rise until about an hour.

- Preheat oven to 350°F. Mix the remaining egg white with about a tablespoon of water and gently brush the entire surface of the loaf, taking care not to deflate.
- Bake for 25 to 35 minutes, rotating the pan halfway through cooking, until the loaf is deeply browned in color.
- Allow the loaf to cool on a cooling rack.
Notes
Video
Nutrition
Nutrition information is automatically calculated, so should only be used as an approximation.

Your video does not follow the written instructions.
Which part are you referring to? I just rewatched the video and followed along with the instructions and I couldn’t find any issues.
As a Hebrew speaker – Just thought it might be interesting and wanted to let you know that “Challah” Is in fact sounded with a CH… they might be American and grew up using the H annunciation but the Hebrew word (origin) is spelled
CHET, LAMED, HEY
CHET – makes a “CH”
HEY makes an “H”
Not CH like chair… rather a scratch throat sound like its coming from deep in the throat LOL – like phlegm
This video explains it very well and is accurate
https://www.youtube.com/watch?v=MSdqkJUCHnk
The first time I had Challah bread was at my sisters wedding celebration a few years ago. I thought it was delicious then and Ive been wanting to make it. During the blizzard this weekend here in Wyoming I found this recipe and decided to make it today. The hardest part for me was braiding it but it turned out so good! I would recommend this recipe to anyone and I would definitely make it again!!
I made this for a Jewish neighbor for Hanukkah. We also made a loaf for ourselves. I am hooked. Making some more today. Loved it. and was very easy.
Just a couple of comments. It’s not Challah Bread, it’s simply Challah. It’s not for Hanukkah or Sunday dinners; it’s a ritually significant part of Shabbat dinner on Friday nights, our Jewish Sabbath.
Thank you so much! I’ll be updating the post with the info. I sincerely appreciate it! -Krissy