This post may contain affiliate links. Please read our disclosure policy.


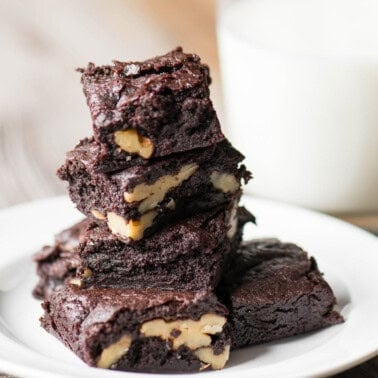
If you’re looking for a super quick and simple chocolate fudge recipe, look no further! My Five Minute Microwave Fudge is one of my most popular recipes during the holidays because it tastes SO GOOD and literally anyone can make it – it’s that easy!
I’ve been making this holiday treat for Christmas every year. The recipe has been viewed over 1 million times! It’s about as sweet as Granny’s Monkey Bread recipe, which also gets made every year during the holidays.

This has always been one of my favorite fudge recipes, but my brown butter pecan fudge and peanut butter fudge (also made in the microwave oven) are always a hit too!
And don’t take my word for it… just read the hundreds of comments from readers who also love this easy microwave fudge recipe!
Why This Recipe Works
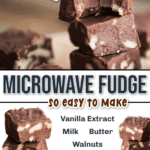
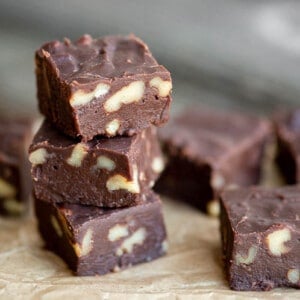
- Simple ingredients: All you need is powdered sugar, unsweetened cocoa powder, butter, milk, walnuts, and vanilla extract. You don’t even need to mess around with melted chocolate chips! These pantry staples come together in perfect harmony to create a velvety, indulgent treat.
- Easy to make: The magic happens in a large microwave-safe bowl, eliminating the need for complex tools like candy thermometers or a double boiler traditionally used when making homemade fudge.
- Holiday treat: If you were looking for an easy fudge recipe that you can include in your Christmas cookie tins, this is the best fudge that will satisfy any sweet tooth! I make this every year, along with other favorites like Hazelnut Brittle, Salted Vanilla Bean Caramels, or my Copycat See’s Bordeaux.
How to Make Microwave Fudge
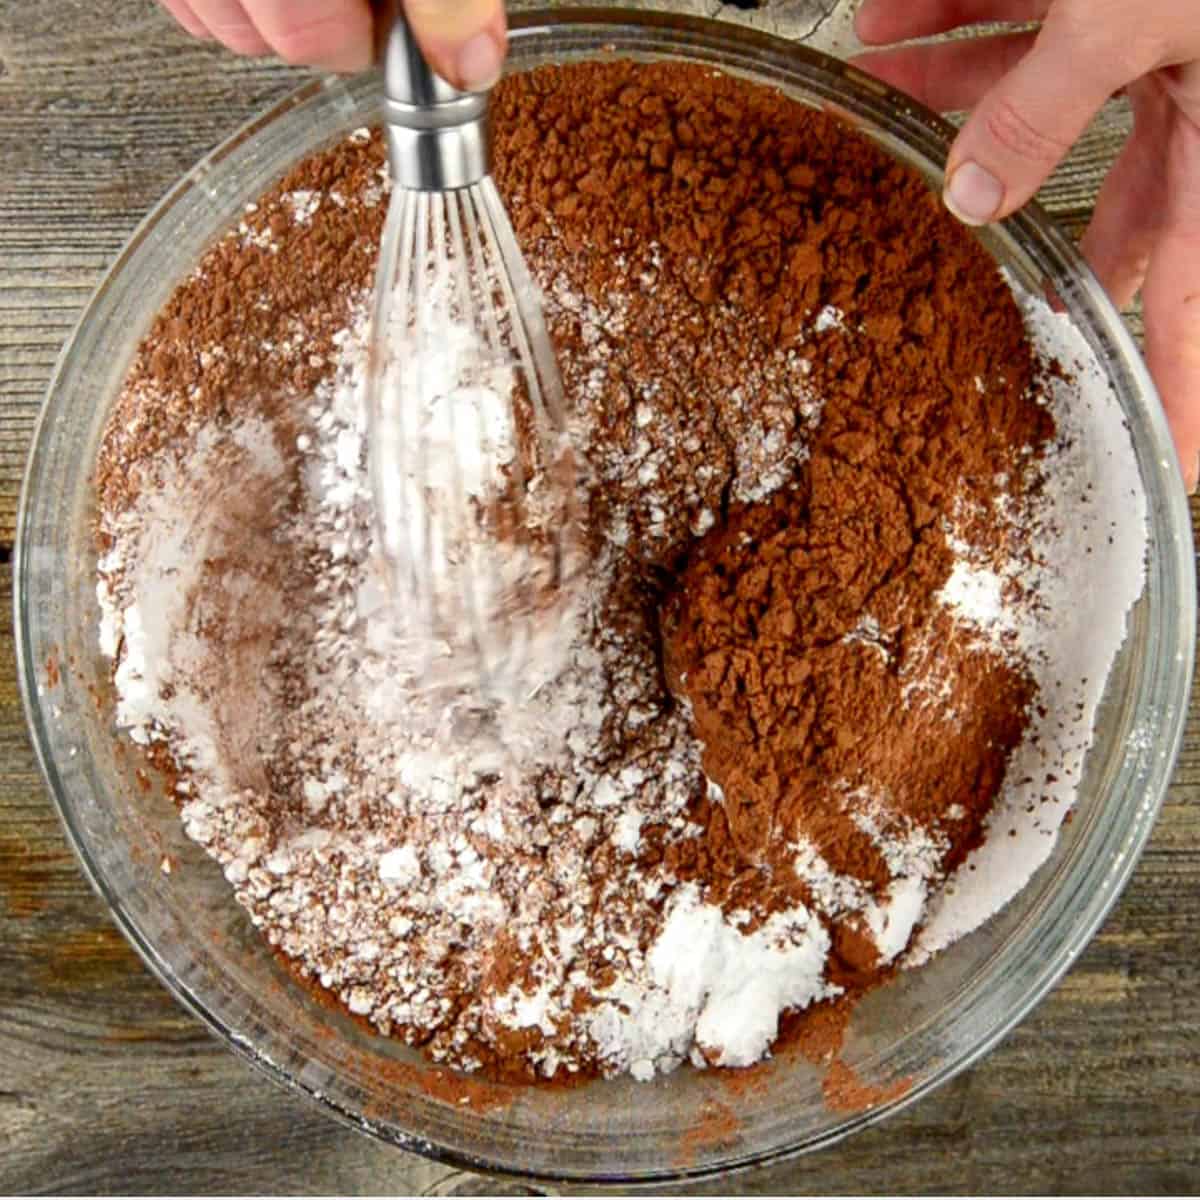
Step 1: Whisk together the cocoa powder and confectioners sugar in a large microwave safe bowl. Try to eliminate any lumps. You can always sift the sugar and cocoa powder to eliminate any lumps, if you want.
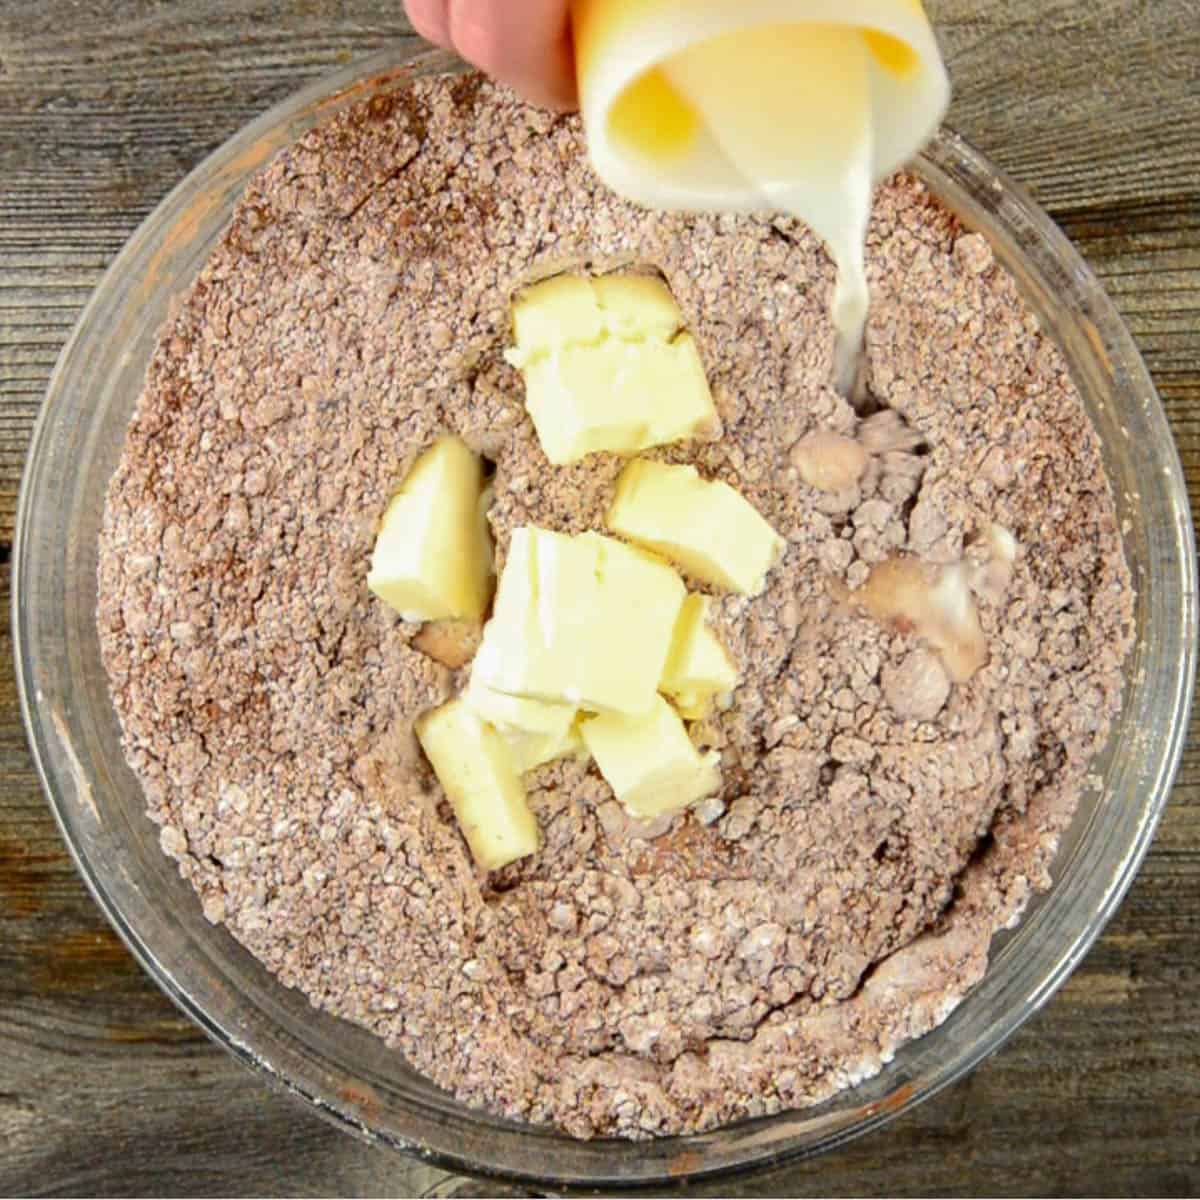
Step 2: Add the butter and milk but do not stir the mixture.
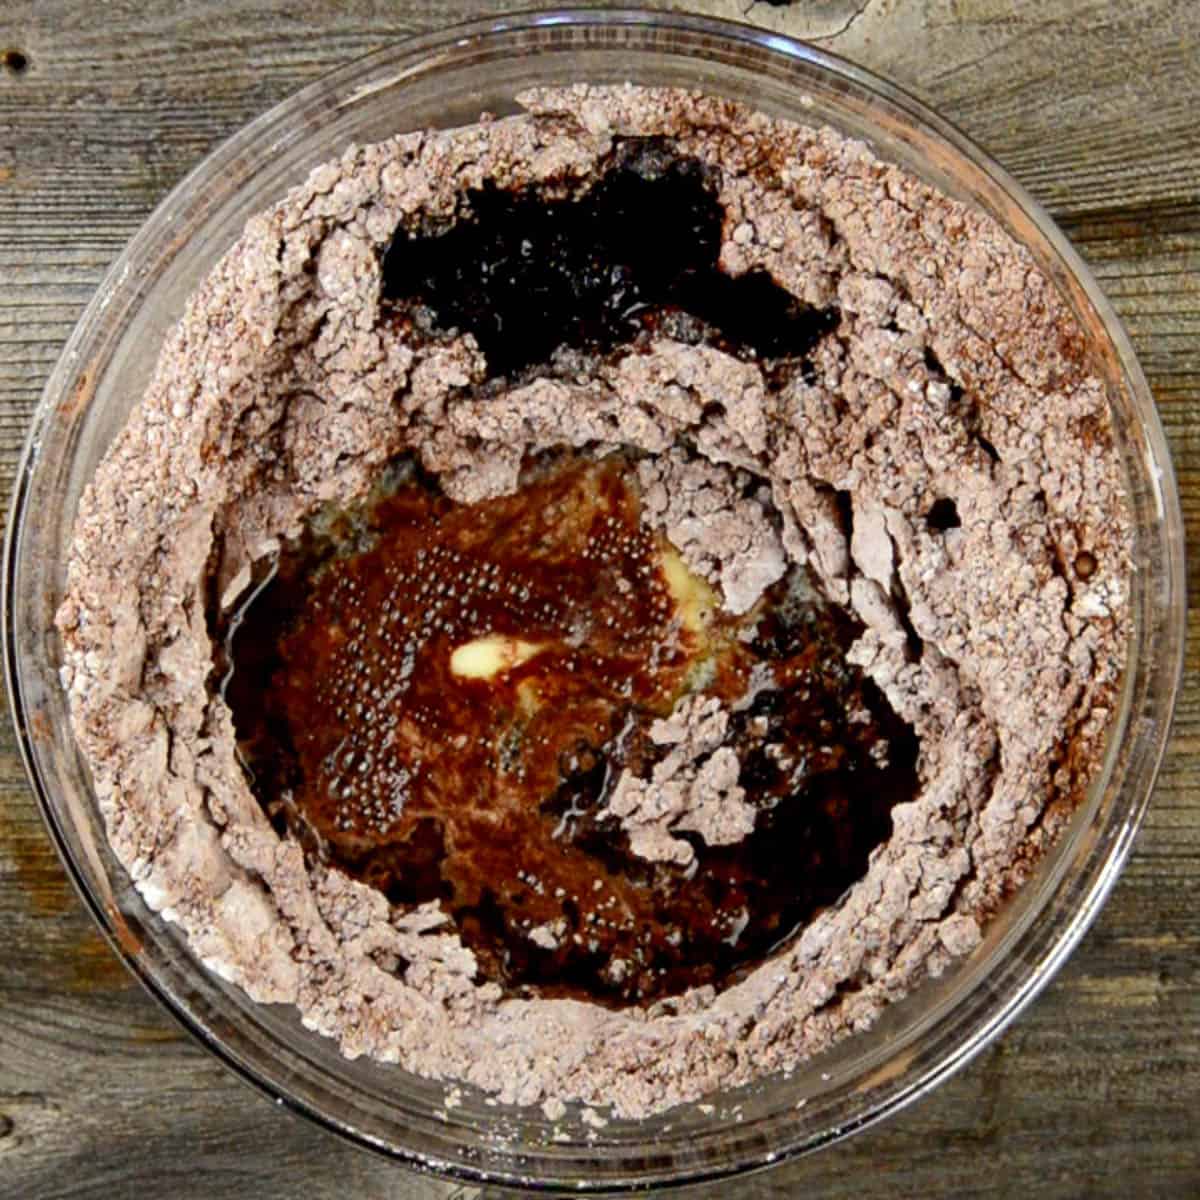
Step 3: Microwave it on high for a few minutes until the butter has fully melted. You will then need to quickly stir the fudge until everything is well combined.
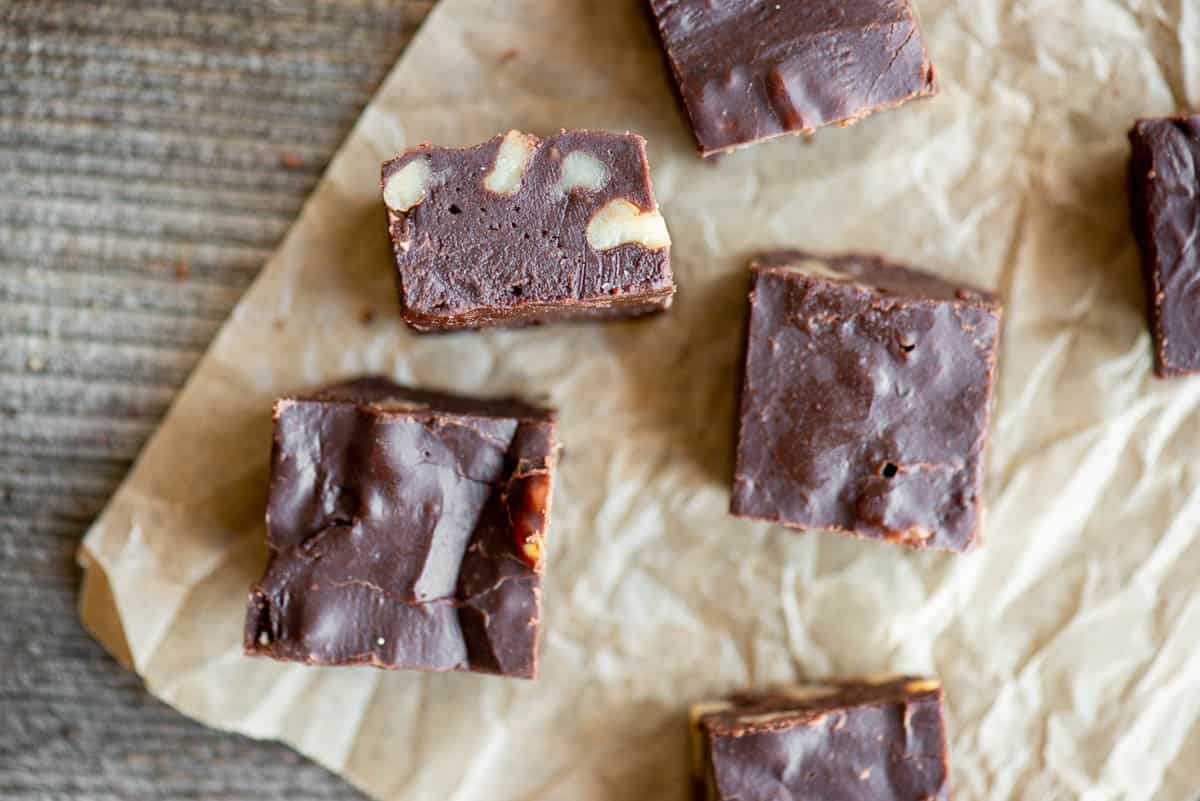
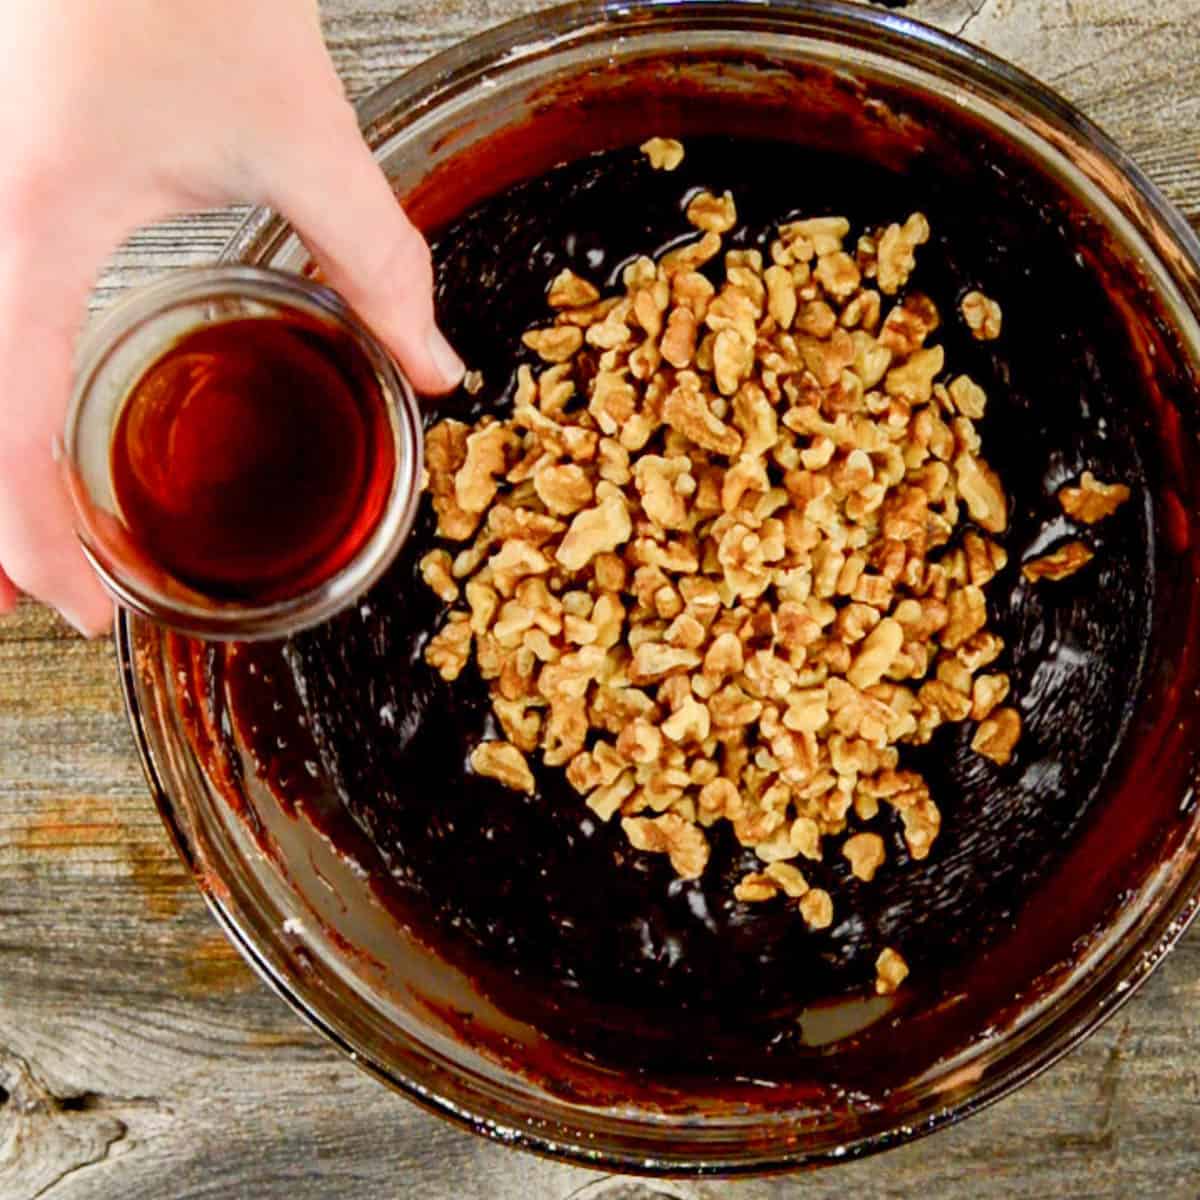
Step 4: Stir in the walnuts and vanilla extract.
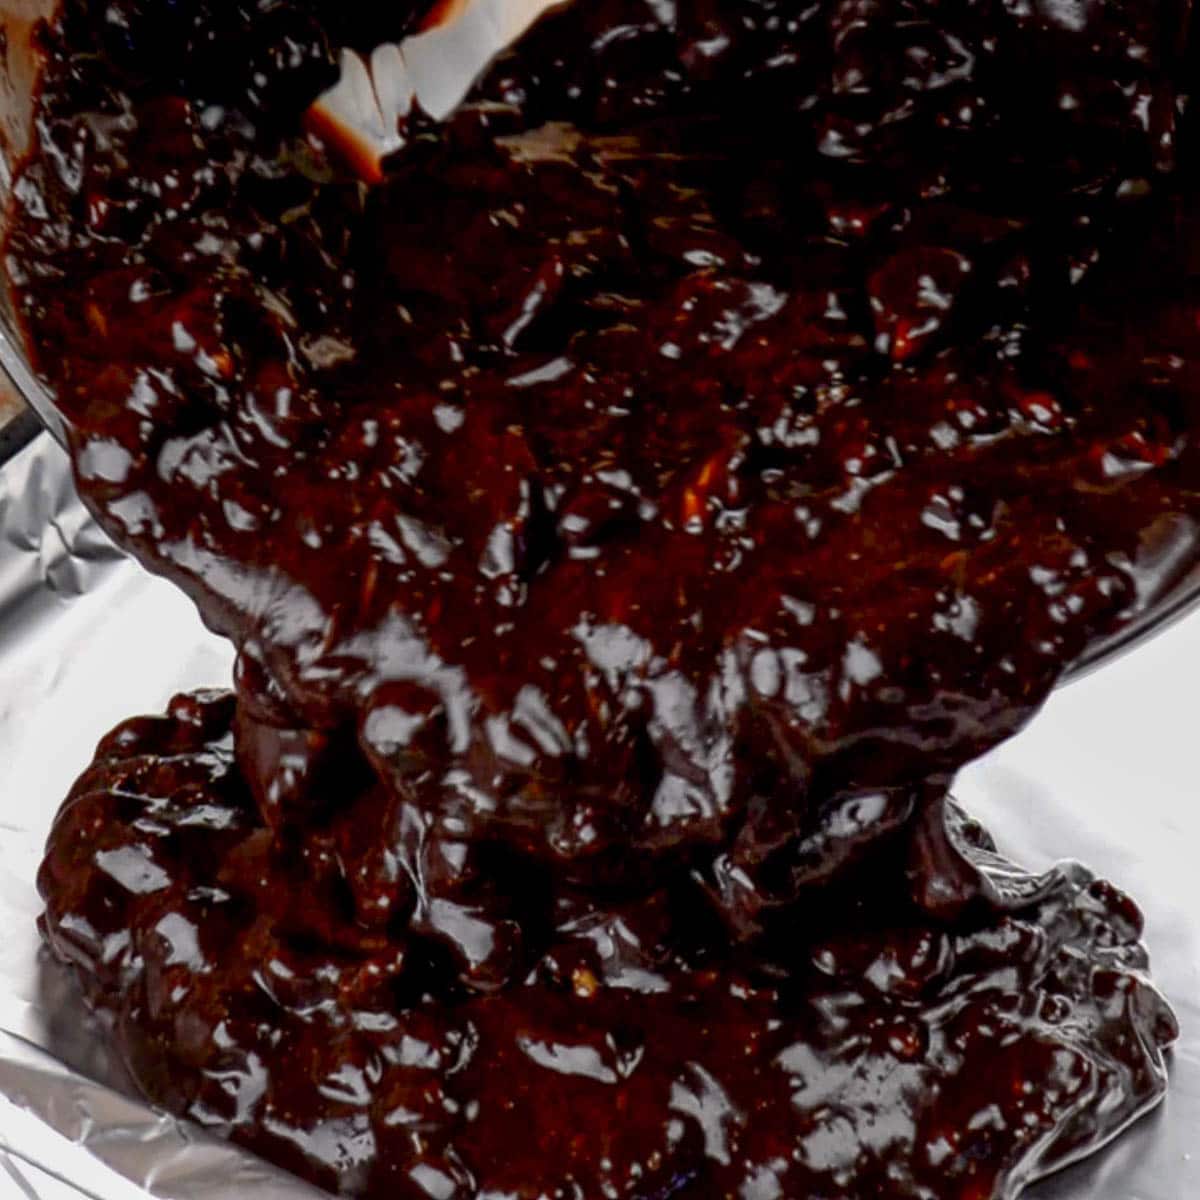
Step 5: The warm fudge is then poured onto an aluminum foil lined baking sheet or square pan.
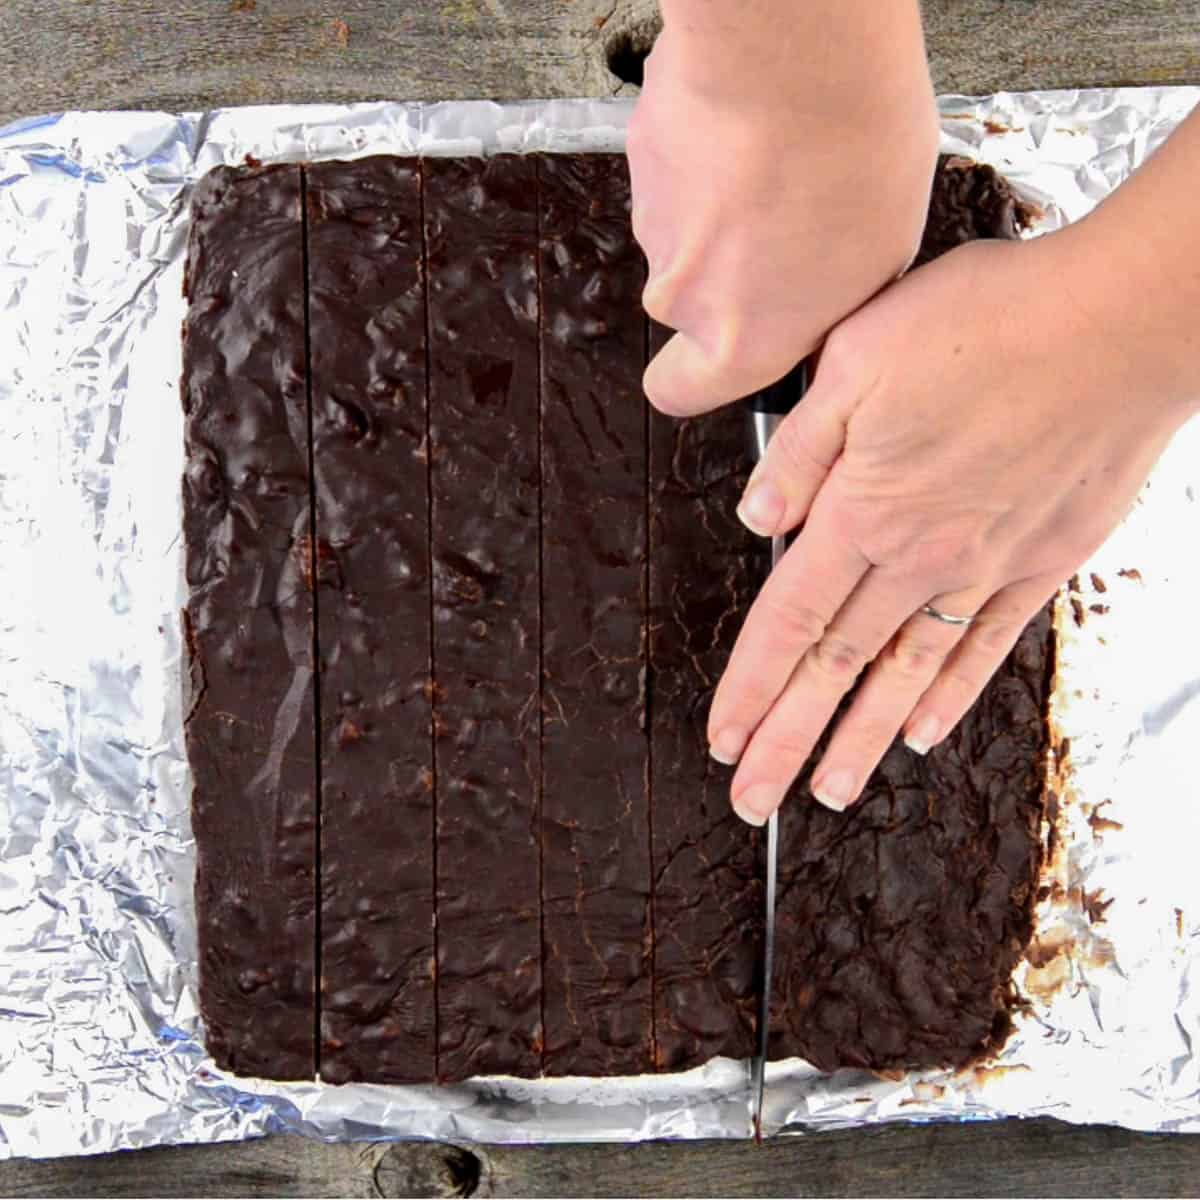
Step 6: Once the pan of creamy fudge sets, you can transfer it to a cutting board to cut it into individual pieces.
Recipe Tips
- Sifting the confectioners’ sugar and the cocoa powder is an optional step. It’s not necessary, but should be done if your sugar has lumps.
- You only need to microwave it long enough to melt the butter. To be on the safe side, you can always microwave in 30-second intervals to ensure the mixture is heated gently.
FAQs
Nope! I prefer nuts because of the flavor and the crunch, but you can leave them out of the recipe.
Certainly! Cut the fudge into bite-sized pieces, store them in an airtight container with parchment paper between layers, and enjoy for days.
Absolutely! Add peppermint extract for a minty twist. Feel free to mix in crushed Oreo cookies, coconut flakes, mini marshmallows, candy canes, peanut butter chips, etc. for variety.
Yes, regular whole milk is my preference, but evaporated milk or lowfat milk also work great.
The microwave fudge comes together in minutes. All you need is about 10-minutes, start to finish, not counting the time it takes to set.
Certainly! Adjust the quantities accordingly and use a larger microwave-safe bowl for doubling the recipe. Pour the fudge onto a baking sheet or use two 10-inch pans.
No, this microwave fudge recipe eliminates the need for a candy thermometer. The microwave does all the work for you.
Yes, you can freeze leftover fudge in a freezer bag. I happily enjoy a bite here and there when it’s still frozen, or you can thaw before enjoying.

Christmas Candy Recipes
If you love making treats during the holidays, you’ll also love these favorite dessert recipes!
- Vanilla Fudge
- Peanut Brittle
- Peanut Butter Balls
- Eggnog Fudge
- Peppermint Bark
- Copycat See’s Bordeaux
- Salted Vanilla Bean Caramels

Pin this now to save it for later
Pin ItFive Minute Microwave Fudge
Ingredients
- 32 ounces powdered sugar 32 ounces ≈ 8 cups
- 1 cup unsweetened cocoa powder
- 1 cup unsalted butter cut into 1/2 inch cubes
- 1/2 cup milk whole milk recommended
- 1 1/2 cups raw walnuts
- 2 tablespoons vanilla extract
Instructions
- Line a baking sheet or casserole dish with foil.
- In a large bowl, combine 32 ounces powdered sugar and 1 cup unsweetened cocoa powder and stir until they seem reasonably well mixed. If the mixture seems like there are small clumps, you may sift it after its been measured.
- Pour 1/2 cup milk over sugar mixture but do no mix. Place cubes of butter on top. Microwave on high power 3-4 minutes until the butter has almost completely melted. If unsure, you can always microwave in short intervals to avoid over cooking the mixture.
- Immediately remove mixture from microwave and stir well until thoroughly combined. You need to work fast because you want to spread the mixture while its still hot, but you want it to be fully mixed.
- Once chocolate mixture is thoroughly mixed, stir in the 1 1/2 cups raw walnuts and 2 tablespoons vanilla extract.
- Immediately pour the warm fudge into prepared dish and spread to desired thickness. If using a baking sheet, you can form the fudge so that it only takes up a portion of the surface. It will only spread as far as you want, so make it as thick as you'd like the individual pieces to be. Alternatively, if you use a 10×10-inch pan, it will cover the entire surface.
- Allow the fudge to fully set at room temperature. Our house is always freezing, so it doesn't take much time. If you live in a warm house, it may take several hours or even a bit of refrigeration.
- Lift foil out of dish and transfer the fudge to a cutting board. Use a sharp knife to cut into squares.
- Store in airtight container or plastic storage bag. Use parchment paper to separate layers, if needed.
Notes
Recipe Tips:
- All microwaves perform differently so be sure check on the mixture and stop cooking as soon as all the butter has melted.
- Sifting the sugar and cocoa powder is additional and optional step, but recommended if either your sugar or cocoa powder has lumps.
- Whole milk is recommended, although lowfat or nonfat will work. Evaporated milk in a can will also work.
Video
Nutrition
Nutrition information is automatically calculated, so should only be used as an approximation.
I originally posted this fudge recipe in November 2014 and have since updated it to include better photos, recipe tips, and helpful information. Don’t worry – I didn’t change the recipe!


wow, I love chocolate. It is the easiest way to make it.
I just made this fudge in South Texas during the Summer (indoors of couse) but it is fabulous, perfect and so easy! I could never make “cooked fudge” but this rivals my mom’s and my Nana’s recipes! Thanks ♡
Thanks Krissi for taking some time and sharing the fudge receipe. I was searching internet for fudge receipe and this one was very helpful. I will defenitely try this.
I have made this fudge twice now, and it is not as thick, when putting in the pan as yours. What am I doing wrong? It’s actually almost liquidy.
Maybe more powdered sugar is needed at your elevation?
I tried making fudge tonight using the “old fashioned” method and literally it turned into liquid hot fudge like what goes on a sundae. I made your recipe instead after failing at my 1st attempt, and it was so easy and turned out perfect!! Thank you for sharing!
Super easy recipe to follow, I made these yesterday and they went down a treat with the daughter and wife! Definitely 5 stars!
I love it! I tried it out just now and it tastes delicious! 10/10! definitely will recommend.
p.s my mom loves chocolate and i made some and she smelled it and was like :OMG IS THAT CHOCOLATE I SMELL: LOL
Wow, I love this fudge! The recipe has been around for a while now, but it’s still one of my all time favorites.
This fudge was amazing! They were delicious 🙂
My grandmother used to make this now and then and I decided I wanted to try it, but the recipe card wasn’t clear. It made it sound like you’re supposed to put the milk and butter together in the microwave and then pour it into the coco/sugar mix, so that’s what I did. I’ve never made fudge before but it didn’t look right so I decided to look here (what I should have done in the first place) and I saw that it all goes in together. I’m not sure what it’s supposed to be like but mine is about like brownie batter. I mean, it still tastes like fudge but I was wondering what what I did will do to it? Maybe I should just go ahead and make a new batch the right way.
Hi, In the directions I say to pour the milk over the sugar/cocoa mixture, add the butter, then microwave. Once the butter has melted you stir. It is rather wet at first but then it sets in the pan. Hope that helps. Krissy