This post may contain affiliate links. Please read our disclosure policy.
Homemade Buttermilk Biscuits are easy to make!
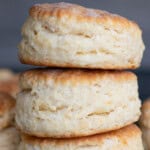
This is the best buttermilk biscuit recipe you’ll find, and I tell you step by step how to make them. There are few things better than delicious and hot Flaky Buttermilk Biscuits in the morning. Cover them in sausage gravy or serve with butter and homemade rhubarb and strawberry jam. YUM!
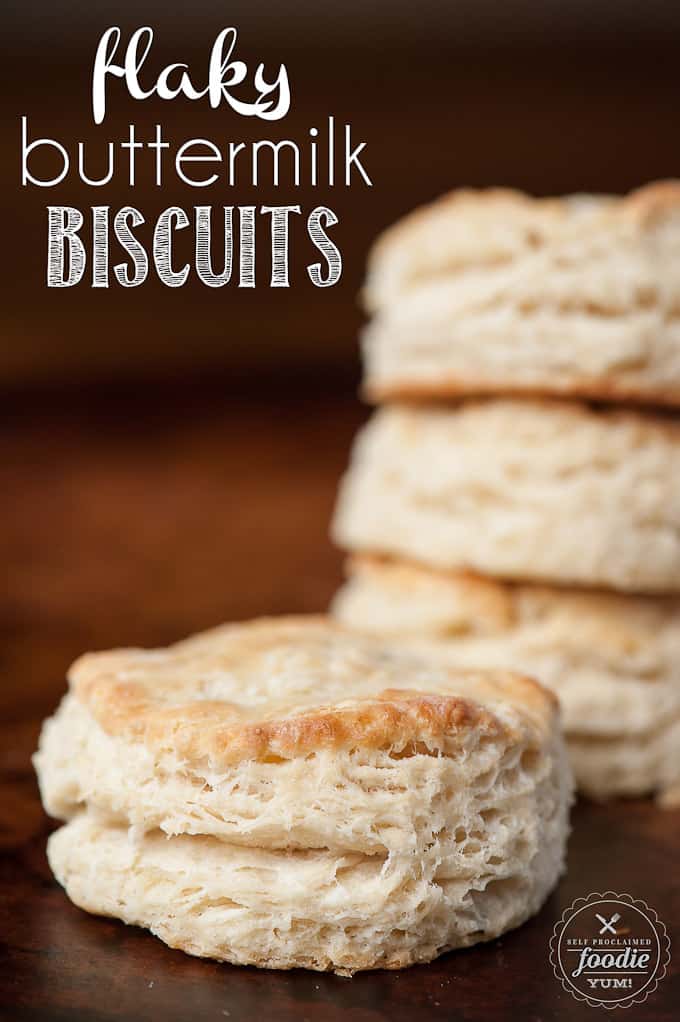
Why buttermilk in biscuits?
A quick Google search will tell you that buttermilk brings a pleasant tang to cakes, breads, biscuits and other family favorites while adding very little fat. It is an acidic ingredient, like yogurt or sour cream, that also helps tenderize gluten, giving baked goods a softer texture and more body. Buttermilk also helps quick breads rise, leading to the desired fluffy result.
I had never made buttermilk biscuits and was terrified of the process. I have heard that it’s all about the technique, and if you do it wrong, all you get is a hard lump of flour. Lucky for me, I found some inspiration in a Food Network episode which shared some great baking pointers, and it got me motivated to try (see step one below).
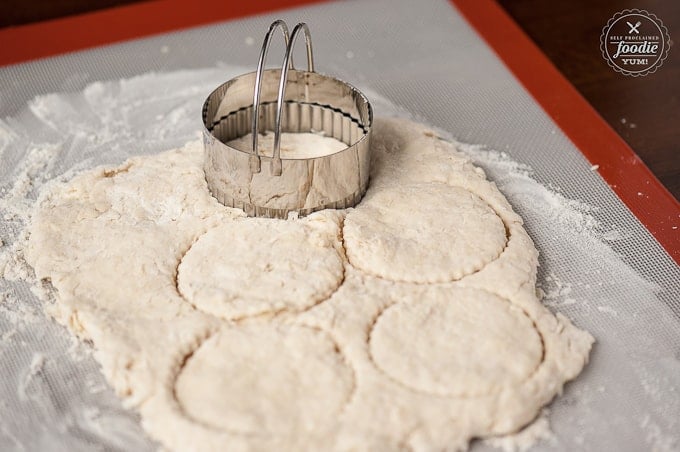
How do you make Flaky Buttermilk Biscuits from scratch?
- First step is to ensure your butter is extra cold. Stick it in the freezer if that helps. Then grate it like you would cheese.
- Next, you’ll combine the flour, baking powder, salt, and sugar in a bowl. You will then add in the butter and mix everything well to ensure each piece of butter is coated with the flour mixture.
- Make a well in the middle and add the buttermilk. Use your hands to mix just enough to make all of the ingredients. Don’t be afraid – it’s fun to get messy!
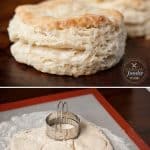
- Next you will dump the dough onto a lightly floured surface and gently flatten the dough into a rectangle that is about 9 inches long and 5 inches wide. You can use a roller or just your hands for this step. Just try not to over work the dough. Now here’s how you get those flaky buttermilk biscuit layers: Fold the long sides over in thirds so that you now have a rectangle that is 3 inches long and 5 inches wide. Repeat that process two more times. Flatten the final rectangle so that its about an inch thick. My secret has been revealed!
- Finally, you’ll use a biscuit cutter to press straight down (don’t twist otherwise your biscuits won’t rise). You should get a total of about 6 biscuits. To get the last couple, you’ll have to gently squeeze the scraps together into a shape that’s just bigger than the biscuit cutter. Bake and enjoy!
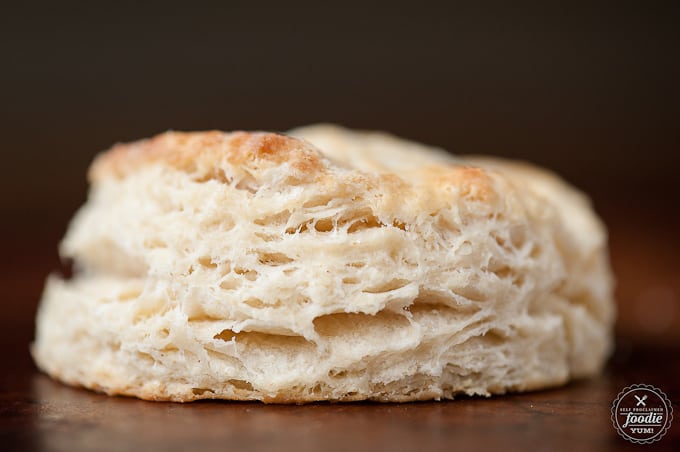
How do you make buttermilk biscuits light and fluffy?
Aside from the ingredients in the recipe to help the dough rise, one of our local breakfast joints, Pine State Biscuits, shared the tip on Food Network to freeze and grate your butter before adding it to the rest of the ingredients. That tip alone seems like a bonus in creating those light and fluffy biscuits! The rest of the magic comes from the folding and cutting technique which is explained in the steps above.
Additionally, the biscuit cutter really does make a difference. If you don’t have one, you can use a glass, but the sharp edges of a biscuit cutter are what allows you to press straight down without sealing the edges. Sometimes the tools we use in the kitchen can make all the difference, and this is a great example. These are the best light and fluffy, flaky buttermilk biscuits! See all the wonderful layers?
Pin this now to save it for later
Pin ItFlaky Buttermilk Biscuits Recipe
Ingredients
- 6 tablespoons unsalted butter cold
- 2 cups all-purpose flour
- 1 tablespoon baking powder
- 1 teaspoon salt
- 1 tablespoon sugar
- 1 cup buttermilk
Instructions
- Ensure your 6 tablespoons unsalted butter is extra cold. Stick it in the freezer if that helps. Then grate it like you would cheese.
- In a medium sized bowl, combine 2 cups all-purpose flour, 1 tablespoon baking powder, 1 teaspoon salt, and 1 tablespoon sugar. Add in butter and mix well to ensure each piece of butter is coated with the flour mixture.
- Make a well in the middle and add 1 cup buttermilk. Use your hands to mix just enough to combine all of the ingredients.
- Dump dough onto a lightly floured surface and gently flatten out to a rectangle that is about 9 inches long and 5 inches wide. Fold the long sides over in thirds so that you now have a rectangle that is 3 inches long and 5 inches wide. Repeat process two more times. This is how you get the layers. Flatten the final rectangle so that its about an inch thick.
- Use a biscuit cutter to press straight down (don’t twist otherwise your biscuits won’t rise). You should get a total of about 6 biscuits. To get the last couple, you’ll have to gently squeeze the scraps together into a shape that’s just bigger than the biscuit cutter.
- Bake in a preheated 425°F oven for about 15 minutes. Enjoy!
Video
Nutrition
Nutrition information is automatically calculated, so should only be used as an approximation.
This post was originally created in February 2015 and has been updated with more fun facts and tidbits for your reading pleasure.





You’re a beautiful woman, and have a beautiful family, but ….you are obviously a Yankee (or a hipster, a Democrat, or worse). You wouldn’t know a good biscuit if it bit you on the ass. The best biscuits are always made with self-rising flour (White Lily), use Crisco, and never use sugar (gross). Your proportions are close, but please try 2 cups of sifted self-rising, 1/2 cup crisco (1/2 stick), and a cup whole buttermilk. Roll the biscuits out on another 1/2 cup of sifted self-rising. That’s what old black women in the south have been using for generations. You’re obviously a great chef – feel free to let me know how they come out.
I appreciate the 5 star review combined with the insults. I happen to love these biscuits and I based the recipe and the process on a very popular restaurant here in Portland. I’m not an old black woman, but based on your name, Joel, and your tone, I’m guessing you aren’t either. I don’t eat Crisco and would never use it in place of real butter, so we’ll just have to agree to disagree.
Best biscuit recipe ever. Everyone raves about these treats when they’re brought out for breakfast. Thank you for sharing!
Excellent biscuits. Great for strawberry shortcake as well as sopping up the gravy in your greens or stew.
I haven’t made biscuits many times. Historically they weren’t very fluffy. I have made this recipe twice now and they come out great.
Great to hear! I still get intimidated by making biscuits!
I’m sorry, but I am not getting the folding technique; could you please make a video? Thank you!
Hi Kim. There is a video in the recipe card.